PrismATS
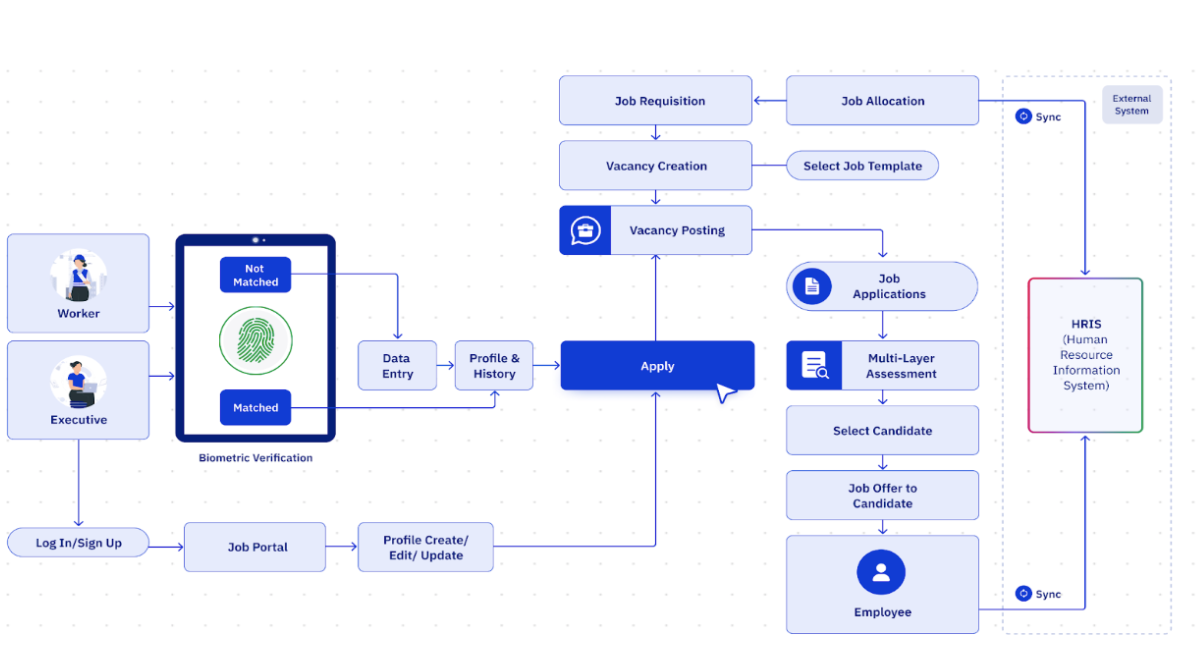
Applicant Tracking System (ATS) Prism Recruitment system is a combination of two applications called Applicant Tracking System (ATS) and Mobile Part, which is called Candidate Verification System (CVS).
Recruitment Core
Process flow:
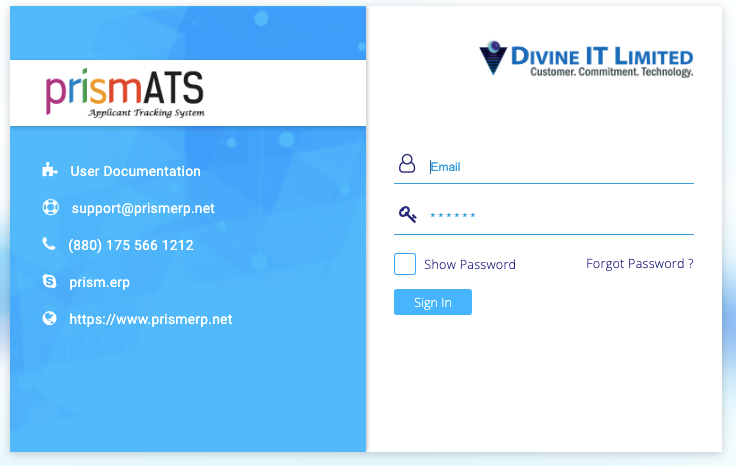
Login page:
- Description of the login functionality here.
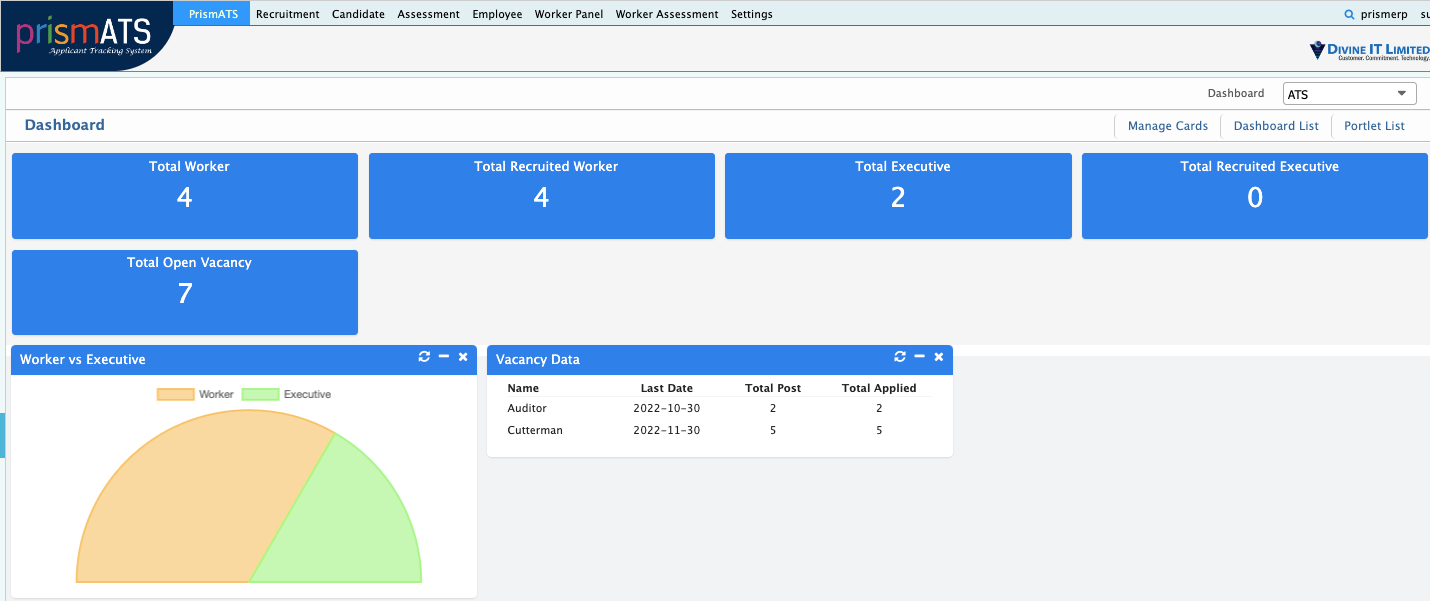
Dashboard:
- Overview of the dashboard here.
There are several modules under the ATS:
- Recruitment Module
- Candidate Module
- Assessment Module
- Worker Module
- Online Job Portal Module
- CVS (Candidate Verification Module)
Recruitment
This module is mostly focused on job template creation, job allocation, job requisition vacancy creation, and vacancy posting.
Job Template Creation:
Path: Recruitment >> Job Template >> Add New Job Template
Before creating a vacancy for any position, you need to create a job template. After configuring a job template, one can easily tag a job vacancy with minimal data. This page is divided into different sub-sections where users can input the basic information of the job. These sections are:
- Basic information
- Department Information
- Responsibilities
- Skills
- Academic Qualification
- Terms & Conditions
- Benefits
Basic Information: In this section, you can add job vacancy template by:
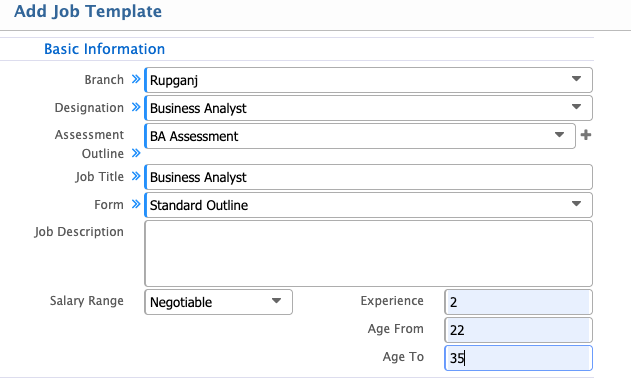
- Branch: Name of the Branch
- Designation: Name of the Designation
- Assessment Outline: Name of assessment outline created previously
- Job Title: Name of the job title
- Form: Select job form already created
- Salary Range: Select the salary range from the dropdown (e.g., Negotiable, Fixed, Range)
- Experience: Age range (from, to)
Department Information: Under which department the job template is created (Division, Department, Section, Subsection).
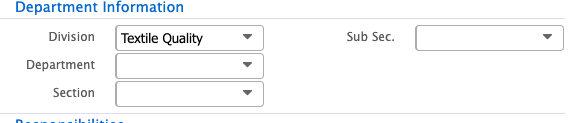
Responsibilities: Add job responsibilities using this section. You can add or delete using the (+) and (-) buttons.
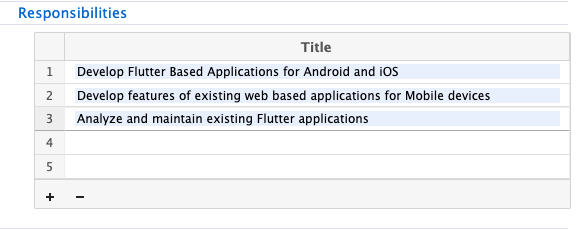
Skills: Add job skills using this section. You can add or delete using the (+) and (-) buttons.
Academic Qualification: Add minimum degree and result needed for the job (e.g., Exam/Degree Title, Level of Education, Minimum Result, Marks%).

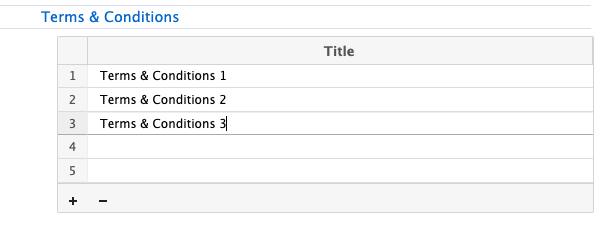
Terms & Conditions: Add terms and conditions using this section. You can add or delete using the (+) and (-) buttons.
Benefits: Add job benefits using this section. You can add or delete using the (+) and (-) buttons.

Once all data is completed, click Save to be redirected to the job template list page.
Job Template List:
Path: Recruitment >> Job Template >> Job Template List
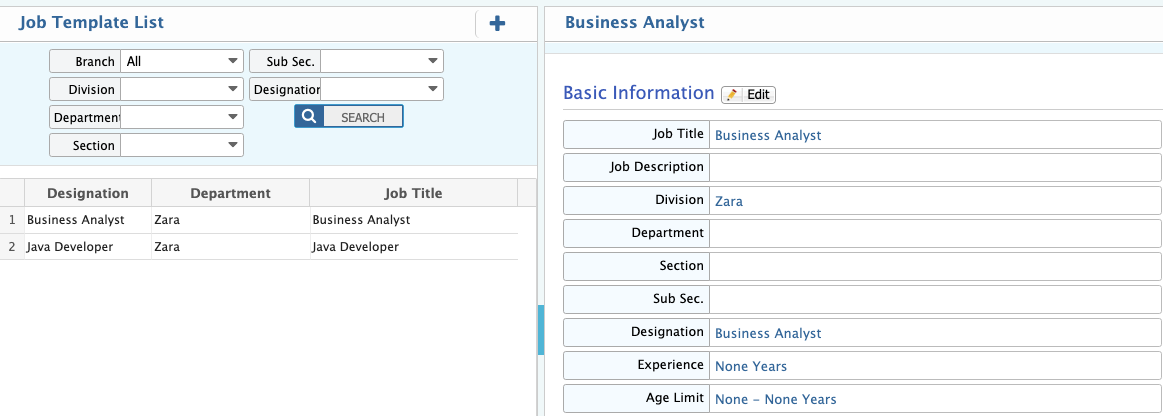
This page shows all the created job templates.
- Left section: Search job template.
- Right section: Detailed view of the job template.
Job Allocation:
Path: Recruitment >> Job Allocation >> Add New Job Allocation
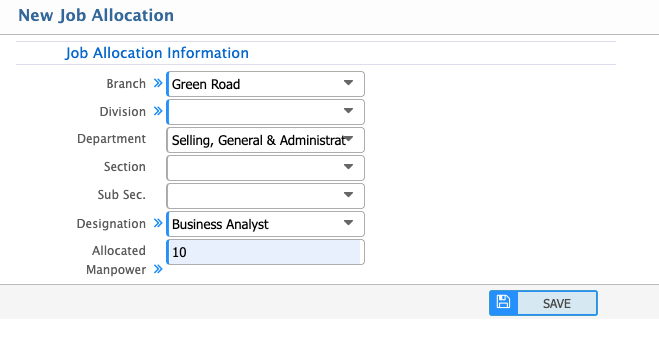
In this section, you will declare department-wise manpower. Select branch, department, and designation, then allocate the number of manpower required.
Job Allocation List:
Path: Recruitment >> Job Allocation >> Job Allocation List
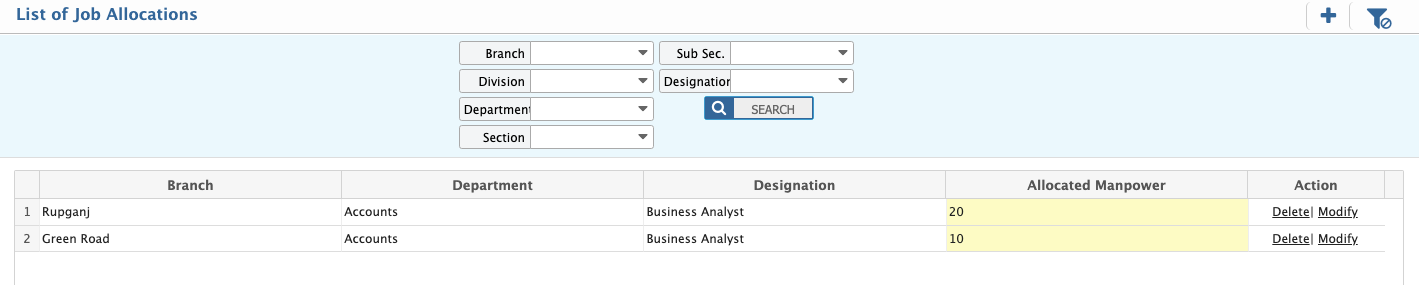
View the list of job allocations. You can also edit the allocated number by clicking the allocated number and entering the updated value.
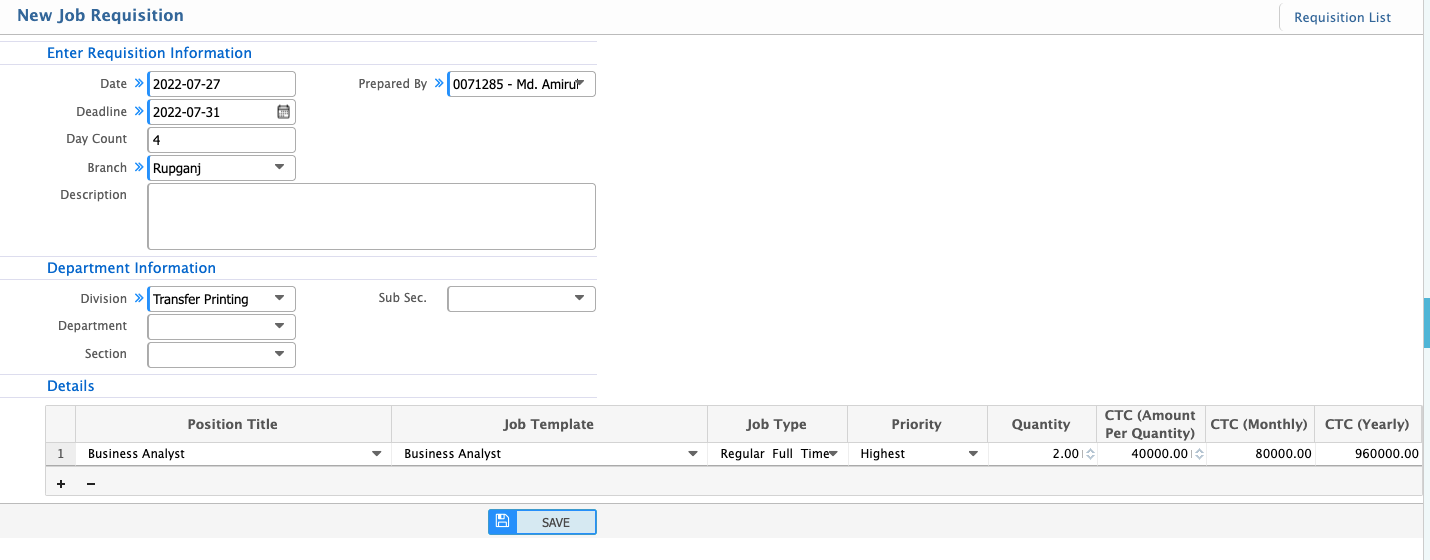
Add Job Requisition:
Path: Recruitment >> Job Requisition >> Add New Requisition
- Entry Process: Department Head or the assigned person can add requisitions of manpower for a particular job. Select the date, employee preparing the requisition, branch, department, designations, job type, priority, quantity, amount per quantity, monthly, yearly.
- Click Save to submit.
Job Requisition List:
Path: Recruitment >> Job Requisition >> Requisition List
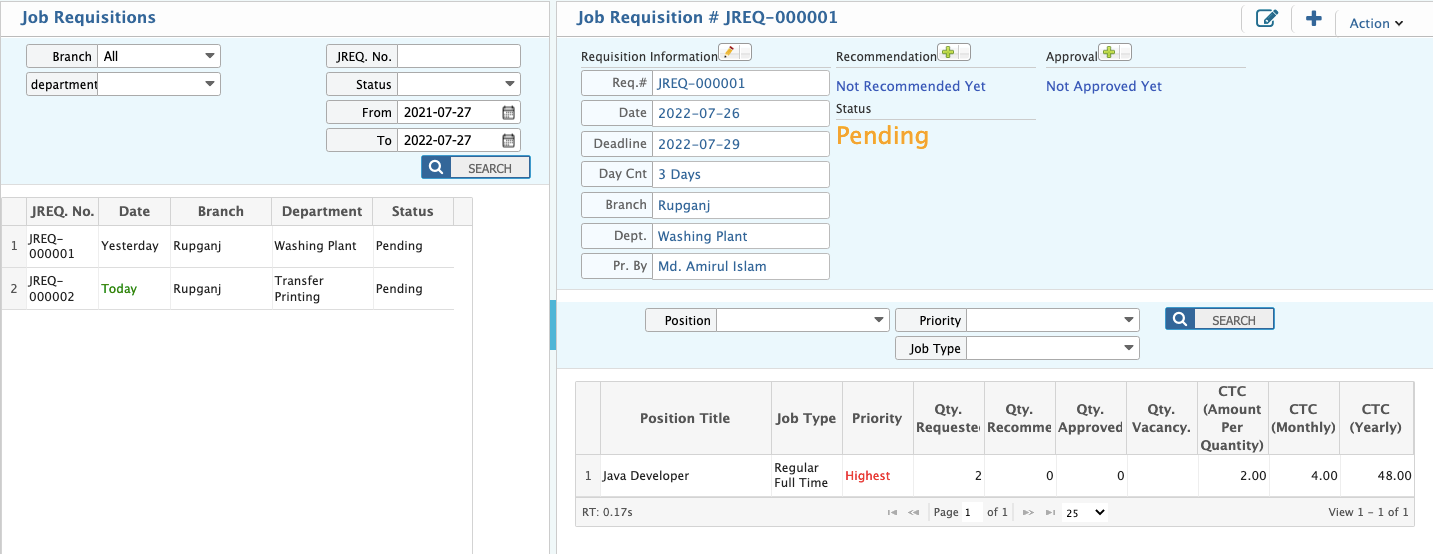
View the requisition list with status. Requisitions must be recommended and approved by the assigned person.
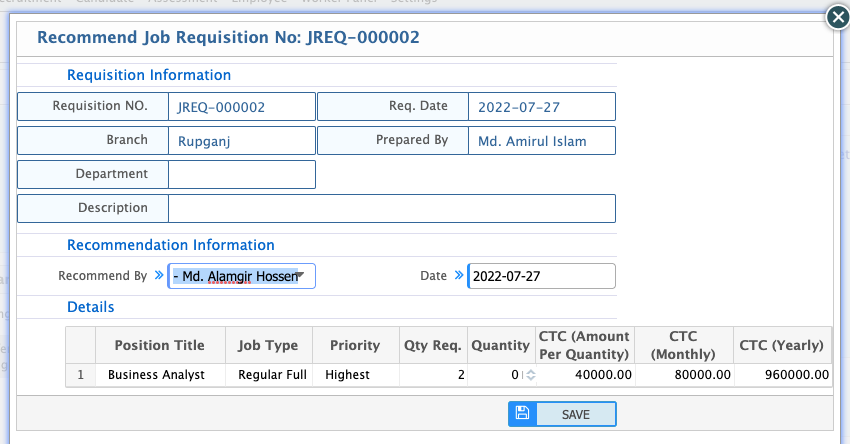
Requisitions Pending for Recommendation (Pending Requisitions):
Path: Recruitment >> Job Requisition >> Pending Requisition

Here you can see pending requisitions. Click the Recommend button, select date and recommender name, and change the quantity of manpower requisition.
Requisitions Pending for Approval (Recommended Requisitions):
Path: Recruitment >> Job Requisition >> Recommended Requisition
See the recommended requisition list. Click Approve to approve and modify the quantity of manpower requisition.

Requisitions Pending for Vacancy Creation (Approved Requisitions):
Path: Recruitment >> Job Requisition >> Approved Requisition

See the approved requisition list.

Add New Vacancy:
Path: Recruitment >> Vacancy >> Add New Vacancy

Add vacancy without requisition form here. After filling required data, click Save to create the vacancy and redirect to the list page.
Vacancy List Page:
Path: Recruitment >> Vacancy >> Vacancy List
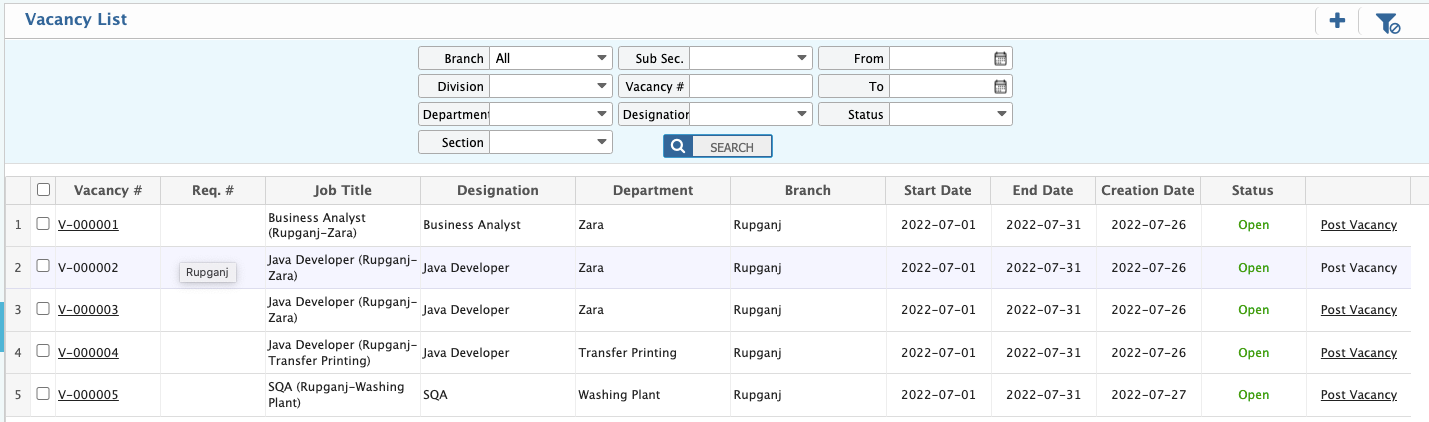
View all the created job vacancies here.
Add New Vacancy Posting:
Path: Recruitment >> Vacancy Posting >> Add New Vacancy Posting
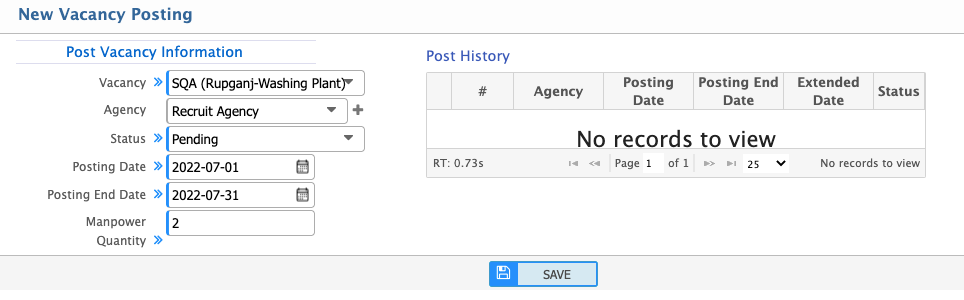
Fill out required data to create a new vacancy posting.
Vacancy Posting List:
Path: Recruitment >> Vacancy Posting >> List of Vacancy Posting
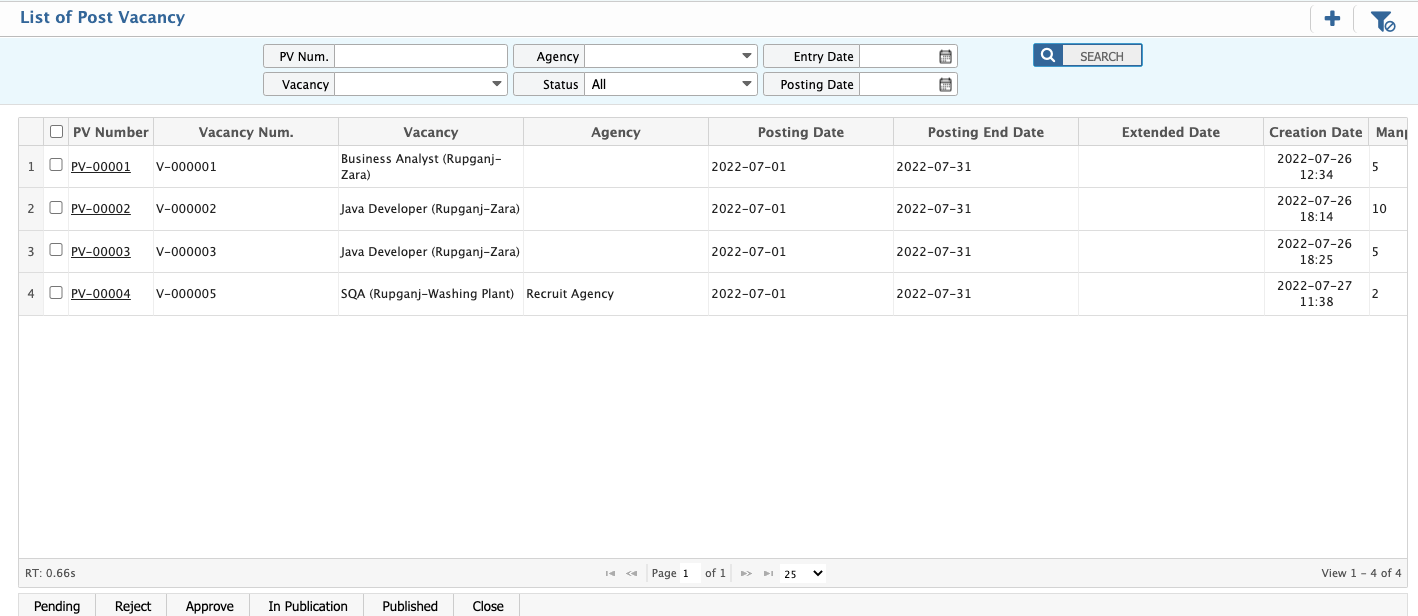
View all the vacancy postings here.
Vacancy Posting Status:
After posting a vacancy, the status will be Pending. Approved person will update the status to Pending >> Approve >> In publication >> Published.

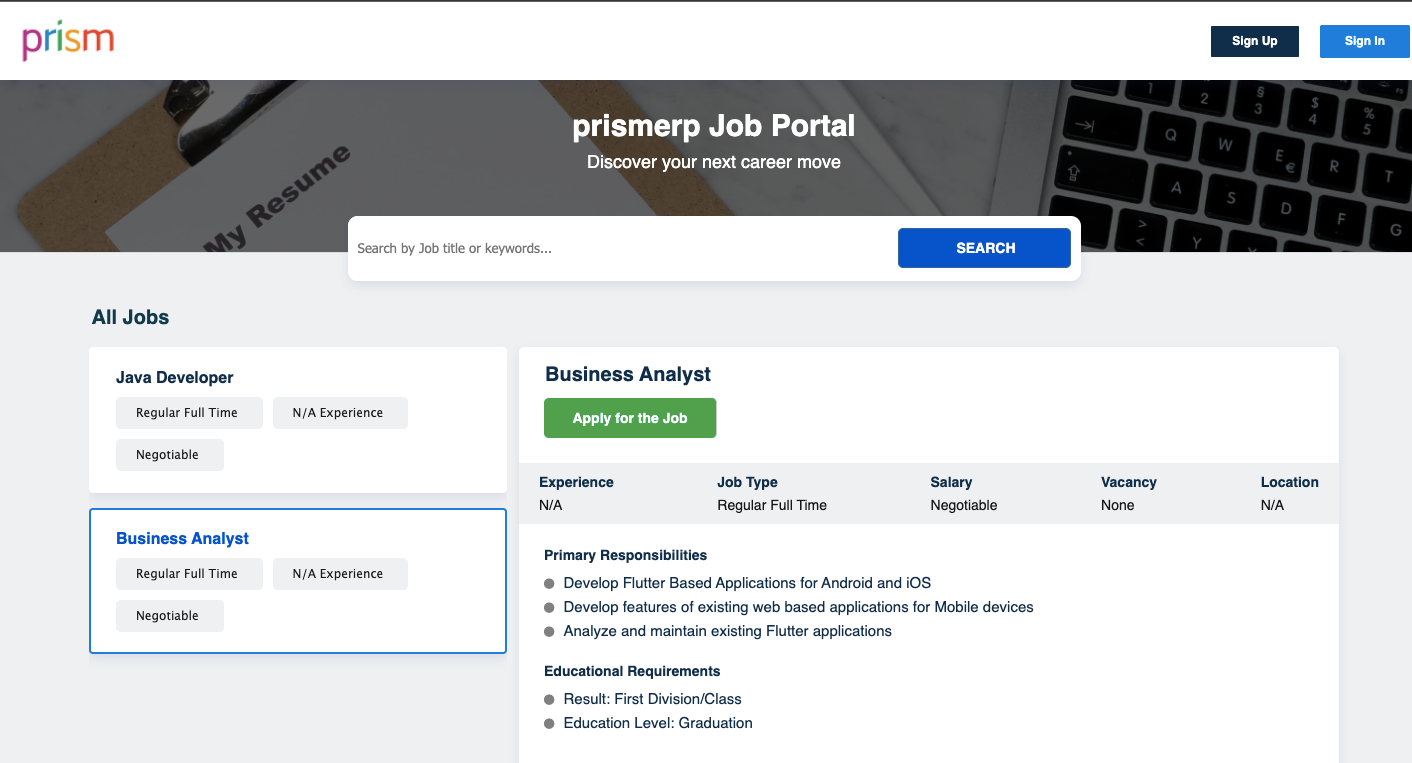
All published jobs will be visible in the Prism ERP Job Portal.
Prism Job Portal
Candidate
Candidate Edit Request:
Path: Candidate >> Candidate Edit Requests
If any candidate wants to edit information in the candidate profile using PrismErp job portal an edit request will be generated and shown in the candidate edit request page.
1.Change Request form PrismErp job portal
2.Candidate Data Change Request
You can see all the change requests in this list page.

3.Action
There are two actions under an edit request. You can approve or reject the request.
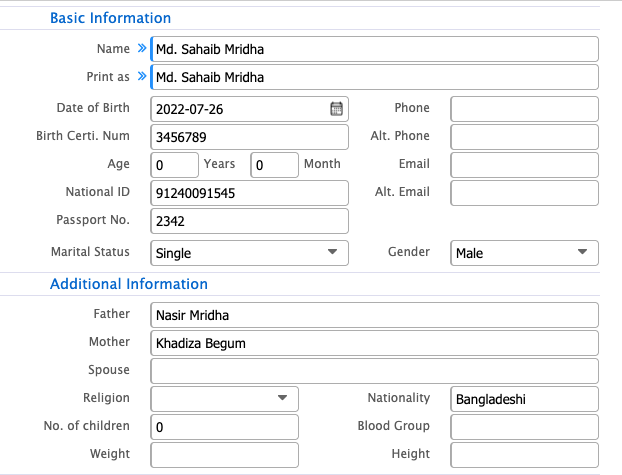
Add New Candidate:
Path: Candidate >> Add New Candidate
Entry Process:
- Add Application Information (Post, application date, expected salary, current job details).
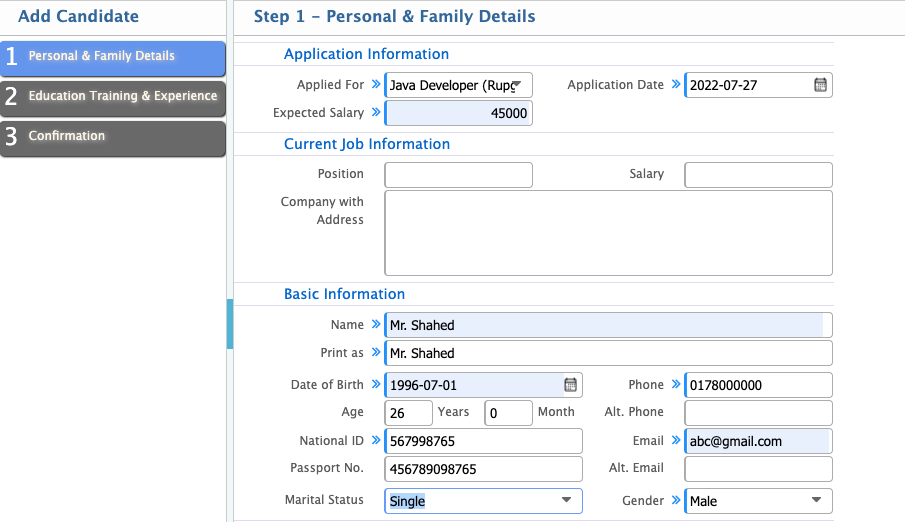
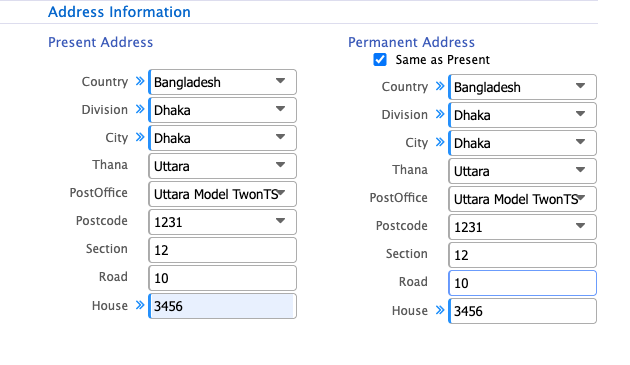
- Fill in Address Information and Permanent Address (if applicable).
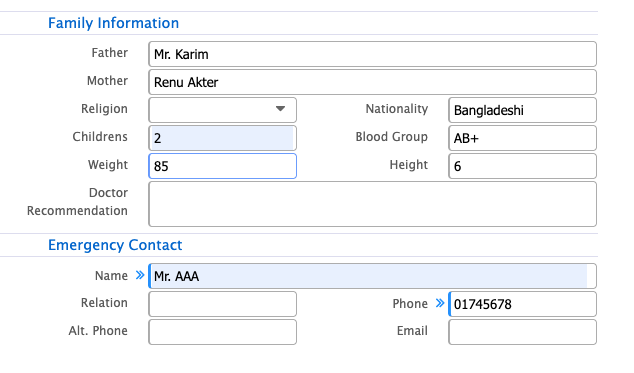
- Add Family Information, Blood Group, Nationality, Religion, etc.

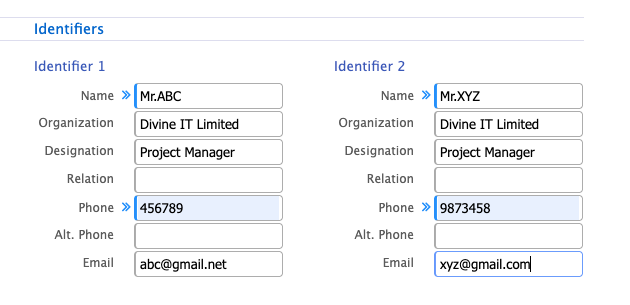
- Add Emergency Contact (mandatory).
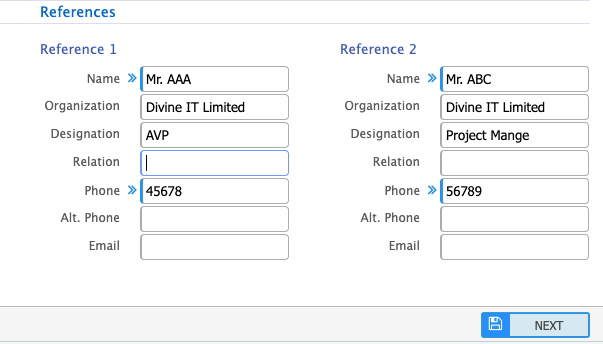
- Add Candidate References.
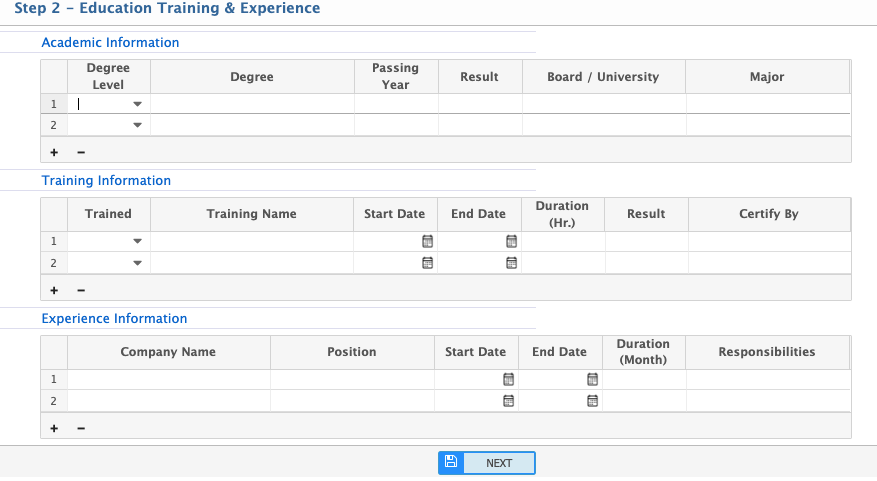
- Add Academic Qualification and Professional Qualification & Experience.
After reviewing, click Save to complete the process.
There is another way to add candidate
Add candidate through Prism job portal
Add candidate through Prism job portal:
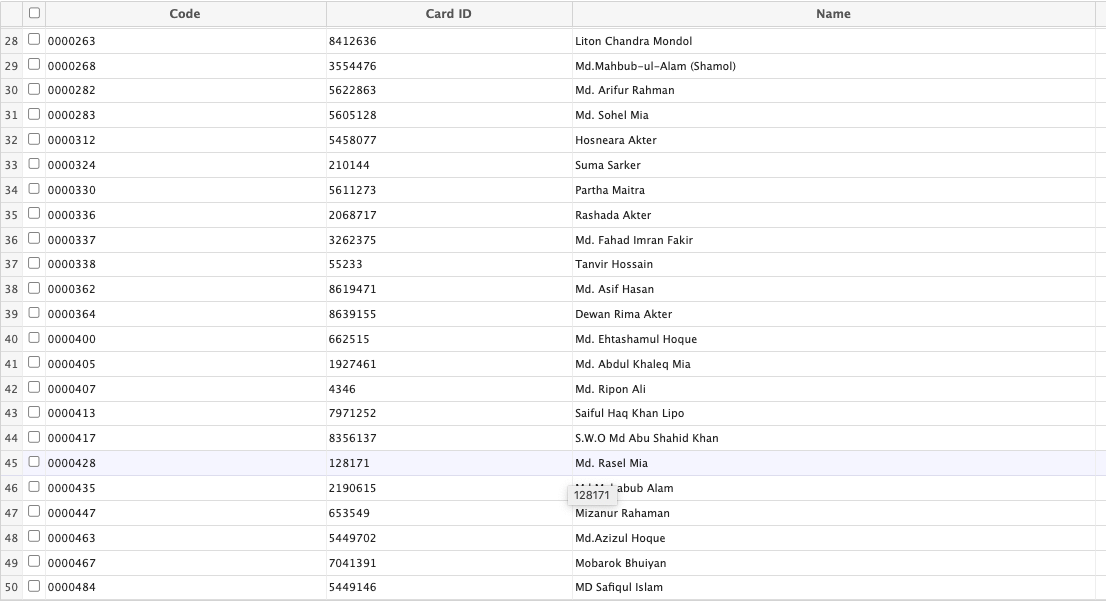
Candidate List Page:
Path: Candidate >> Add Candidate List
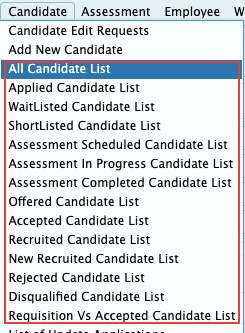
View the list of all candidates here.
Assessment
Add Assessment Outline:
Path: Assessment Outline >> Add New
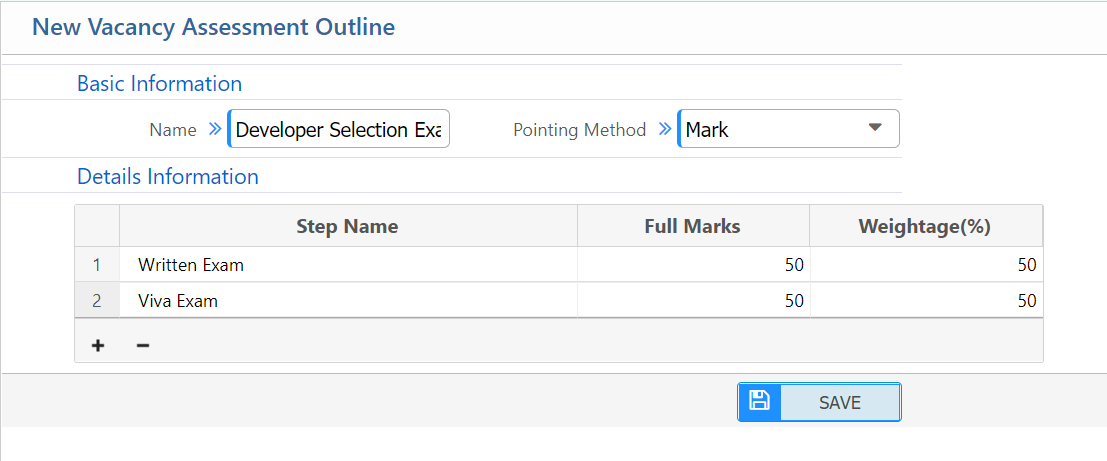
Enter an assessment outline name, select the scoring method (Points or Marks), and set assessment steps (e.g., written test). Set Weightage values for each step.
List of Assessment Outlines:
Path: Assessment Outline >> List
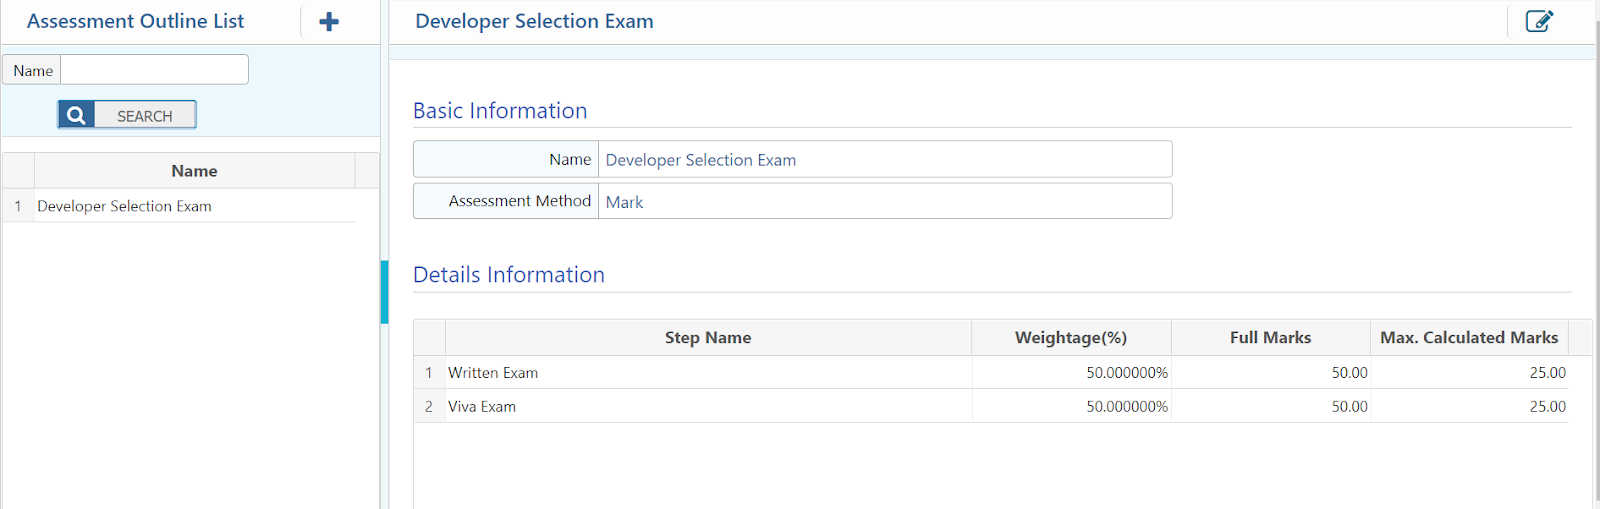
View all created assessment outlines here.
Add Assessment Panel:
Path: Assessment Panel >> Add New
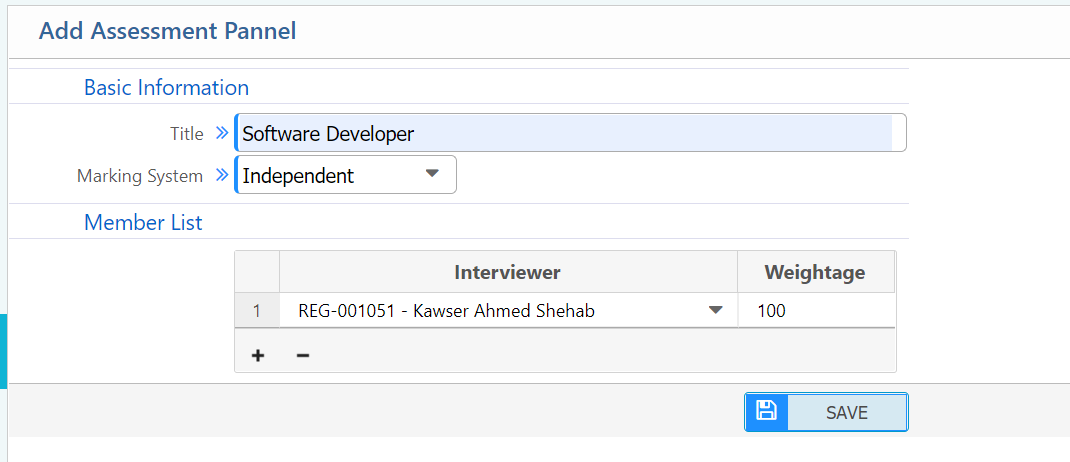
Enter the Assessment Panel name, define the Marking System, and select employees for assessment. Set their respective weightages.
Assessment Panel List:
Path: Assessment Panel >> List
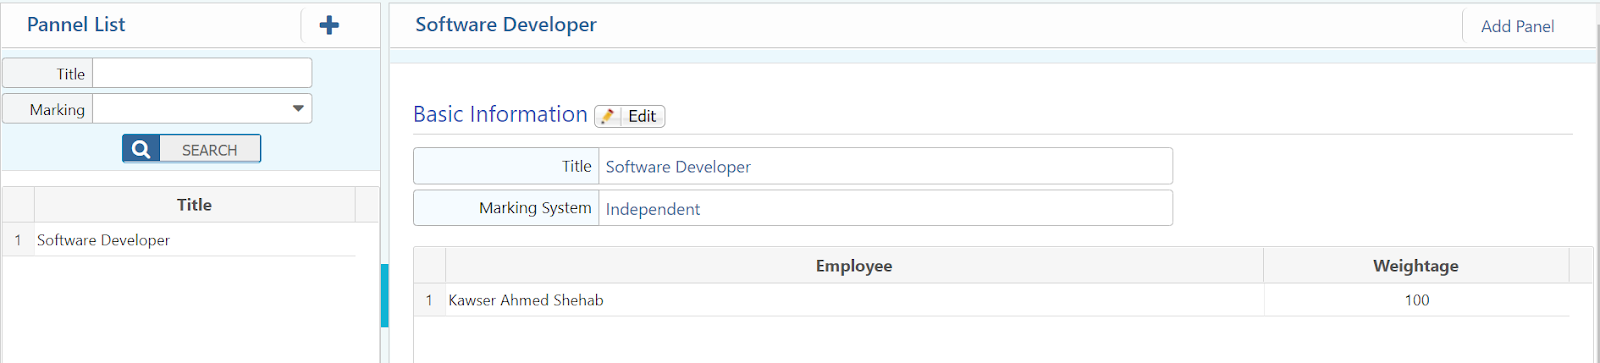
View and edit the entire list of assessment panels.
Add Assessment Schedule:
Path: Assessment Schedule >> Create Schedule
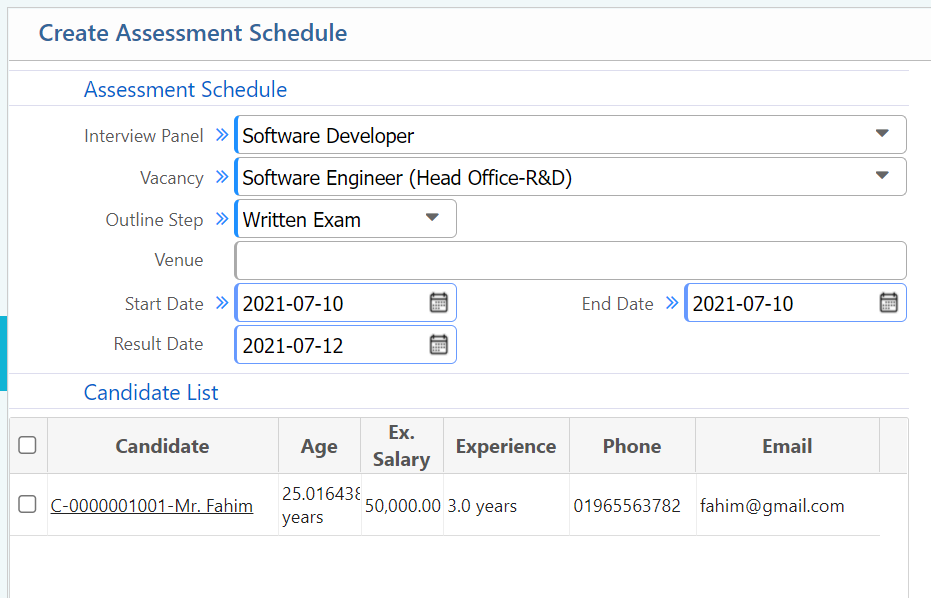
Select Interview Panel, Vacancy, Outline Step, Venue Name, and define Start Date, End Date, and Result Date. Select Candidate for Assessment.
Assessment Schedule List:
Path: Assessment Schedule >> List

View the list of all assessment schedules, including candidates included in each schedule.
Add Assessment:
Path: Assessment >> Add
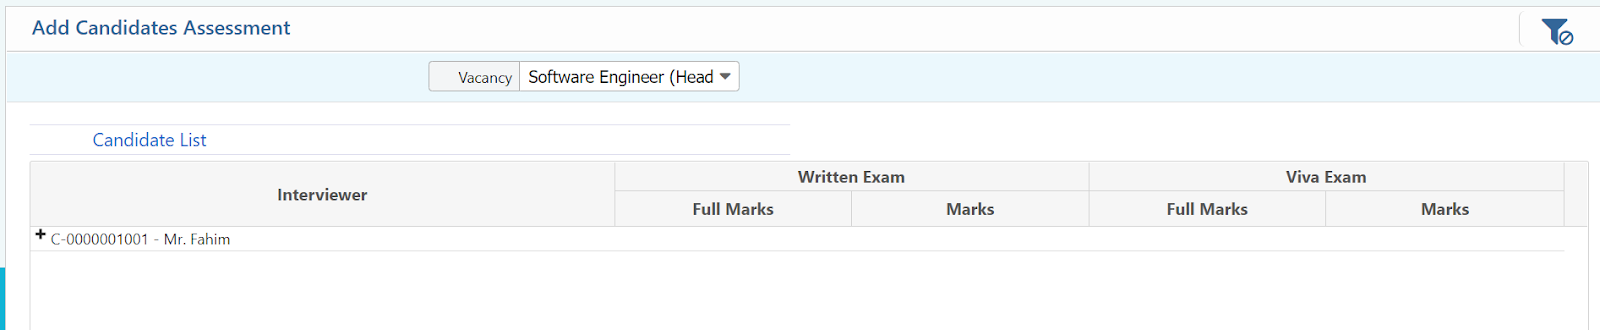
Add marks for candidates against the scheduled assessment.
Assessment List:
View the list of all the assessment marks for employees.
Employee
View the list of all employees here.
Worker Panel
Add Worker:
Path: Worker Panel >> Add Worker
Workers can be added via:
- Admin Panel

- Candidate Verification System (CVS): Workers can be added using biometric verification.
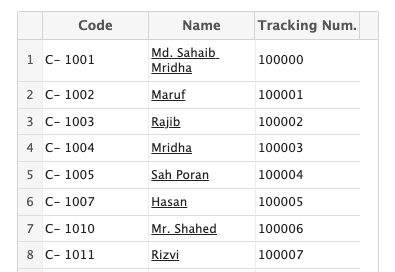
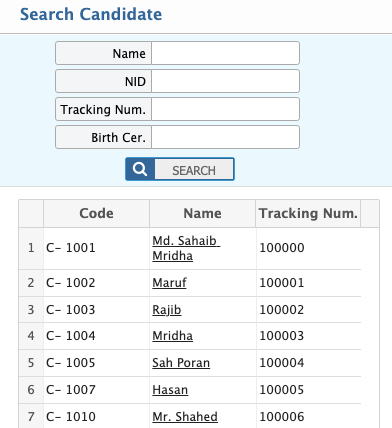
Check History:
Verify whether a worker has previously worked with the company using the tracking number.
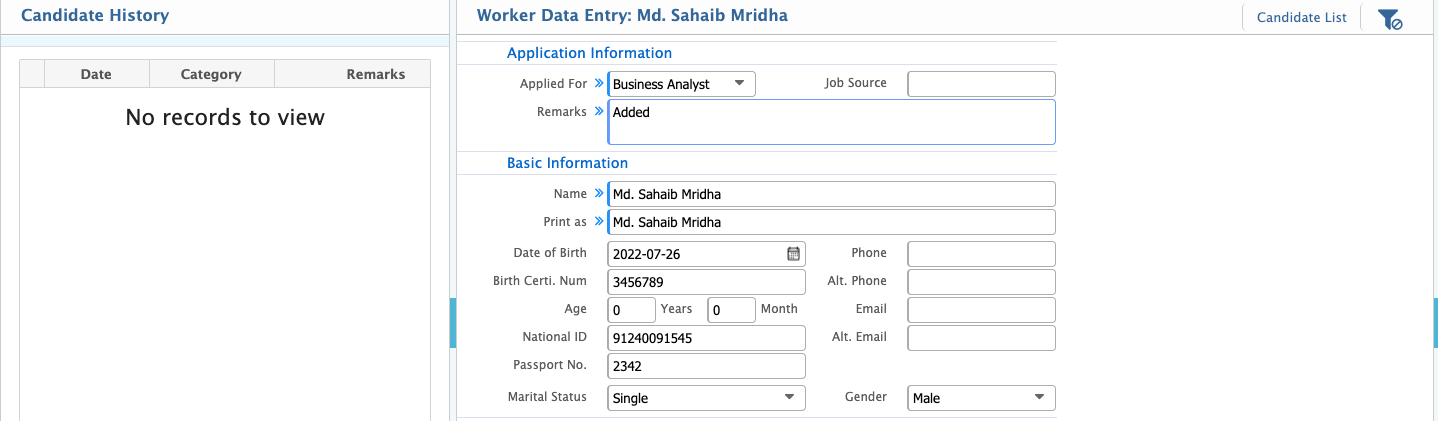
While adding worker data if he/she passes screening then input the basic data of the candidate. If he/she failed screening based on candidate history showing on the left then reject the candidate.
![]()
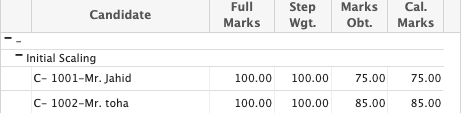
Assessment:
Under Assessment, you can add dynamic tests. Configure tests under Settings >> Assessment Config.
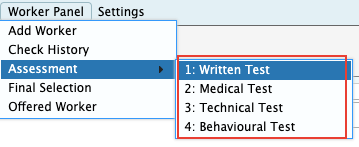
All the sceaning passed candidates waiting for the first level (Written) test.

To attend the test you need to click start access.
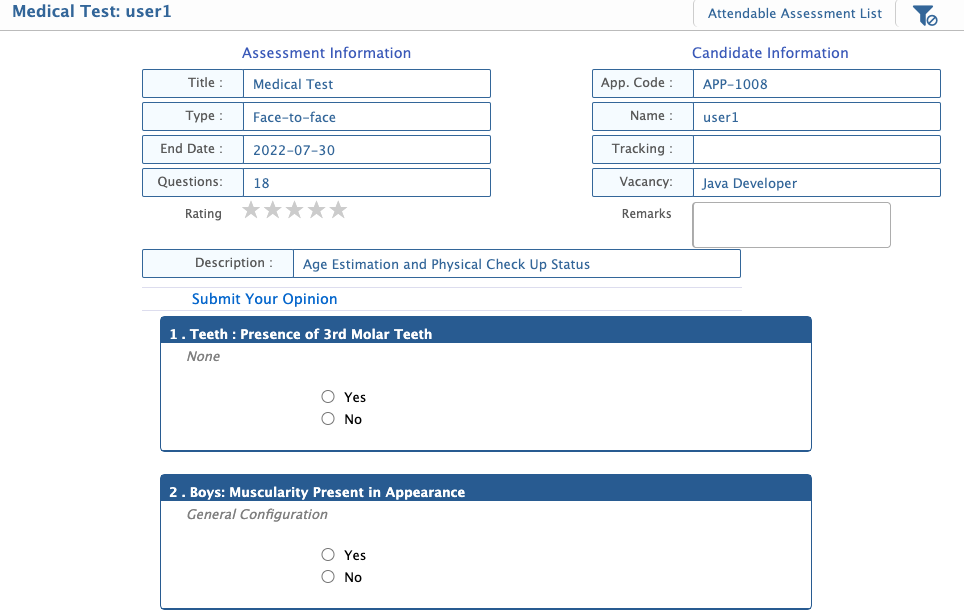
![]()
After clicking the save button the status of the candidate will be updated and goes to the next test waiting list. If rejected the status will be rejected with the state name and the assessment of the rejected candidate will be ended.
Final Selection:
If a candidate passes all assessments, they are selected for final selection.

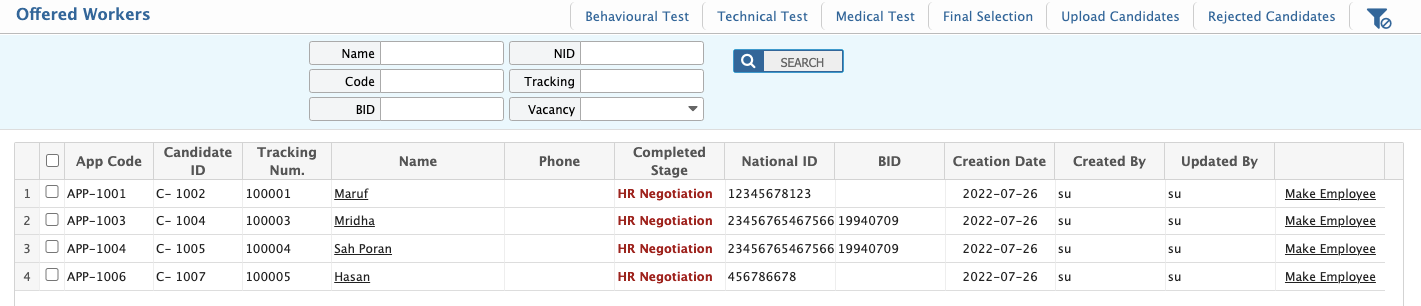
Offered Candidate:
Click Offer to begin negotiations with the candidate. If successful, they become an Offered Worker. After clicking Make Employee, the candidate status will change to Employee.
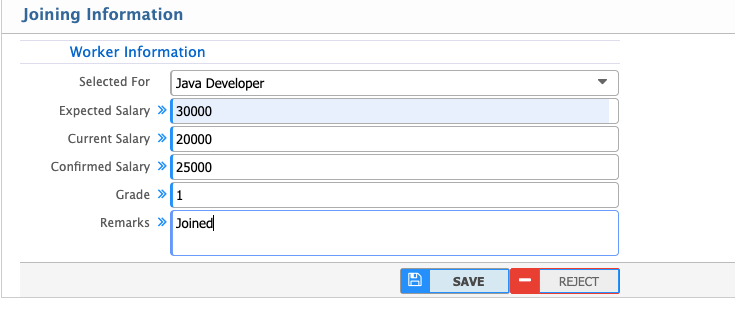
If the candidate passes this step, the candidate is selected as an offered worker.
After clicking Make Employee button the candidate will changed the status as employee in the system
Settings
Add Form Outline:
Path: Settings >> Form Builder >> Add Form Outline
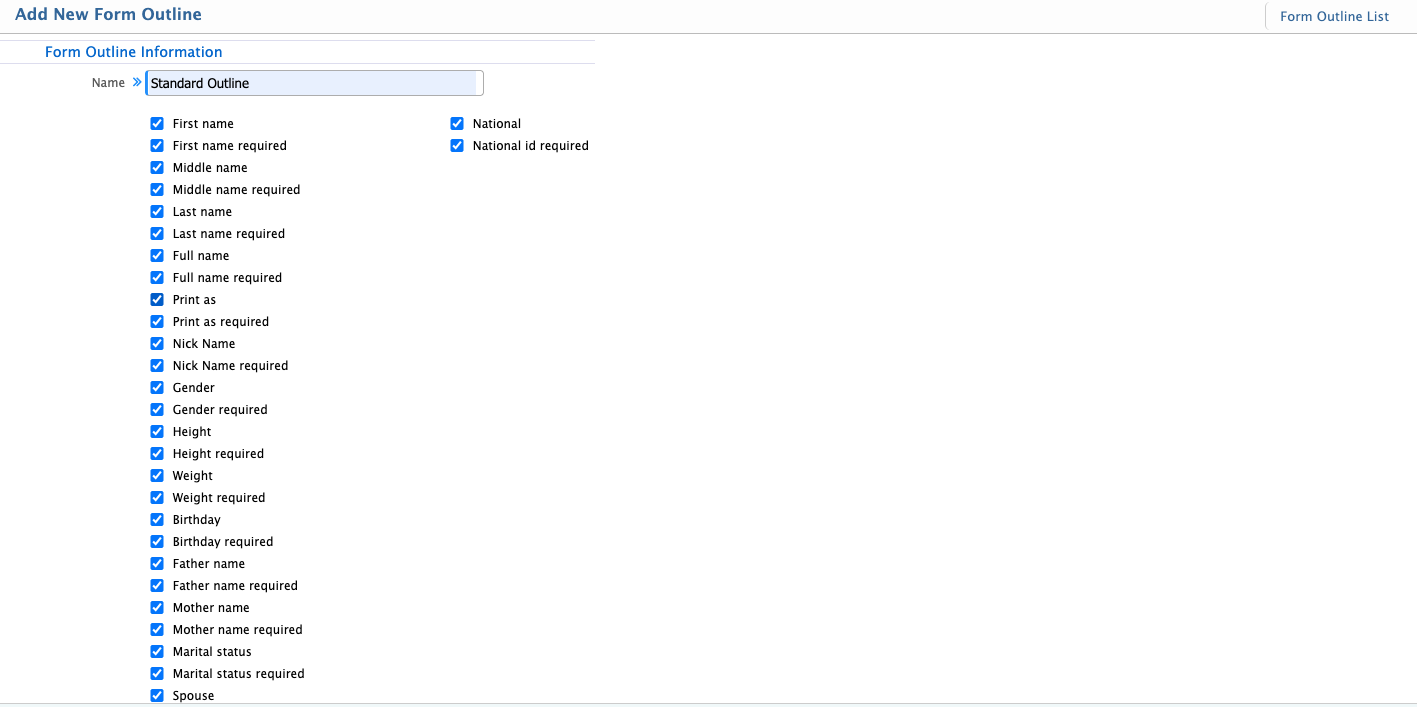
Set a name and select input fields. These fields will appear in the application form when candidates apply.
Form Outlines:
Path: Settings >> Form Builder >> Form Outlines
All created form outlines appear in the list page. You can edit or delete the form outlines.

Using the Configure Section selected input fields can be categorized. Like Basic Info , Educational information, Training etc.

After clicking the configure section a pop will display named “List of Sections Tagged With default Outline”. After creating the section, the section name will appear in this list.To add section go to (Settings >> Form Builder >> Add Form Sections)
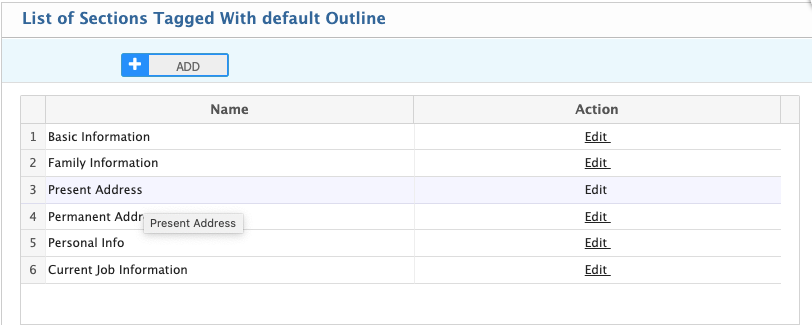
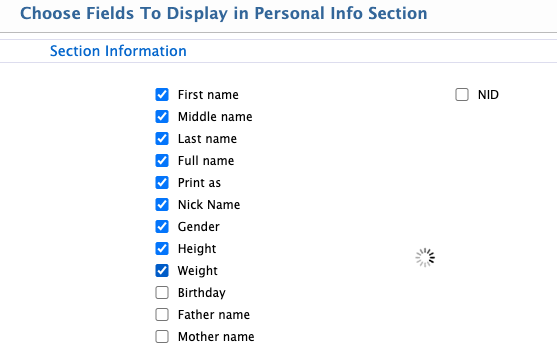
To edit the Section input field click the Edit link under the Action field. The chosen field displays in the linked section.
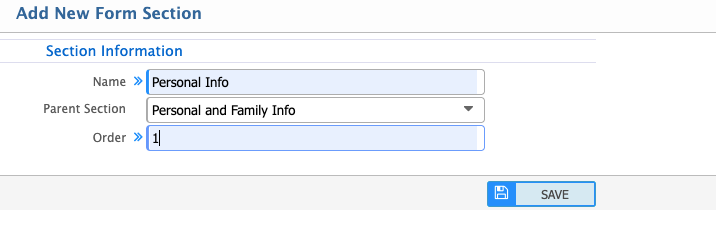
Add Form Sections:
Path: Settings >> Form Builder >> Add Form Sections
Add sections to input fields in the application form.
Form Sections:
Path: Settings >> Form Builder >> Form Sections
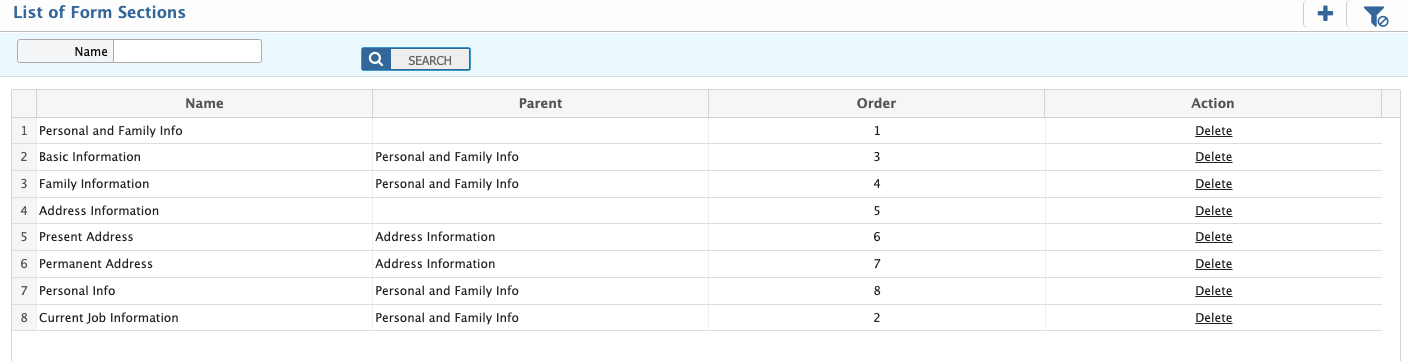
Delete sections if needed.
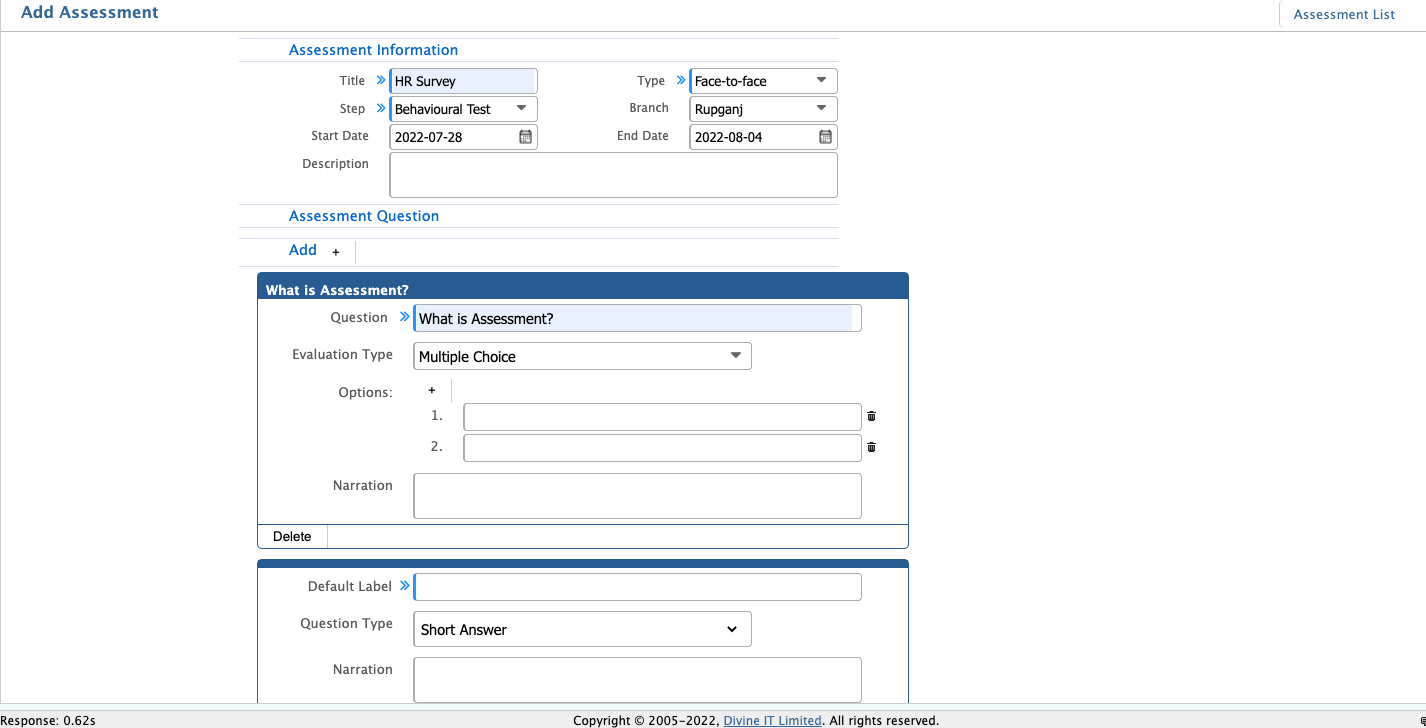
Add Assessment:
Path: Settings >> Assessment Config >> Add Assessment

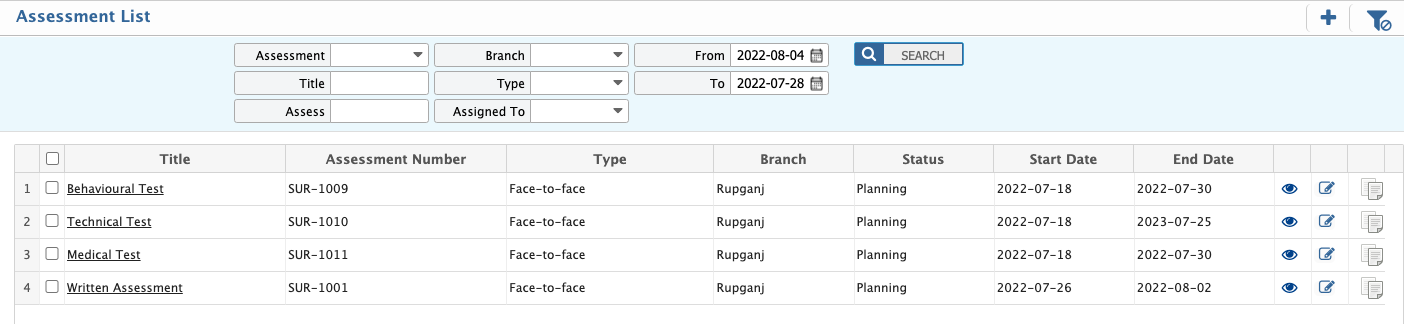
Assessment List:
Path: Settings >> Assessment Config >> Assessment List
In this section you can view the all assessment list. By default all the sections are in the postponed stage. If any section is in the postponed stage you can not view it under assessment.
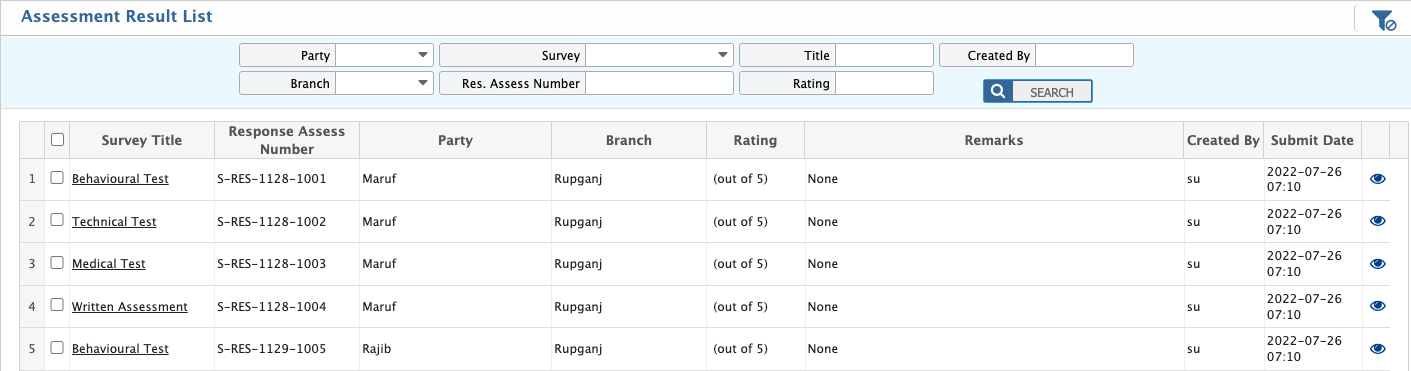
Assessment Result:
Path: Settings >> Assessment Config >> Assessment Result
View all taken assessment results here.
Add Assessment Step:
Path: Settings >> Assessment Config >> Assessment Step
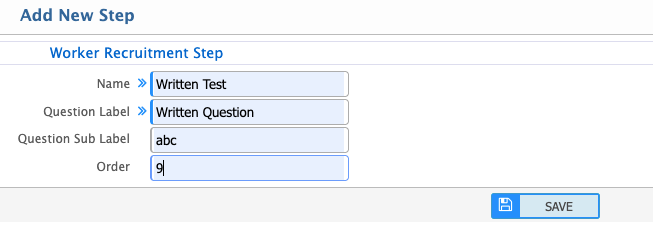
In this section you need to add Step Name, Question Level ,sub level and order. You can not create same order step which is in the active state.
Assessment Step List:
Path: Settings >> Assessment Config >> Assessment Step List

![]()
Depending on the assessment order you can not view it under assessment. From above figure written test will show in the first level in assessment.
1.1.6.10 Add Attachment Category:
Path: Settings >> Attachment Configuration >> Category

Attachment Category List:
Path: Settings >> Attachment Configuration >> Category Items

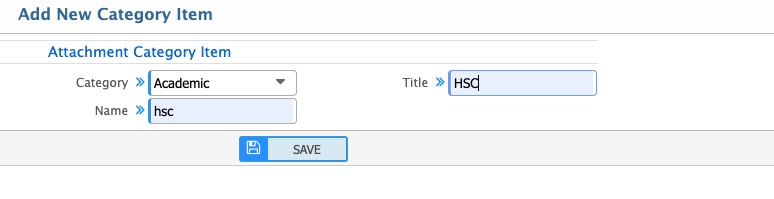
Attachment Category Item:
Path: Settings >> Attachment Configuration >> Category Items
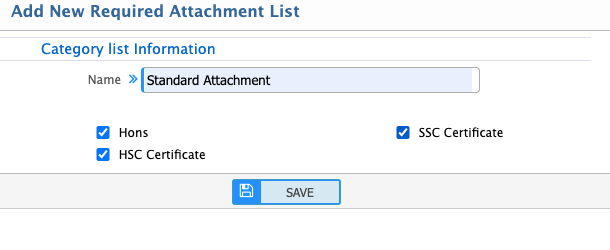
Required Attachment List:
Path: Settings >> Attachment Configuration >> Required Attachment List

Click the (+) button to add new required attachment lists.
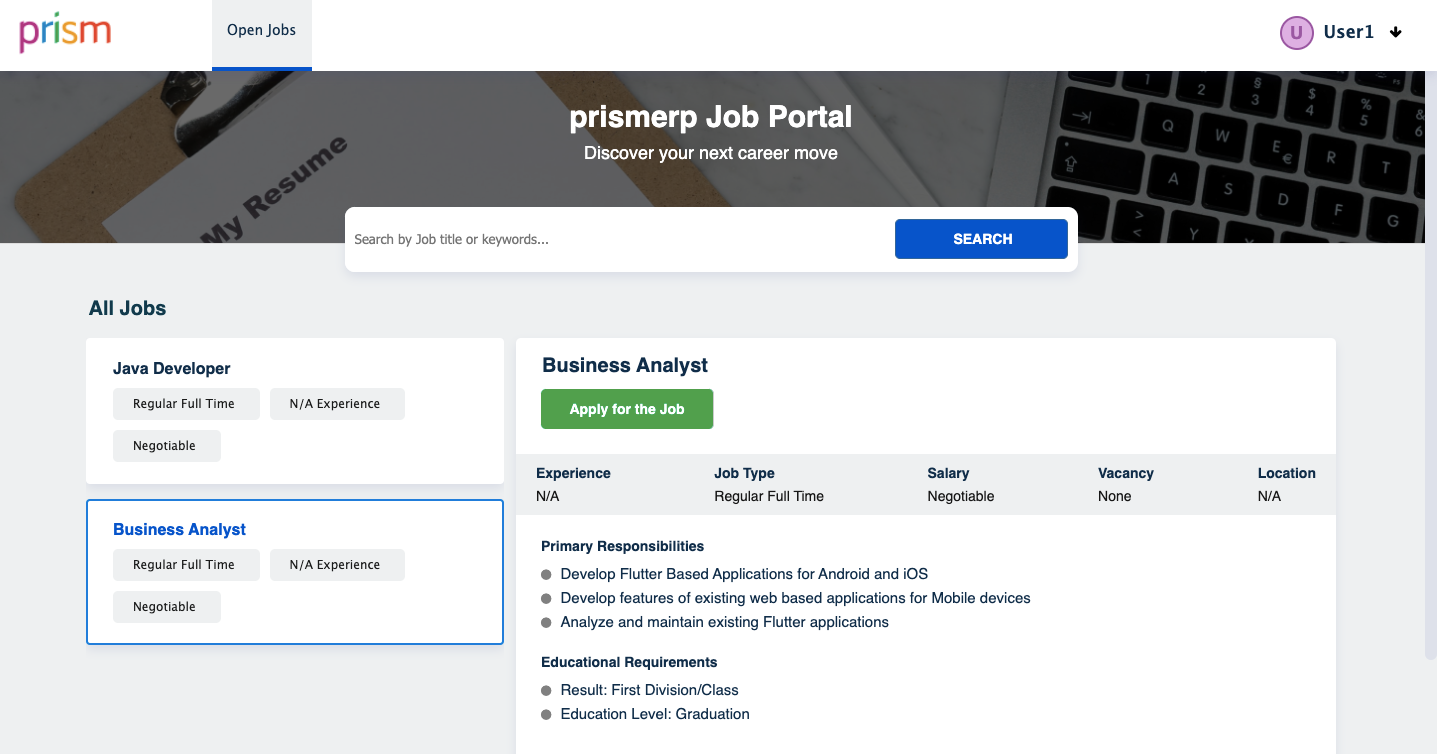
Job Portal
Landing Page:
URL: http://jobs.prismerp.cloud/jobs/
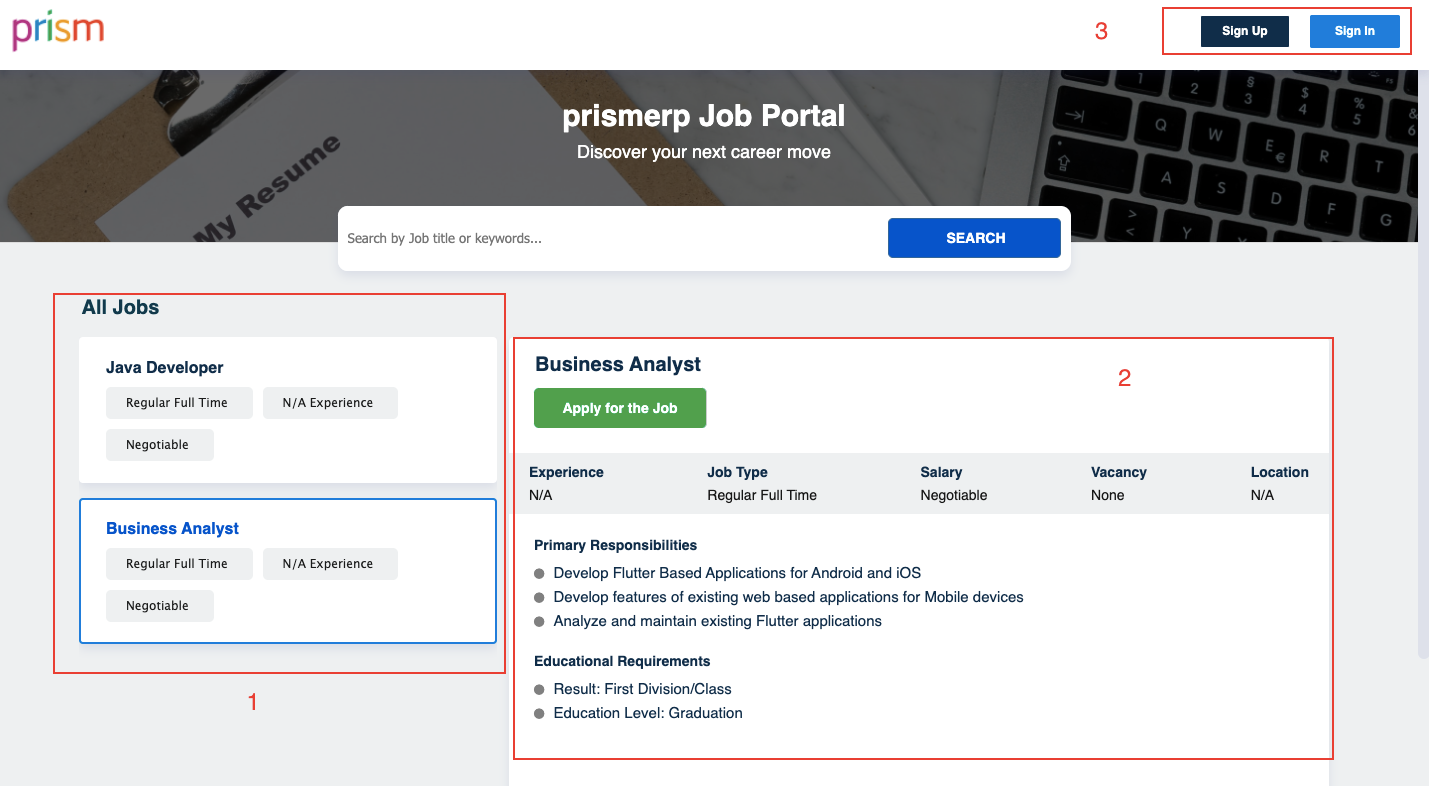
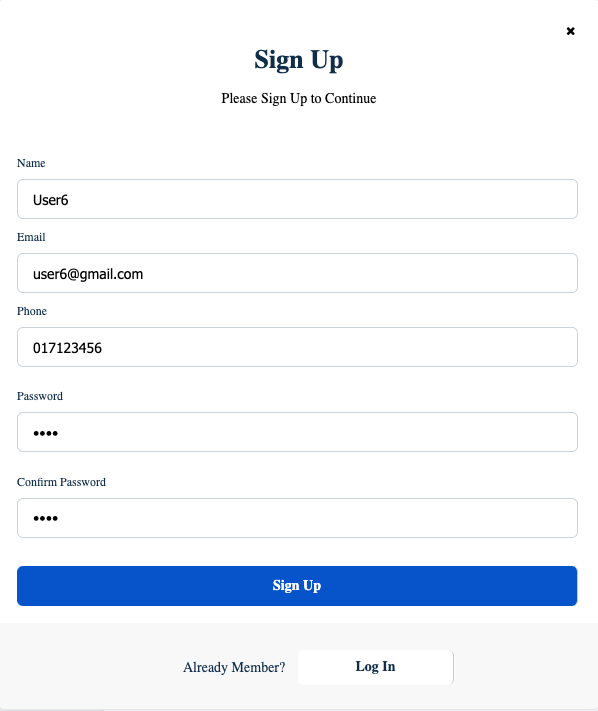
All published jobs appear here with detailed views. Candidates need to sign up or sign in to apply for jobs.
Sign Up Page
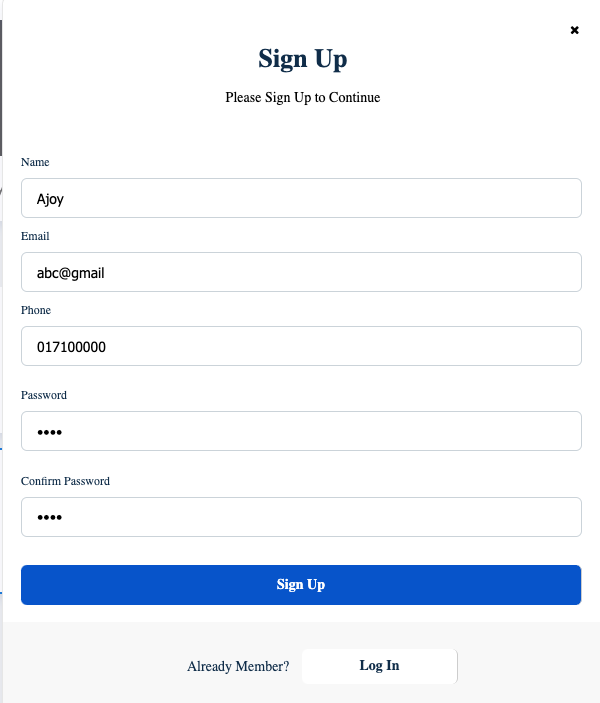
Sign In page:
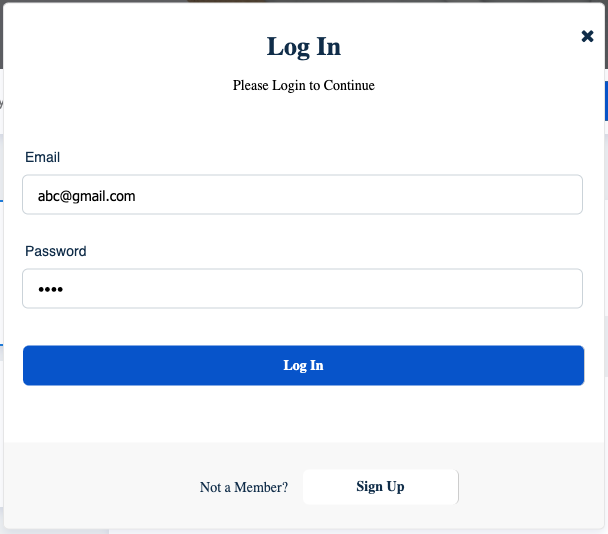
Candidate Portal:
Candidates can see all published jobs and apply. If they have already applied, the "Apply for Job" button will show as Applied.
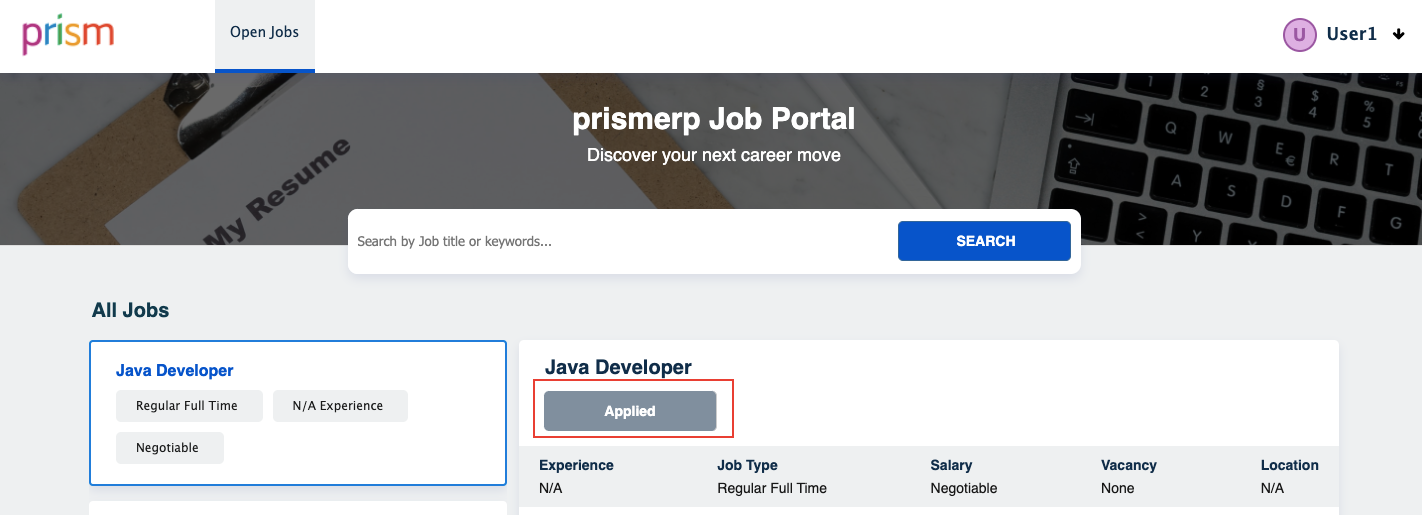
To apply for a new job, candidates need to fill out the application form.
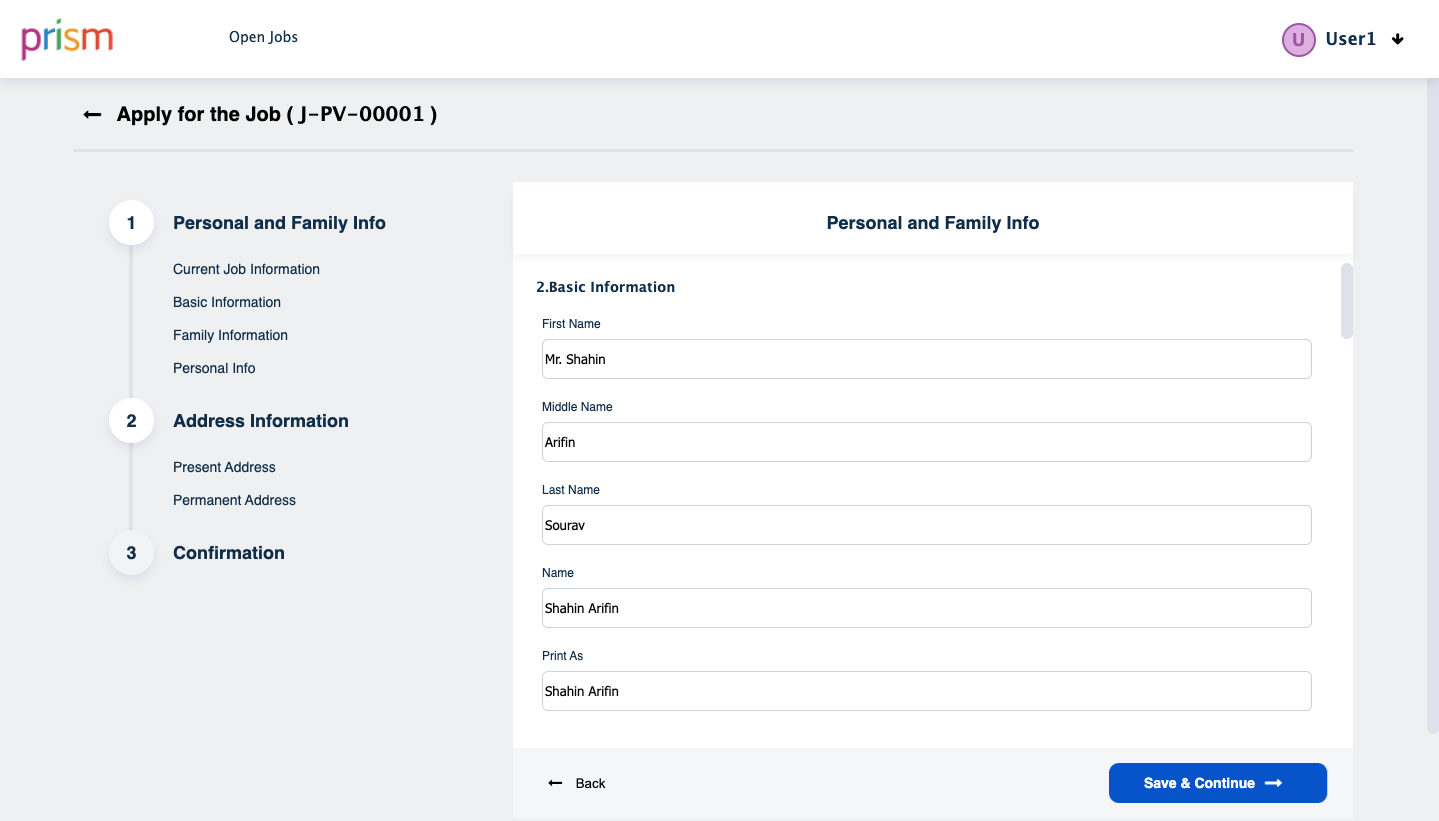
In the left side all the previous created section will show.From will divided under the section and the final state is confirmation. User Profile:
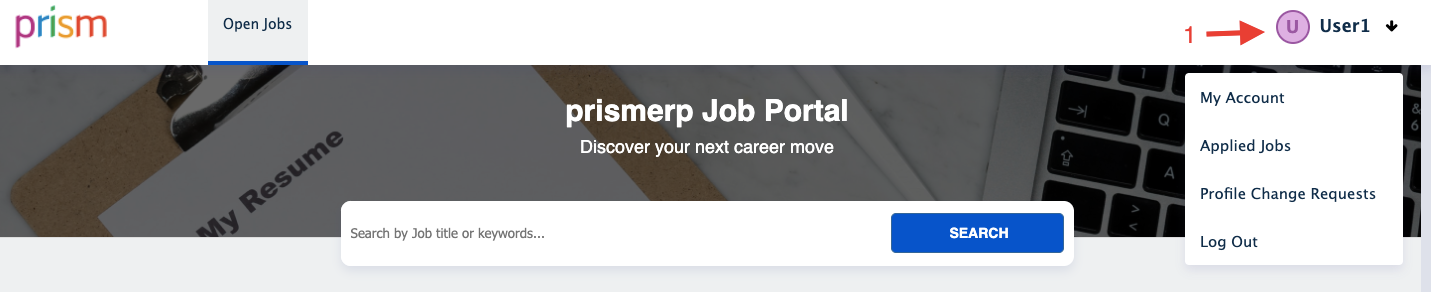
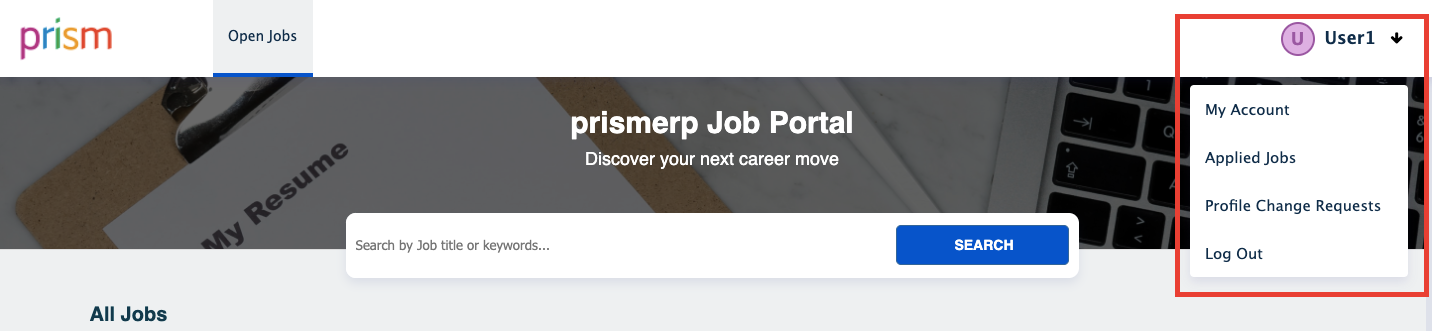
In the upper right corner it shows the user name. after clicking the arrow button all the options under the user profile will show.
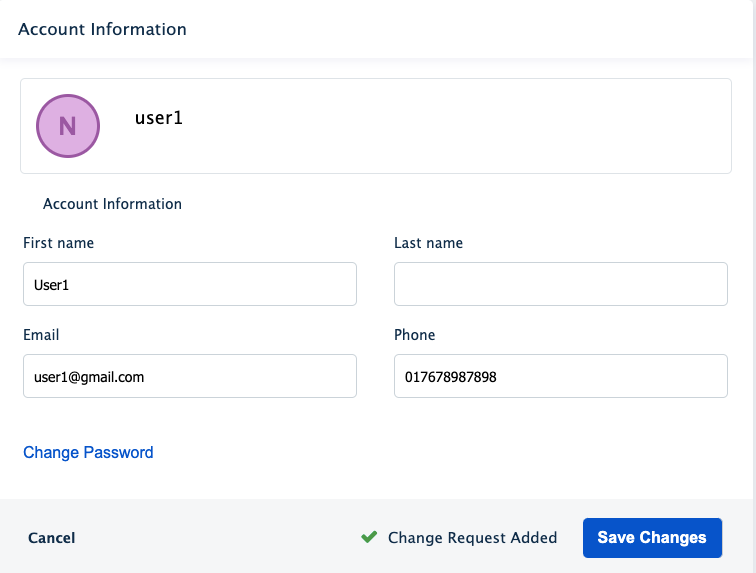
My Account:
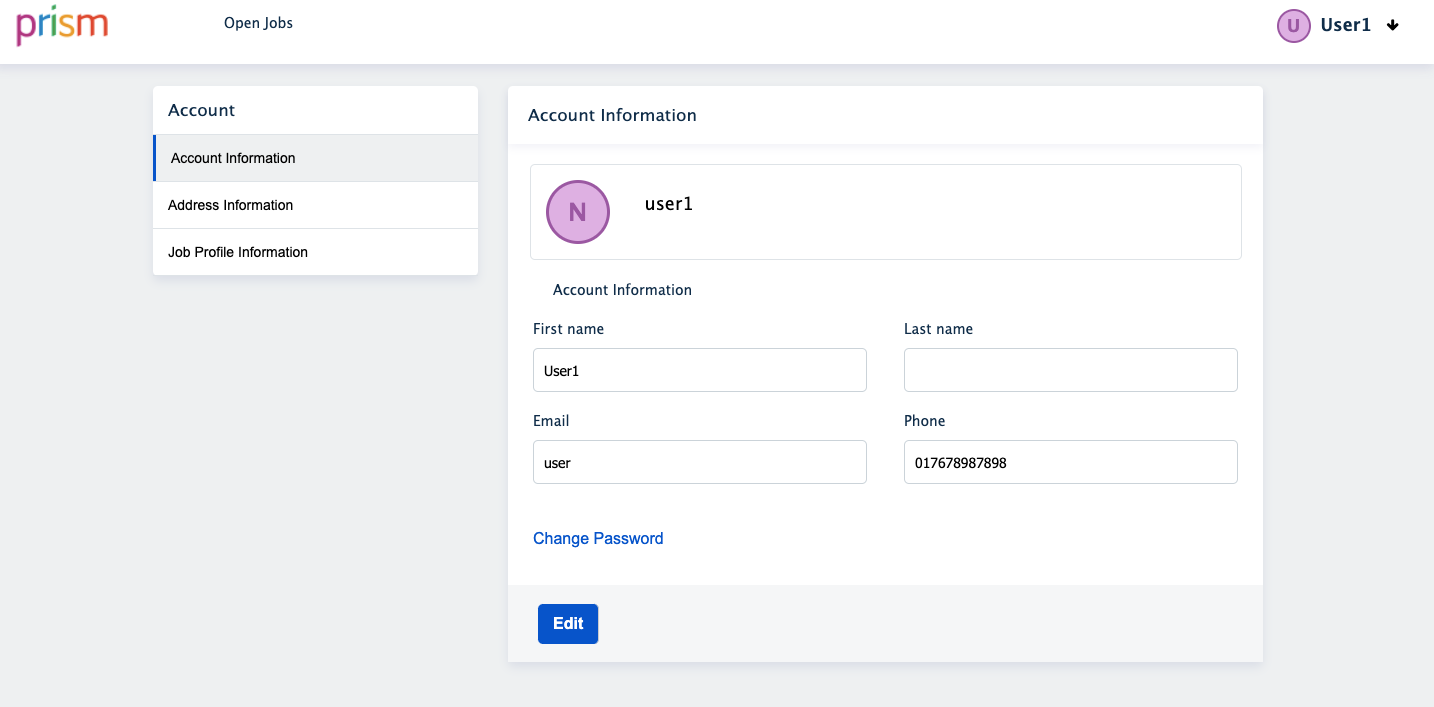
All the account information will be displayed here. Candidates can change the information as a change request. That will be listed in the change profile request.
Change Profile Request:
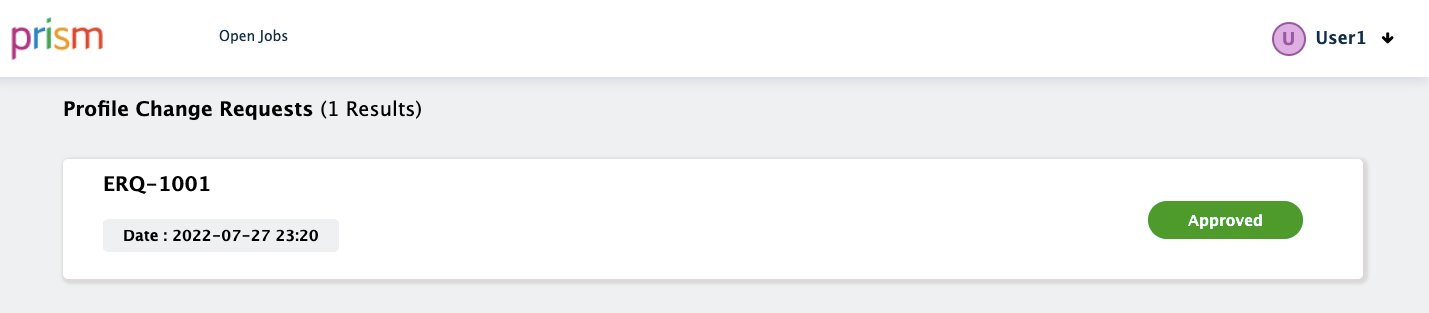
View and approve or reject change requests for the candidate's profile.
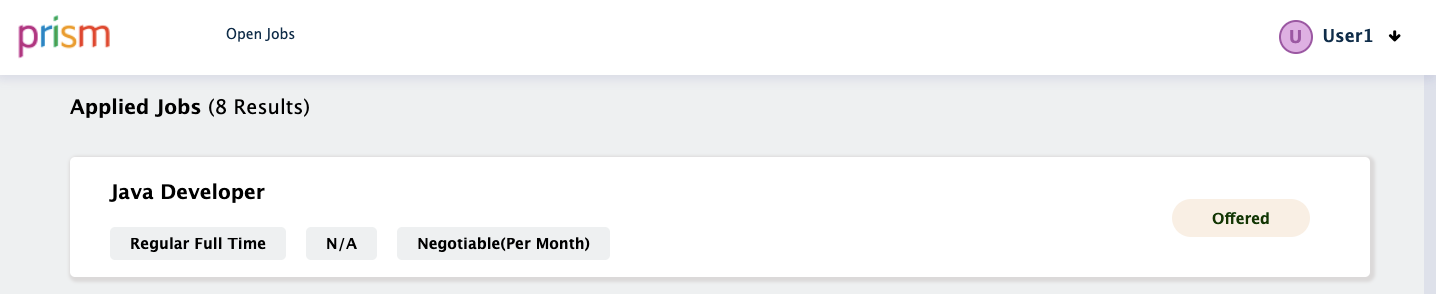
Applied Jobs with Status:
View the status of all the jobs a candidate has applied to.