Employee Loan & Advance
Loan & Advance in PrismERP covers the complete process of handling employee loans from creation to final repayment. Users can create a loan by selecting the employee, loan type, and loan policy, then entering details like loan amount, installment count, repayment delay, and priority.
After the loan is created, it goes through verification and approval, where it can be approved either fully or partially. Once approved, the loan is disbursed by selecting the disbursement date, and the system generates the repayment schedule based on the defined installments.
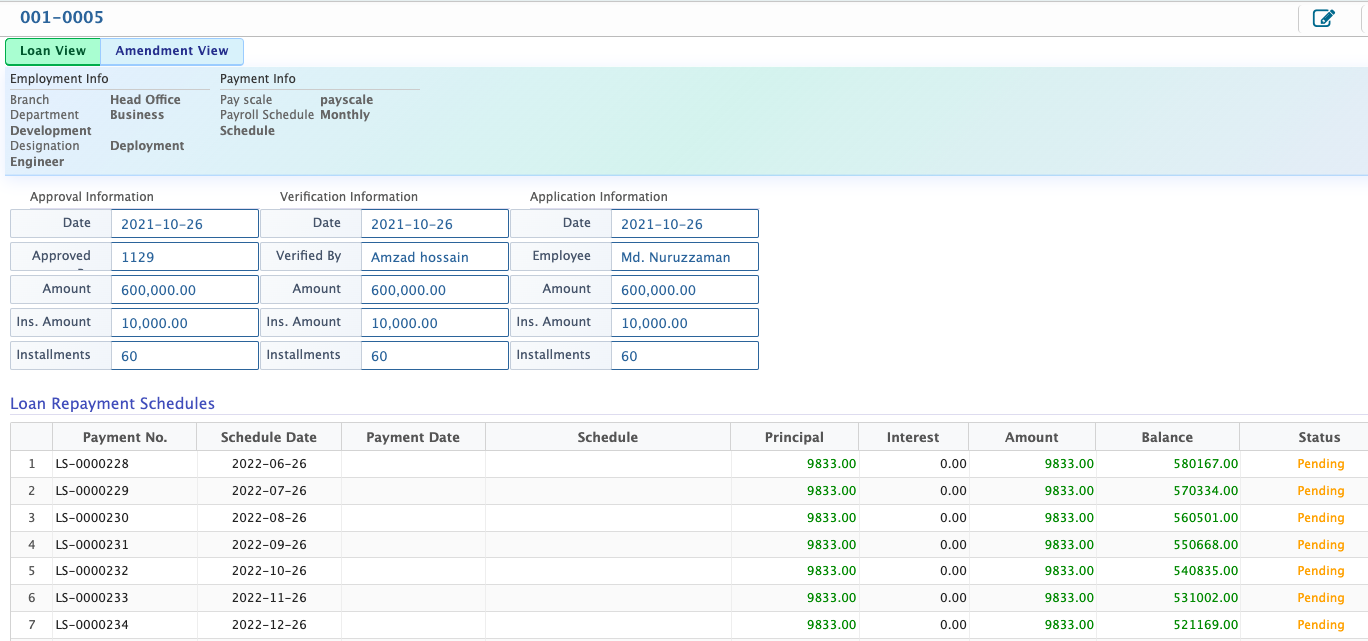
All loans are available in the loan list where users can search and filter records. By opening the loan details view, users can see complete loan information including repayment schedule, paid and due amounts, interest details, and any amendment history linked to the loan.
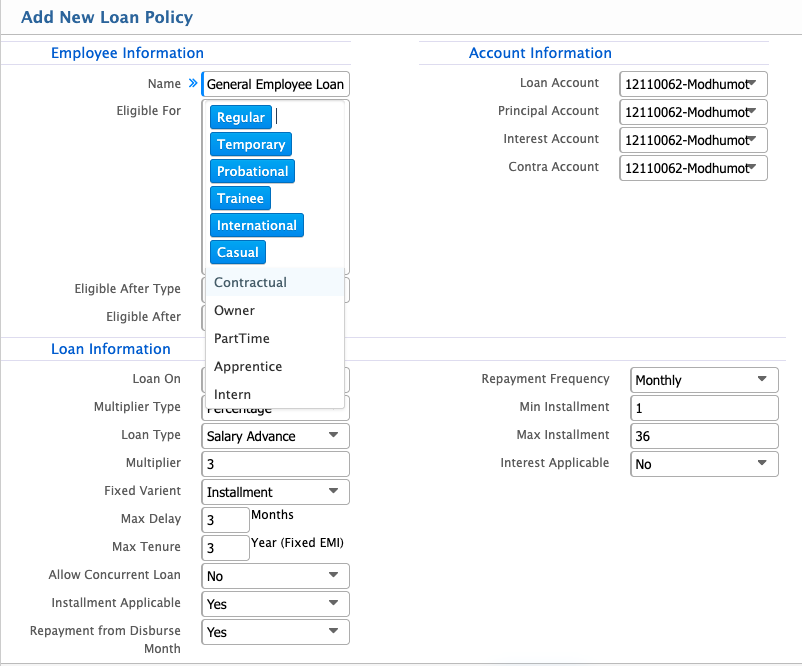
Add New Loan
| Field | Action |
|---|---|
| Branch | Select the branch under which the loan request is being processed to ensure proper organizational mapping. |
| Employee | Select the employee for whom the loan is being created so that the loan is correctly linked to the employee profile. |
| Loan Type | Choose the type of loan to define the category and purpose of the loan request. |
| Loan Policy | Select the applicable loan policy that determines the rules, limits, and repayment structure of the loan. |
| Application Date | Enter the date on which the loan application is officially submitted into the system. |
| Priority | Select the priority level to indicate the urgency of processing the loan request. |
| Repayment Delay Months | Define the number of months allowed as a repayment grace or delay period before installments begin. |
| Repayment Delay Days | Define additional days allowed as repayment delay within the loan schedule. |
| Apply For | Enter the requested loan amount that the employee is applying for. |
| No. of Installment(s) | Define how many installments will be used to repay the total loan amount. |
| Comments | Enter any additional notes or remarks related to the loan request. |
After a loan is created, it is added to the loan list where it becomes part of the system records. Users can then search and apply filters to quickly locate a specific loan based on relevant criteria such as employee, loan type, or loan number.
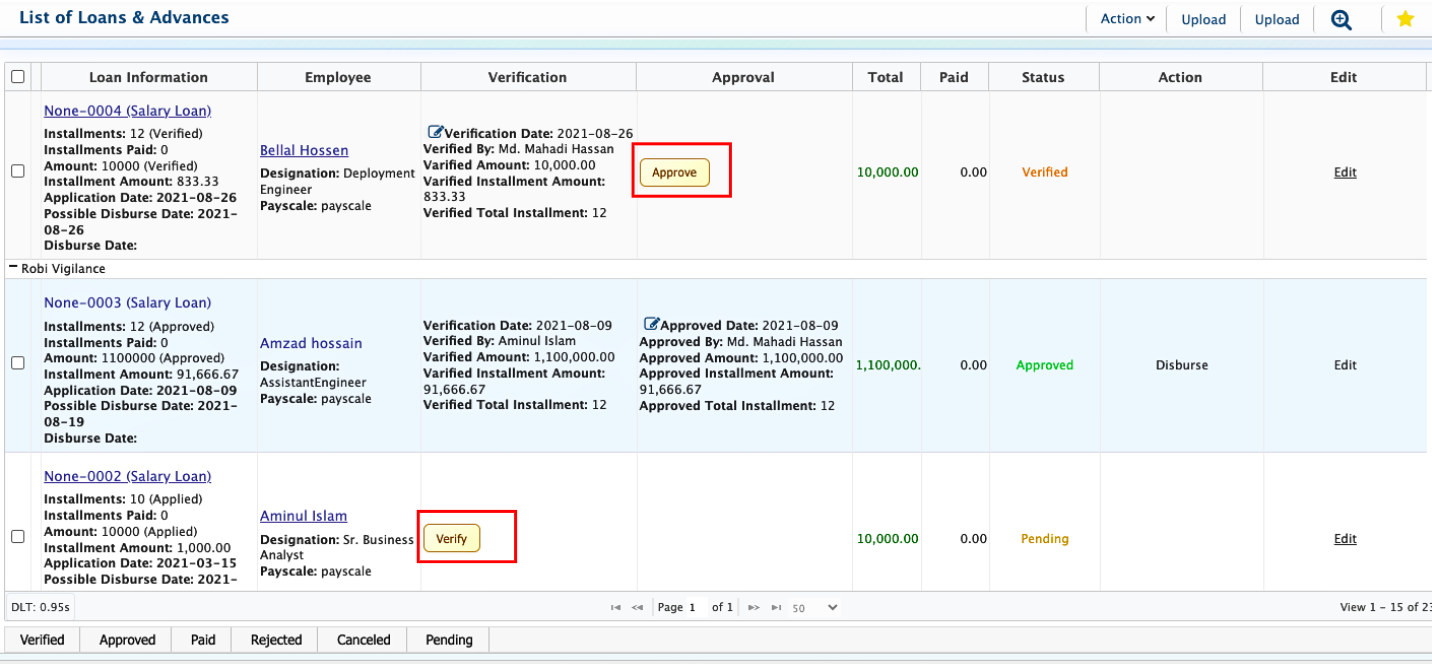
Users can verify the application before saving it. For verification, the user needs to click on the Verify option, select the employee from the dropdown menu, and enter the verification date. After that, clicking Save will complete the process.
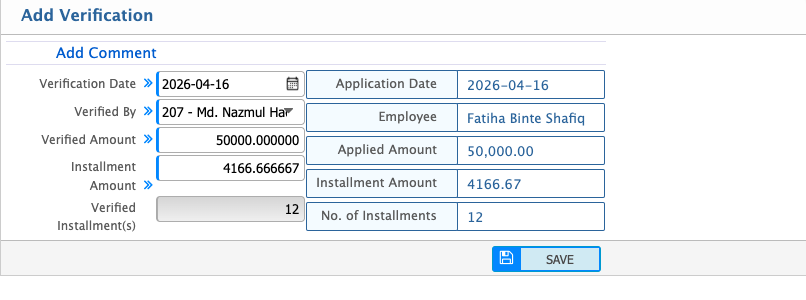
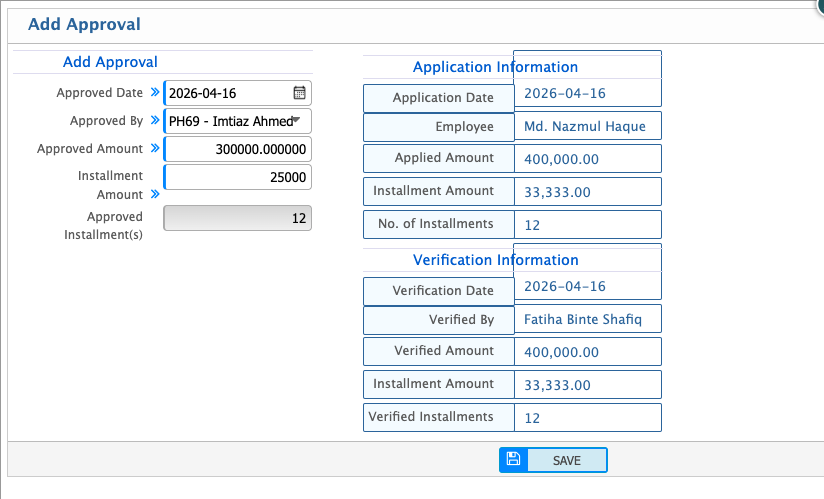
After verification, the application moves forward where the user can proceed with approval actions. The user selects the employee name, enters the required details, and saves the application for approval. During this stage, the user also has the option to approve either the full amount or a partial amount based on the decision.
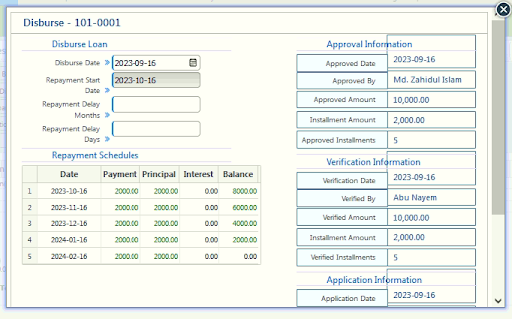
After approval, the loan can be disbursed by selecting the disbursement date and confirming the transaction. Once disbursed, users can also view the complete repayment schedule, including total repayment amount and installment breakdown, for proper tracking of the loan lifecycle.
Users can open the loan details view by clicking on the loan number from the loan list. This view shows all key information of the loan, including basic employee and loan details, repayment schedule, interest calculation, total paid amount, due amount, and overall loan status. If any amendments exist for the loan, users can also view the amendment history and details from the same view for complete tracking of changes.