Cold Storage Management
New Customer Addition
1) Add Customer
Process:
- Go to --> Parties --> Customer --> New Customer
Entry Process:
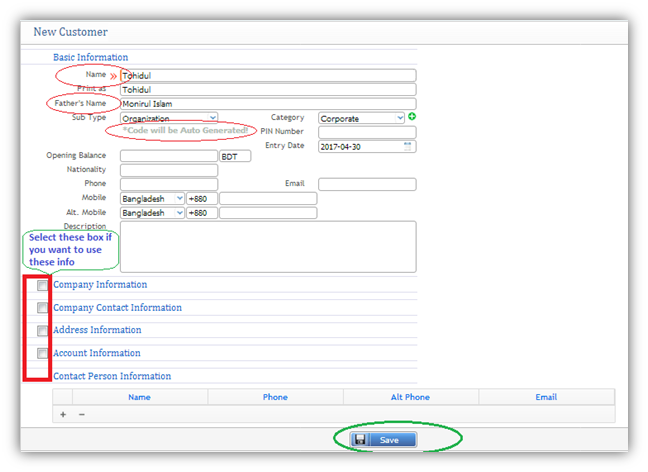
- Basic Information: Type name of the Customer into the name field, Father’s name into the father’s name field, Nationality & Mobile no. The Customer code will be auto-generated.
- Address Information: Type address of the customer & select Country, District, Thana of the customer from the list. Type Village, Post office & P.O box no into the customer’s address information.
2) View a Customer’s Profile
Process:
- Go to --> Parties --> Customer --> Customer List
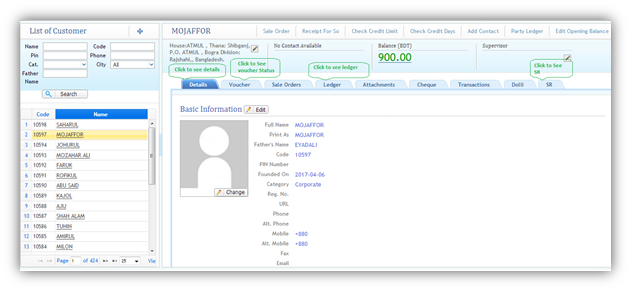
View: Select a customer from the list to view their profile. From this profile, you can see the following tabs:
Tabs:
- Details – Name, Picture, Address & Account information of the selected customer.
- Voucher – All voucher status of the Customer.
- Ledger – Ledger of the selected Customer.
- SR – All SR list of the selected Customer.
Additional Links:
- Add Contact: Click this link to add the contact information of the customer.
- Party Ledger: Print party ledger by clicking this link.
- Edit Opening Balance: Click here to add or edit customer’s opening balance.
Cold Storage Inventory
1) Add Cold Storage Inventory
Process:
- Go to --> Cold Storage --> New Inventory
Entry Process:
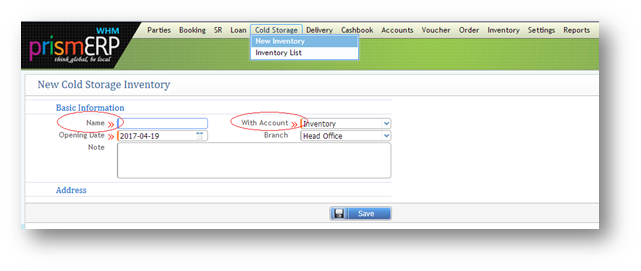
- Type name of the inventory (Cold Storage) into the account name field.
- Put opening date, select branch of the inventory, select account type “Inventory/work in progress”.
- Then click Save.
2) Inventory List
Process:
- Go to --> Cold Storage --> Inventory List
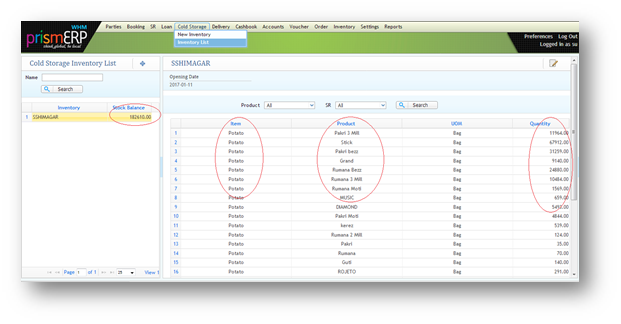
Note:
This is a list of company inventories (Cold Storages) where products for business are stored. Inventory can be managed according to products & SR number.
Booking
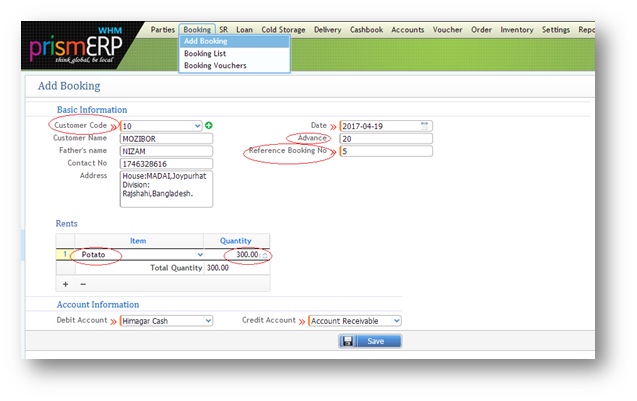
1) Add Booking
Process:
- Go to --> Booking --> Add Booking
Entry Process:
- Select desired Customer code from the customer code dropdown, then all information of the customer will be filled up automatically.
- Write booking advance amount into the Advance field.
- Write reference booking no. into the Reference Booking field.
- Select Rent item & write booking quantity into the Quantity field.
- Select Debit account from debit account dropdown.
- Then click Save.
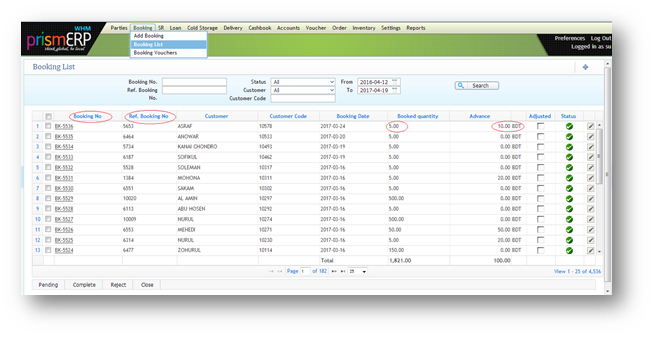
2) Booking List
Process:
- Go to --> Booking --> Booking List
Note:
This is the list of total bookings. Select the desired booking number & then click on Accept. Here you can see system-generated booking number, reference booking number, booking quantity & advance amount easily.
SR Management
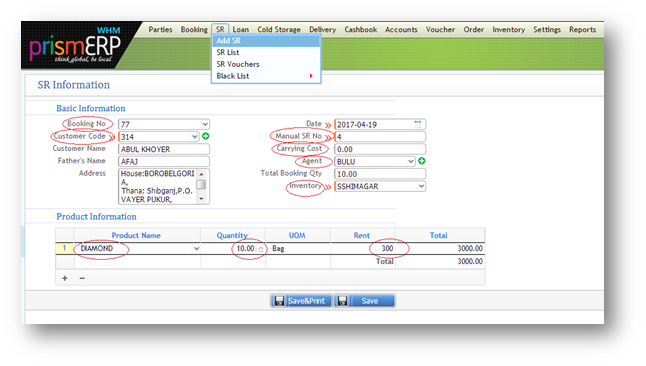
1) How to Add SR from PrismERP?
Process:
- Go to --> SR --> Add SR
Entry Process:
- Select booking no. (if any customer has booking) or Customer code (if any customer has no booking), then all information of the customer will fill up automatically.
- Write SR no. & Carrying Cost (if needed) into the manual SR no. field & Carrying cost field respectively.
- Select Agent name (if needed) & Inventory.
- Select Product (e.g., potato) name, write product quantity & rent amount.
- Then click Save or Save & Print (to get print option directly).
- Then print the SR (Dolil).
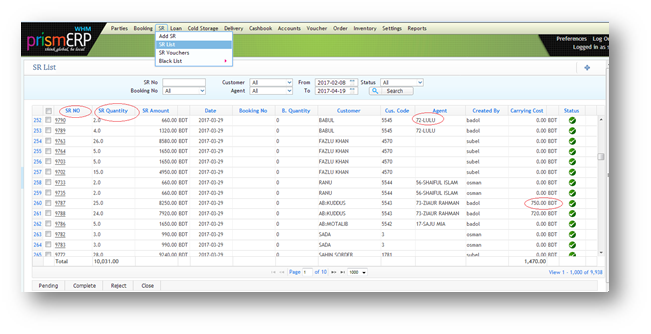
2) SR List Page View
Process:
- Go to --> SR --> SR List
Note:
This is the list of all SRs for all customers. Select the desired SR no. then click on Accept. Here you can see SR number, SR Quantity, Booking no. (from which the SR was created), Agent name & Carrying Cost.
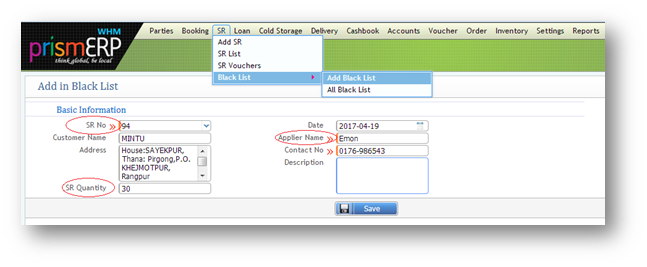
3) Adding a Particular SR to the Black List
Process:
- Go to --> SR --> Black List --> Add Black List
Entry Process:
- Select SR no. then all the SR information will fill up automatically.
- Select date, write Applier name & Contact no. into the applier name field & contact no. field respectively.
- Then click Save.
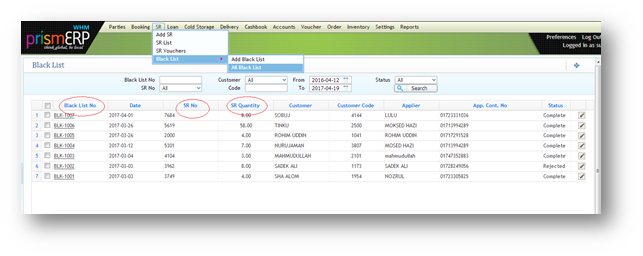
4) List Page View of Black List
Process:
- Go to --> SR --> Black List --> Black List
Note:
This is the black list of all customers. Here you can see SR no, SR quantity, Customer name & Applier name.
Loan Management
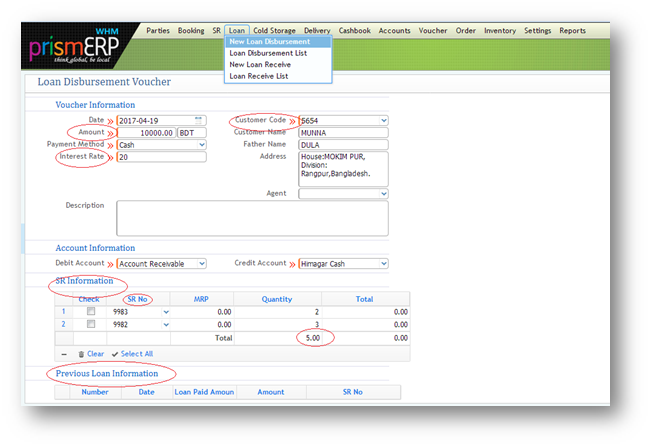
1) Loan Disbursement
Process:
- Go to --> Loan --> New Loan Disbursement
Entry Process:
- Put loan disbursement date.
- Select desired Customer code, then all the information of the customer will be filled up automatically.
- After that, write the loan amount & interest rate into their respective fields.
- Select credit account from which loan will be disbursed.
- In the SR information grid, all SRs of a customer will be filled up automatically after selecting a customer.
- Select desired SR no. & click Clear, all other SR numbers will be hidden except the selected one.
- If you want to select all SRs, click Select All.
- If a customer has any previous loan, it will show in the Previous Loan information grid.
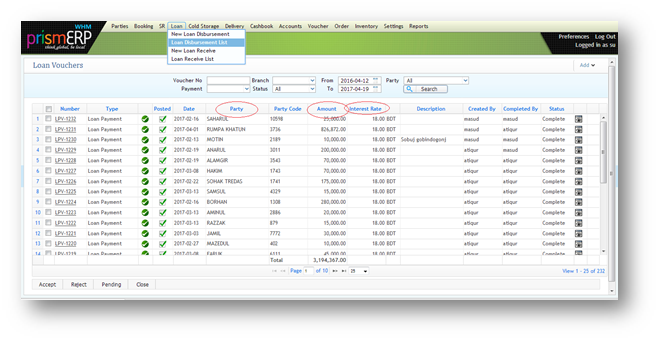
2) Loan Disbursement List
Process:
- Go to --> Loan --> Loan Disbursement List
Note:
This shows all the loan disbursements for all customers. Select desired Loan no., then click Accept. Here you can see customer name, loan amount & interest rate.
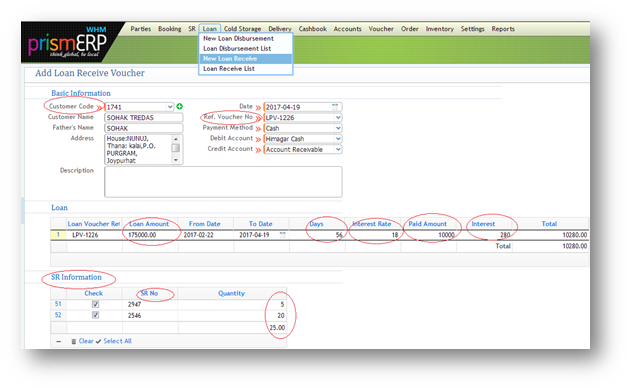
3) Loan Receive
Process:
- Go to --> Loan --> New Loan Receive
Entry Process:
- Select Customer code, then all information of the customer is visible.
- Select the customer’s desired Loan no. (if any customer has multiple loans).
- The SR no. which are taken by the company against the loan will be filled up in the loan information grid & SR information grid respectively.
- You can receive the full amount or partially by selecting desired SR no..
- Write received loan amount & Save. Total days and interest amount will be calculated automatically by the system.
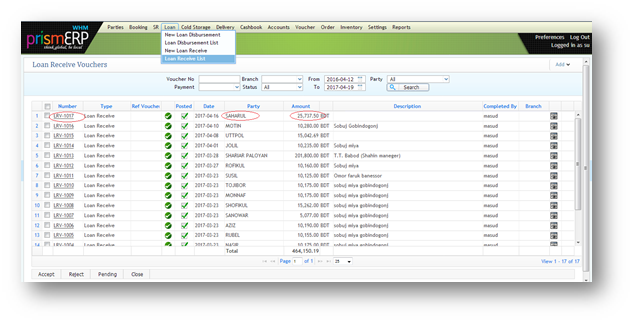
4) Loan Receive List
Process:
- Go to --> Loan --> Loan Receive List
Note:
This shows all the loan receives from all customers. Select desired Loan receive no., then Accept by clicking. Here you can see customer name, loan receive amount.
Sale/Purchase Delivery Management
After purchasing or selling a product and approving the order, it needs to be delivered into the inventory. Delivery can be done with two methods:
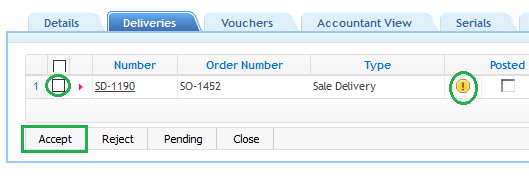
1) Adding Delivery from Specific Sale/Purchase Order Profile
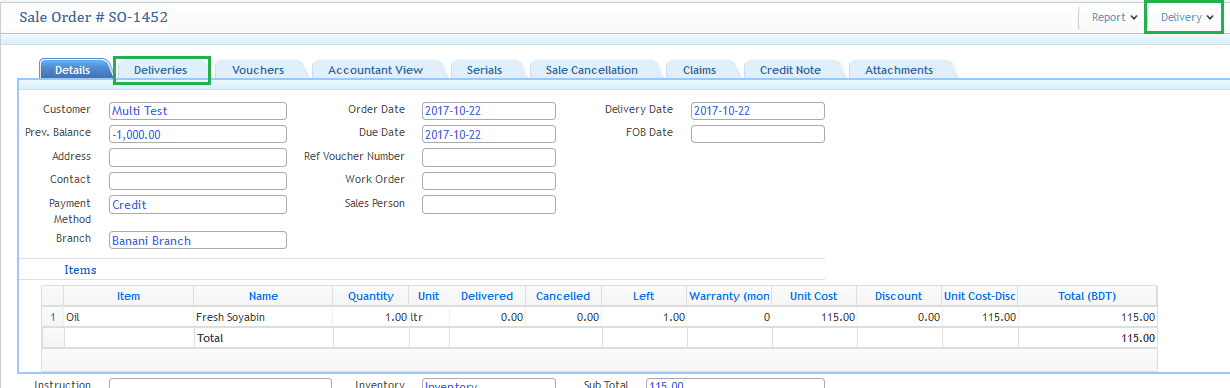
Process:
- After generating the Sale/Purchase Order, visit the specific SO/PO number to add delivery.
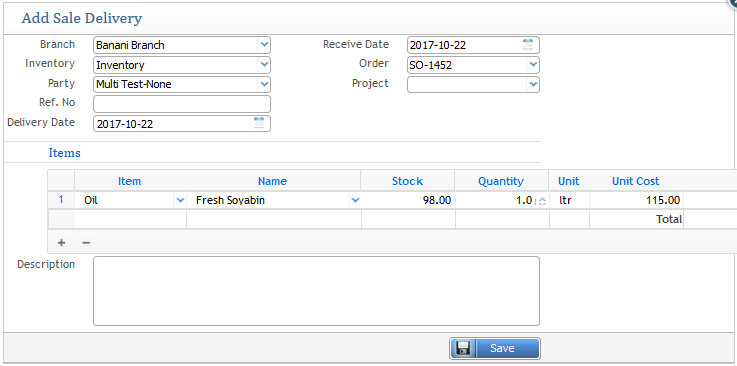
Click on the delivery button at the top right corner, then click on Add Delivery. A window will appear where you can save the delivery. After generating, the delivery will be in a pending state showing a "!" sign.
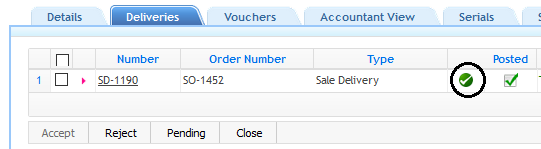
2) After Accepting the Delivery
Select the SD or PD and click on the Accept button. The "!" sign will change to a checkmark, indicating the delivery has been completed.
Customer Service with Empty Bag
1) Empty Bag Disburse
Process:
- Go to --> Order --> New Sale Order
Entry Process:
- Select Customer code from the party selection option, then all information of the customer will be filled up automatically.
- Select order date, inventory from the selection box & other details.
- Provide the product information and put the sales price and quantity.
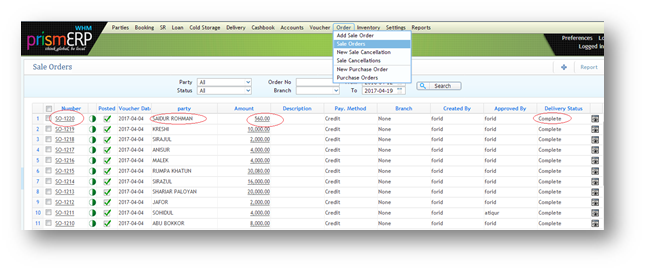
2) Empty Bag Disburse List
Process:
- Go to --> Order --> Sales Order
Note:
Here you can see all the Empty Bag Disburse list. From this list, you can modify the quantity or price and check the delivery status of particular sale orders.