Sale Delivery Return
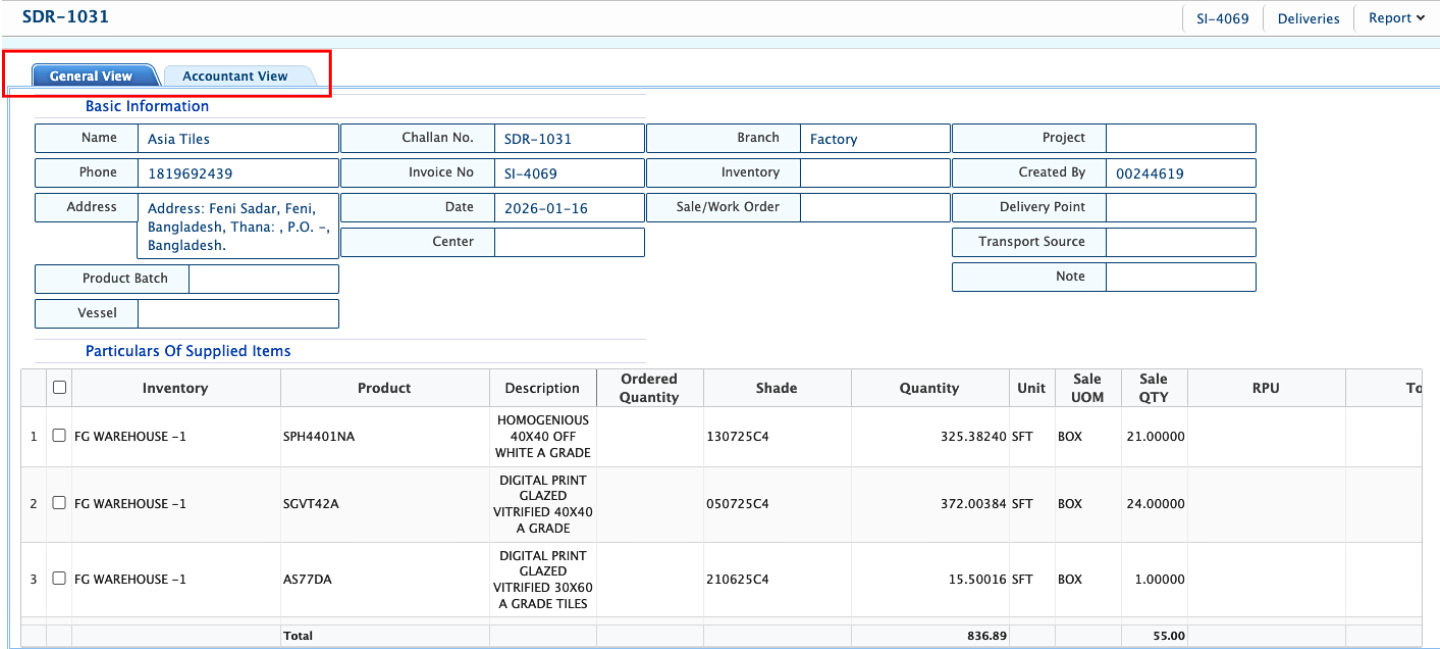
The Sale Delivery Return feature in PrismERP allows users to record and track returned products after a sale. It captures key details like branch, customer, delivery date, sale order, credit account, center, and any notes. Returns can be viewed in the Sale Delivery Return List, filtered using the search panel, and processed through workflows for approval. The Details View provides both product-level and accountant-level information for each return
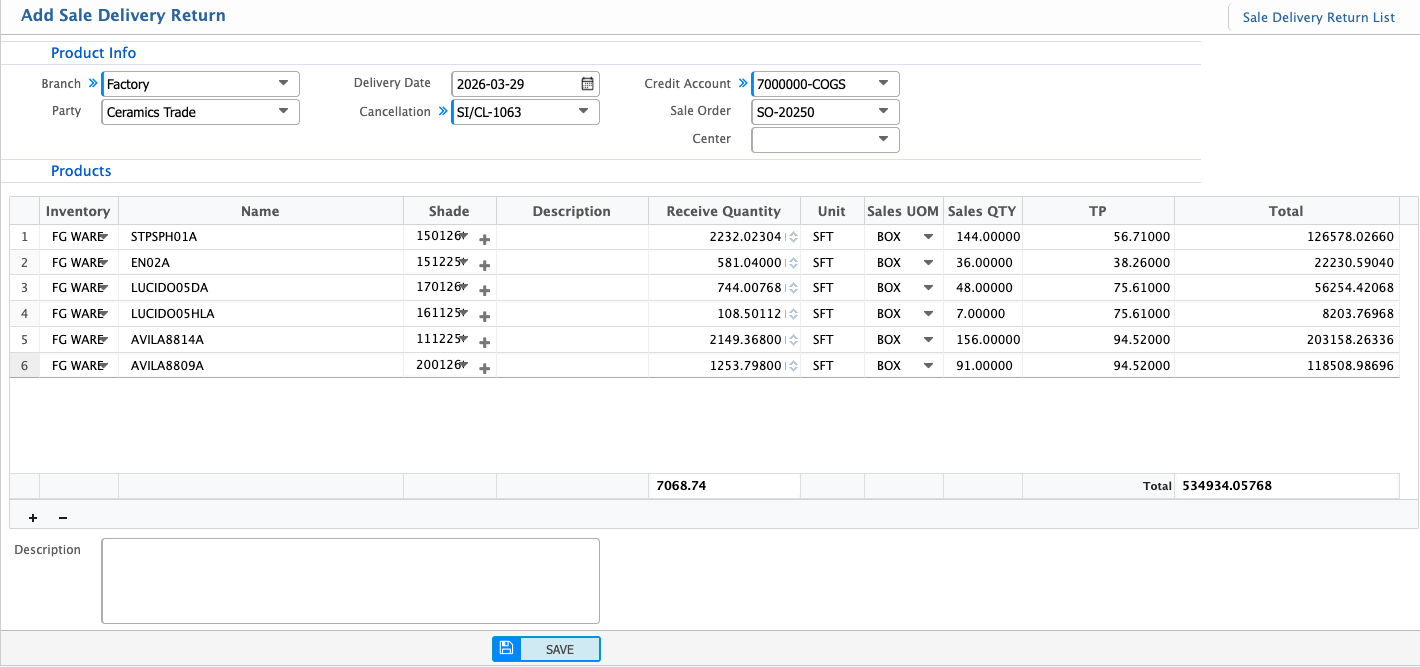
| Field | Action |
|---|---|
| Branch | Select the branch handling the return. |
| Party | Select the customer or party associated with the return. |
| Delivery Date | Enter or select the original delivery date of the items. |
| Cancellation | Mark the return as cancelled if needed. |
| Credit Account | Select the account to credit. |
| Sale Order | Link the return to the original sale order. |
| Center | Select the operational center responsible for handling the return. |
| Description | Enter any additional notes or remarks about the sale delivery return. |
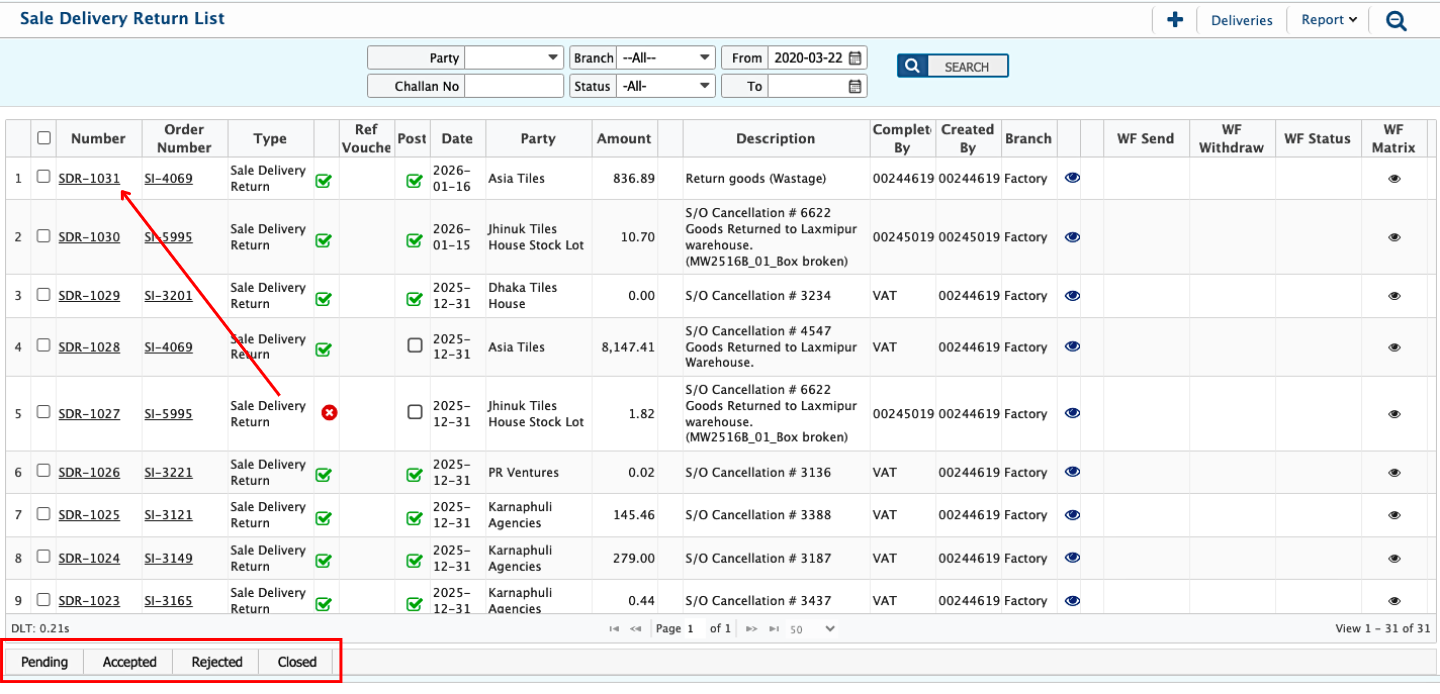
Once a Sale Delivery Return is added, users can see it right away in the Sale Delivery Return List. They can quickly find specific returns using the search panel by filtering through branch, customer, delivery date, or sale order. Each return can go through a workflow for multi-level approval, letting users check the approval status, see the workflow path, or even withdraw it if needed. Users can also update the return’s status from Pending to Accepted, Rejected, or Closed.
By clicking on a return number, the Details View opens, giving two perspectives: Basic Information and Particulars of Supplied Items, where users can check branch, customer, delivery date, products, and notes; and Accountant View, which shows credit and debit amounts along with a COGS breakdown, helping track the financial impact and inventory costs of the return.