🚪 Gatepass
In PrismERP, a Gatepass is used to authorize and document the movement of goods, ensuring that every shipment leaving a warehouse or branch is properly tracked and recorded. For regular deliveries, a gatepass can be created directly from the Sale Delivery Details page, allowing users to formally document the goods being sent to customers or other branches. For shipments that are transported via vessels, gatepasses can also be generated from the Vessel Loading Details page. In this case, users first enter all vessel and shipment information, which is then linked to the gatepass.
| Step | Action |
|---|---|
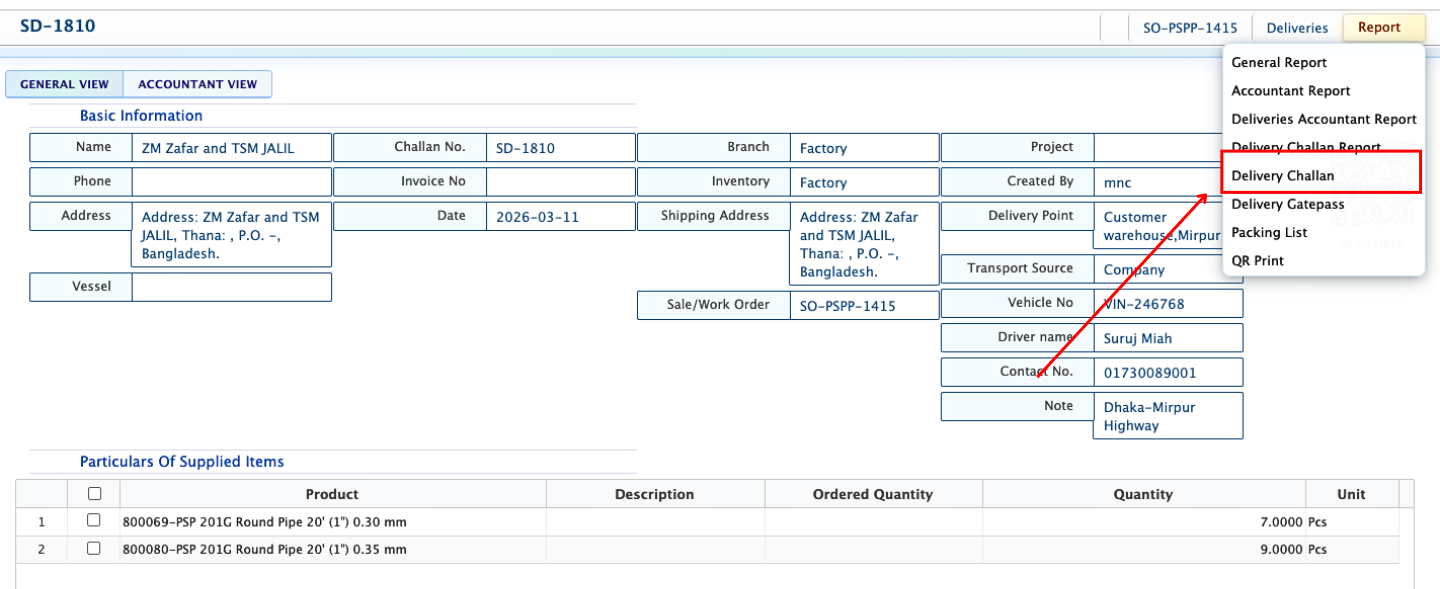
| 1. Open Sale Delivery Details / Vessel Loading Details | Navigate to the completed Sale Delivery or Vessel Loading and open its Details View. |
| 2. Access Gatepass Option | Within the Details View, locate the option to generate the Gatepass. |
| 3. Generate Gatepass | Click on the Gatepass option to create the gatepass for the selected delivery or vessel loading. |
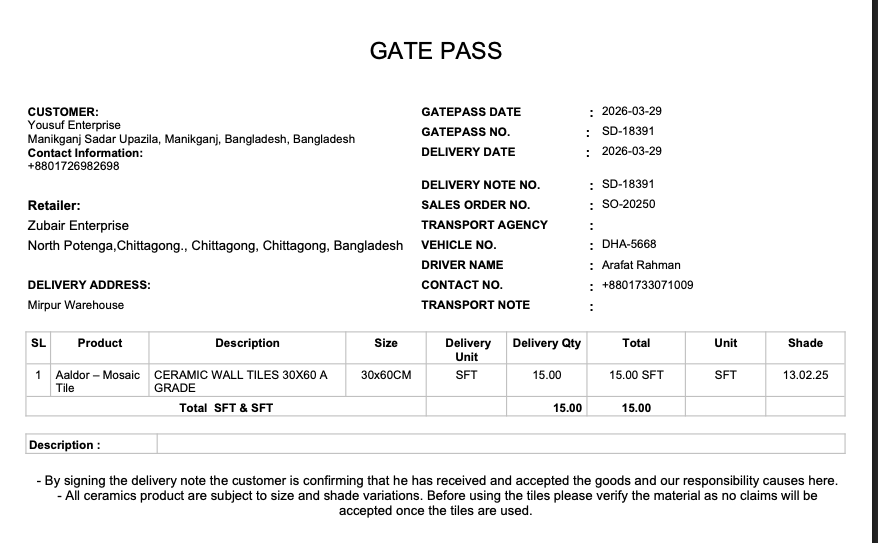
| 4. Review Gatepass Details | Check the generated gatepass to ensure all shipment and delivery information is correct. |
| 5. Edit Gatepass Outline | Modify the layout, header, footer, or page orientation of the gatepass without changing the actual content. |
| 6. Add Signature | Insert the authorized signature for validation and approval. |
| 7. Download Gatepass | Download the gatepass in the preferred format (PDF, DOC, XLS) for printing or sharing. |
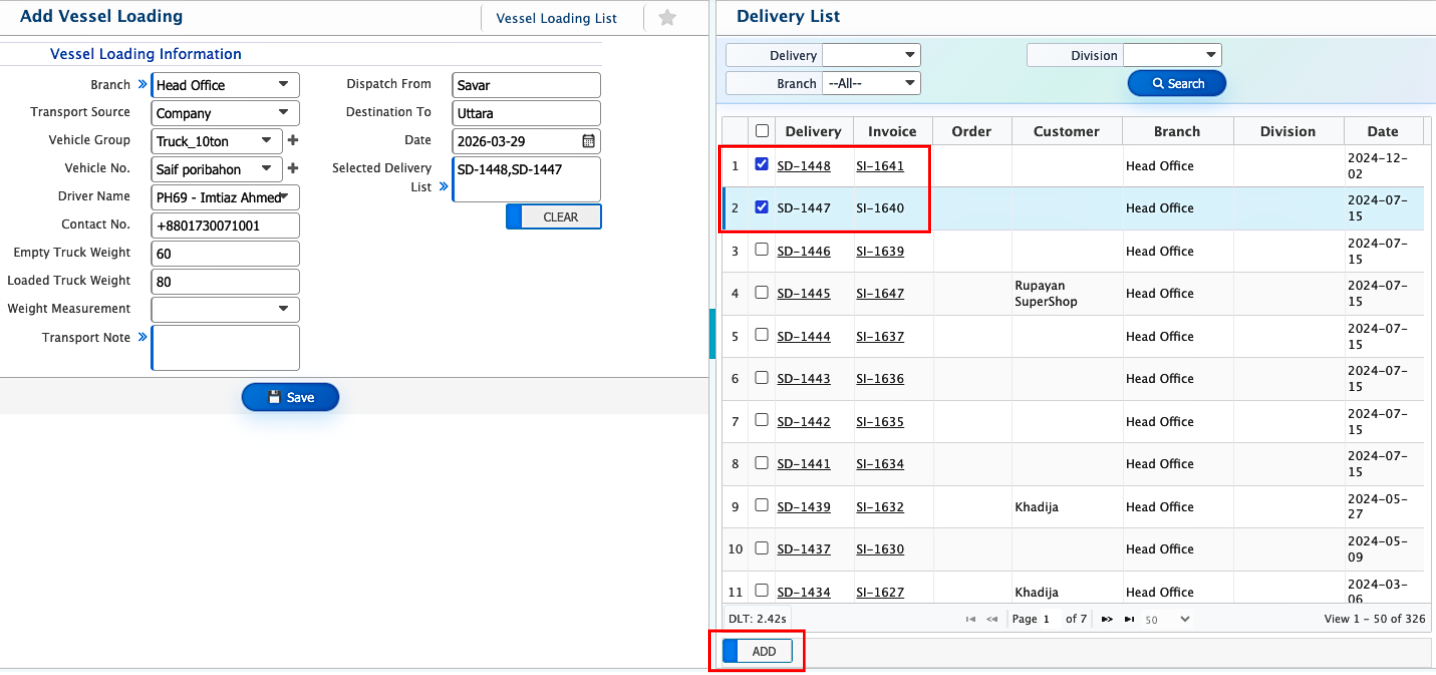
Add Vessel Loading
| Field | Action |
|---|---|
| Branch | Select the branch responsible for this vessel loading. |
| Transport Source | Select the company or transport provider handling the shipment. |
| Company | Enter or select the company associated with the transport. |
| Vehicle Group | Select the vehicle type or group being used for the shipment. |
| Vehicle No. | Enter the vehicle registration number. |
| Driver Name | Enter the name of the driver responsible for the vehicle. |
| Contact No. | Enter the driver’s or transport company’s contact number. |
| Empty Truck Weight | Enter the weight of the truck before loading. |
| Loaded Truck Weight | Enter the weight of the truck after loading. |
| Weight Measurement | Select the unit of measurement for the truck weight (kg, ton, etc.). |
| Transport Note | Add any notes or instructions related to the transport. |
| Dispatch From | Enter the location from where the goods are being dispatched. |
| Destination To | Enter the delivery destination for the goods. |
| Date | Enter the date of the vessel loading. |
| Selected Delivery List | Add the deliveries that are included in this vessel loading. |
Once a Vessel Loading is added, it appears immediately in the Vessel Loading List. Users can view all vessel loadings created for different branches, transport providers, vehicles, and dates in one place. Each entry shows key information such as the branch, transport company, vehicle number, driver name, dispatch and destination points, and loading date, making it easy to track shipments at a glance. The list also allows users to quickly locate specific vessel loadings using filters such as branch or date range. From the list, users can access the Vessel Loading Details View to see more information, including the deliveries included in that loading, truck weights, transport notes, and any other relevant details.
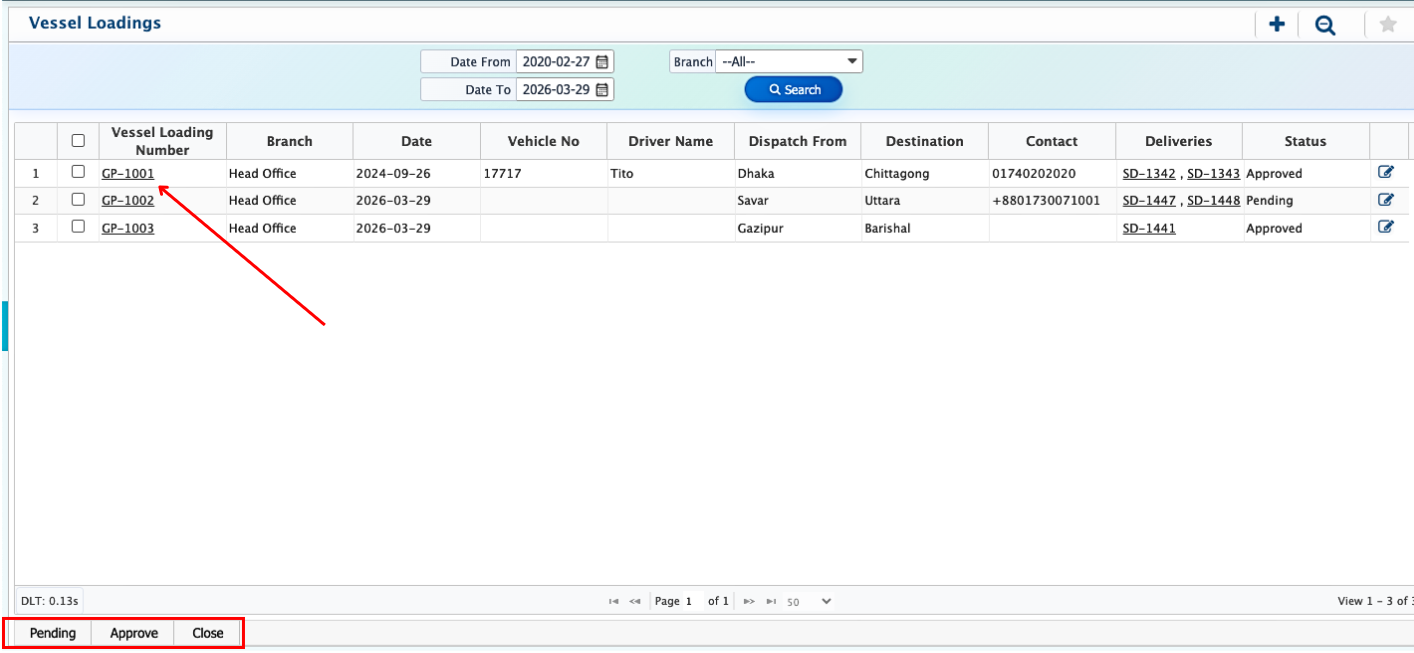
Clicking on a Vessel Loading number opens the Details View, where the shipment can be reviewed and managed. From this page, a Gatepass can be generated, providing official authorization for the goods to leave the warehouse or branch.
