 Bill Claim
The Bill Claim module in PrismERP allows employees to submit and track expense claims related to business activities. The system simplifies the process of submitting claims, getting approval, and making disbursements for reimbursement. Below is an outline of the key features and steps involved:
Key Features
- Bill Claim
- Dynamic Bill Claim Purpose Addition
- Bill Disbursements
Add Bill Claim
To add a Bill Claim in PrismERP, follow these steps:
-
Navigate to the Bill Claim Section:
- Go to the Accounts module in the main menu.
- Under the Accounts section, select Bill Claim.
-
Add a New Bill Claim:
- Once in the Bill Claim section, click on the Add New Bill Claim option.
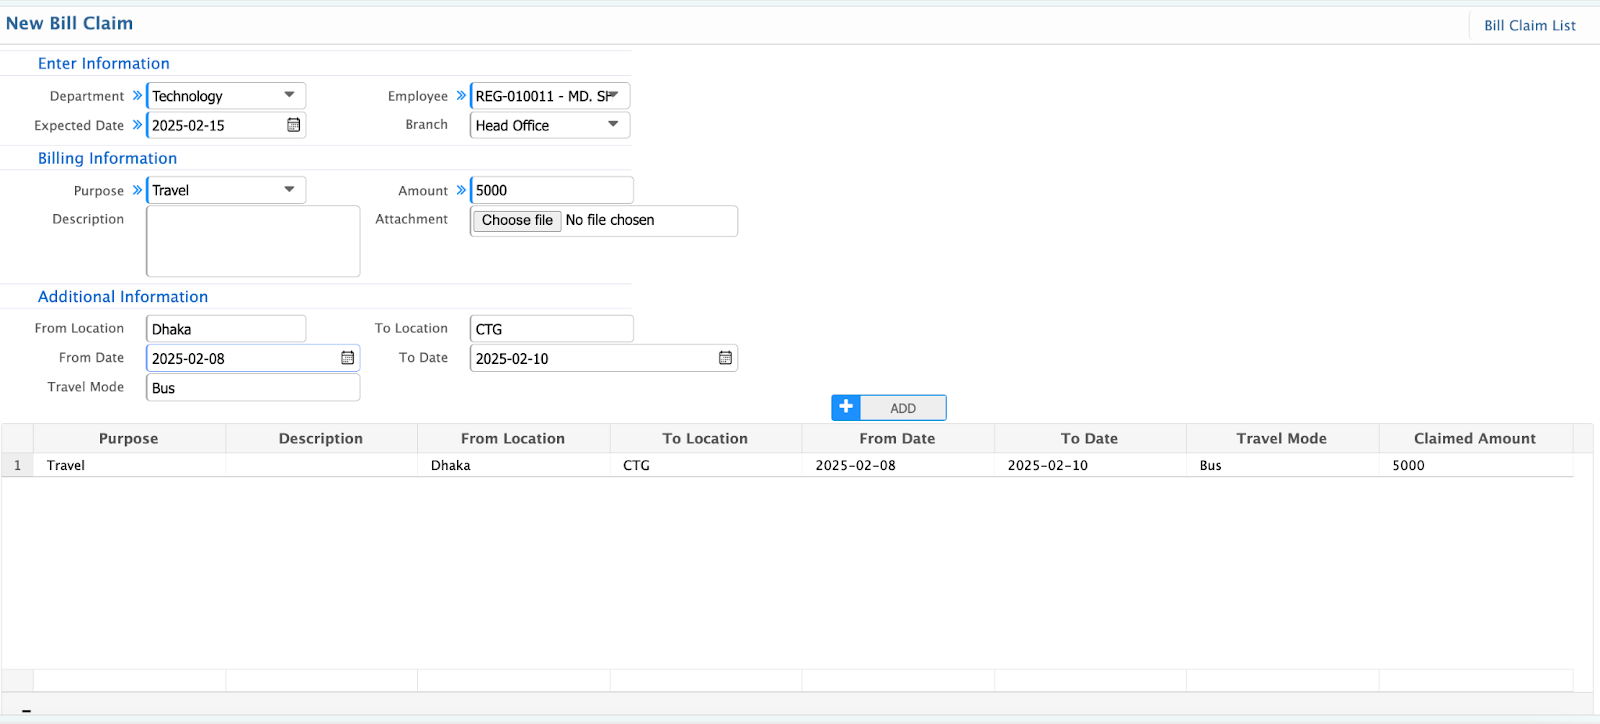
When adding a new Bill Claim, the following fields need to be filled out:
- Department: Select the department of the employee submitting the claim. This helps categorize the claim by department.
- Employee: Choose the employee who is submitting the bill claim. This associates the claim with the respective employee.
- Expected Date: Enter the expected date for when the bill will be processed or the reimbursement is expected.
- Purpose: Provide a description of the claim's purpose (e.g., travel, meals, office supplies, etc.).
- Amount: Enter the total amount being claimed by the employee.
- Attachment: Attach any supporting documents related to the claim, such as receipts, invoices, or proof of expenditure.
- Travel Details (if applicable):
- From Location: The starting location for travel (if the claim is related to travel expenses).
- To Location: The destination location for travel.
- From Date: The start date of the trip.
- To Date: The end date of the trip.
- Travel Mode: Select the mode of transportation (e.g., bus, air, train, etc.).
Claim List
The list page shows all the bill claim lists that are being created in the application.
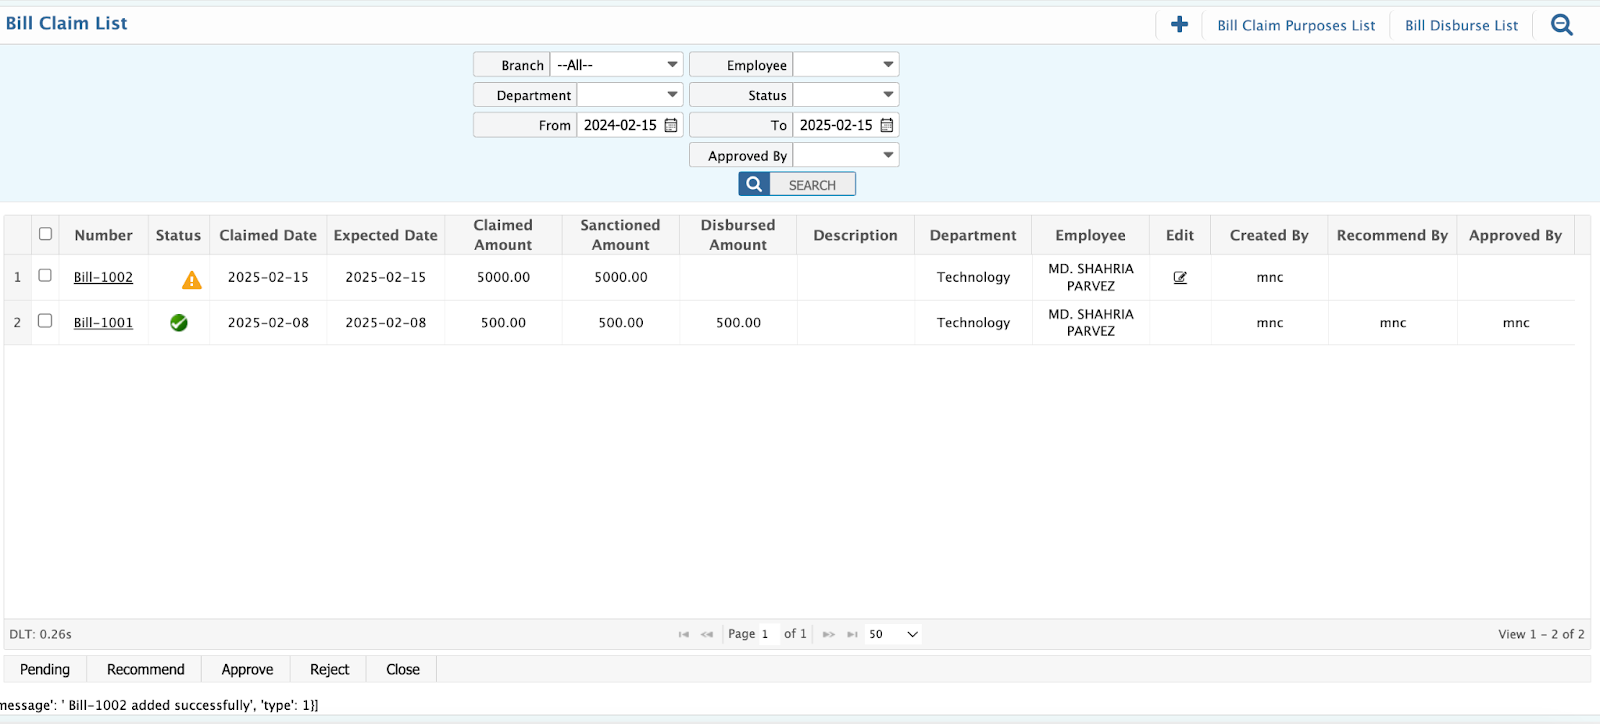
The Bill Claim List Page provides a user-friendly interface for managing all claim lists. Key features include:
- Edit and Modify: Easily make changes to a specific bill claim by clicking the icon located at the right corner of each bill claim.
- Add New Bill Claims: Conveniently create new bill claims directly from the list page.
- Search Fields: Branch, Employee, Department, From Date, To Date. From the list page, you can manage the bill status.
Bill Claim Details
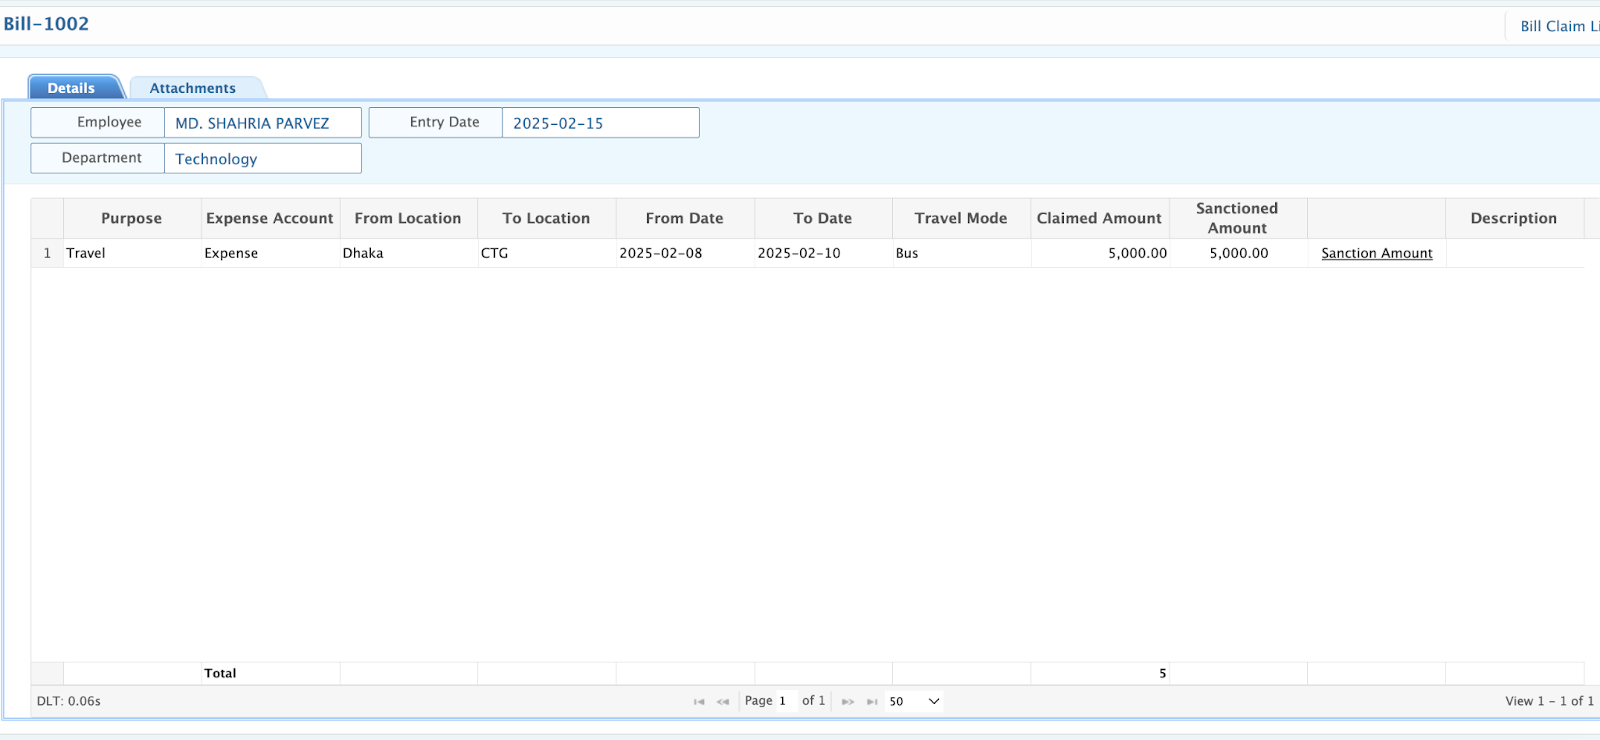
On the Bill Claim Details Page, you can view and manage the details of the submitted bill claim. Here's what is available:
- Purpose: View the purpose of the claim (e.g., travel, meals, office supplies, etc.).
- Expense Amount: Displayed is the total claimed amount that the employee is requesting reimbursement for.
- Travel Details (if applicable):
- From Location: The origin of the travel (if travel-related).
- To Location: The destination of the travel.
- Travel Mode: The method of transportation used (e.g., bus, air, train, etc.).
- Claimed Amount: The amount that the employee has claimed for reimbursement.
- Sanctioned Amount: The amount that has been sanctioned or approved for reimbursement.
- If needed, the sanctioned amount can be edited by clicking on the sanctioned amount link. This allows an authorized user to adjust the amount to be reimbursed.
- Employee & Department: View the employee name who made the claim and the department they belong to, ensuring clarity on who made the request and from which department the claim originated.
Add Bill Claim Purpose
To add a Bill Claim Purpose, follow these steps:
-
Navigate to Bill Claim Purpose:
- Add Bill Claim Purpose.
-
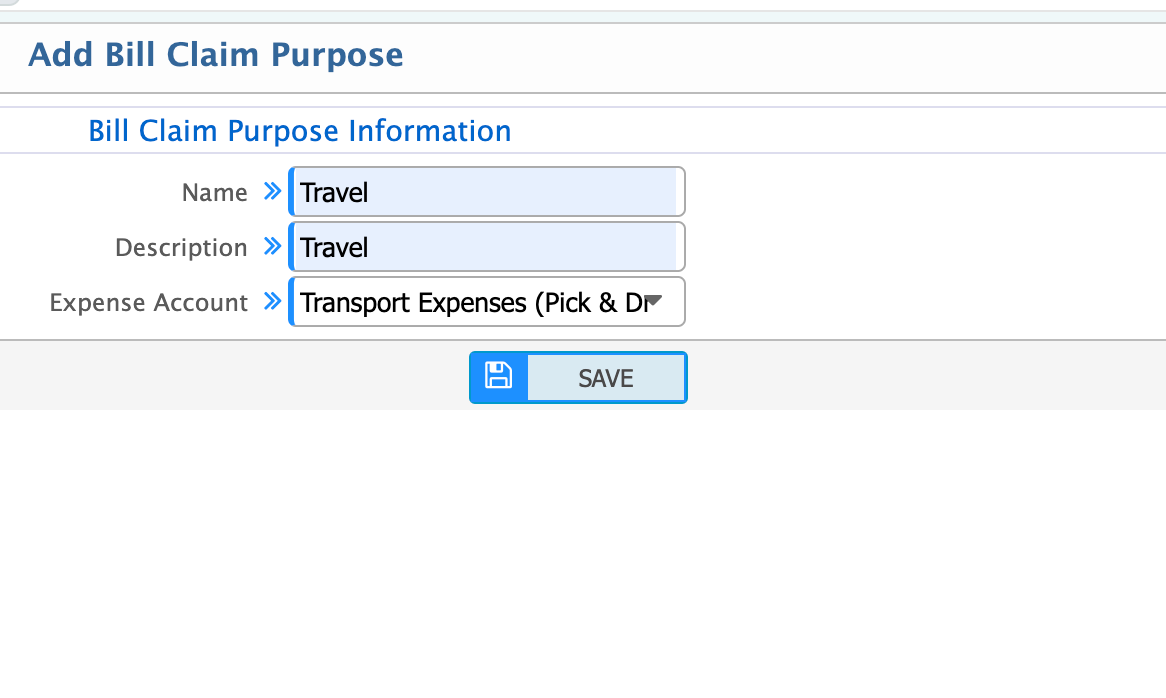
Fill in the Required Fields:
- Name: Enter a name for the claim purpose (e.g., "Travel Expenses," "Office Supplies," "Client Entertainment").
- Description: Provide a detailed description of the claim purpose (e.g., "Expenses related to employee travel for business meetings").
- Expense Account: Select the expense ledger associated with this claim purpose. This helps categorize the claim appropriately in the accounts and ensures accurate tracking.
-
Save the Claim Purpose:
- After entering the information, save the claim purpose to use it in future bill claims.
Bill Claim Purpose List
The Bill Claim Purpose List Page provides a user-friendly interface for managing all claim lists. Key features include:
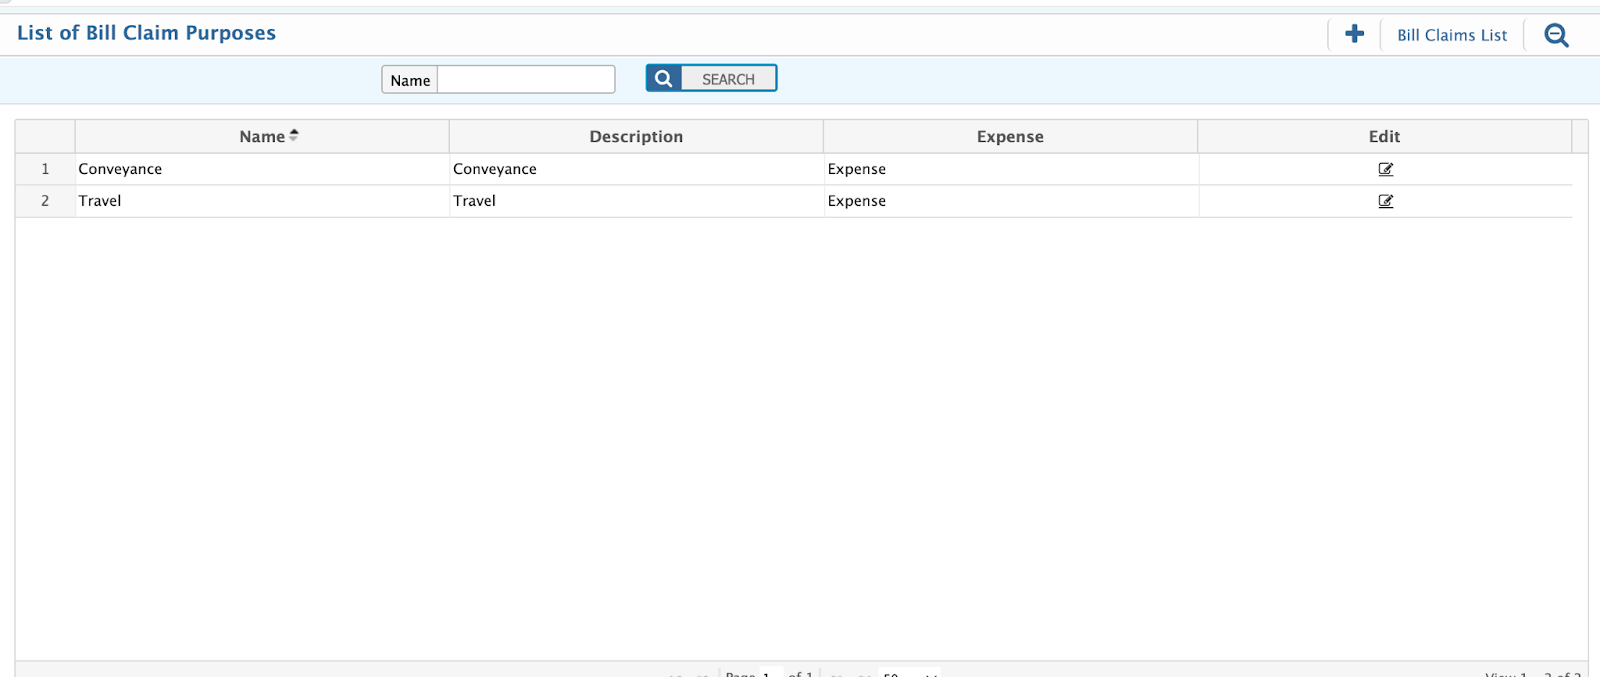
- Search Fields: Name of the purpose.
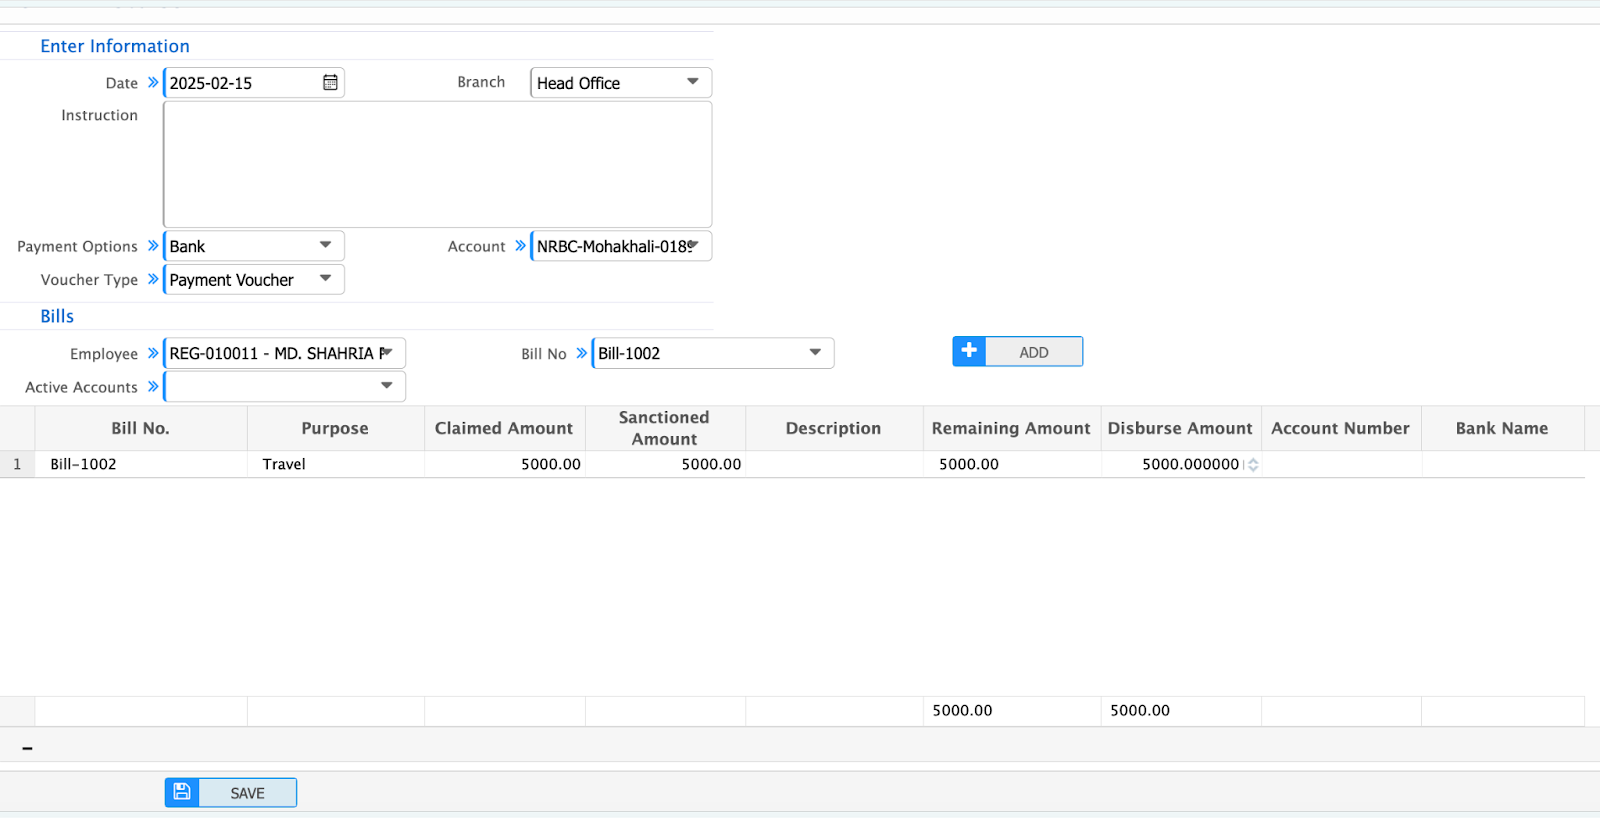
Add Bill Disburse
To add a Bill Disbursement, follow these steps:
-
Navigate to Bill Disbursement:
- Add New Bill Disburse.
-
Fill in the Required Fields:
- Date: Enter the entry date for the bill disbursement.
- Branch: Select the branch where the disbursement will be made.
- Payment Options: Choose the payment mode for the disbursement (e.g., Cash, IOU, or Bank).
- Account: Select the account from which the disbursement will be made (either cash account or bank account).
- Voucher Type:
- Choose the type of voucher for the disbursement:
- Payment Voucher: For regular payments.
- Adjustment Voucher: For adjustments to the bill claim.
- Choose the type of voucher for the disbursement:
- Bill No: Select the Bill No for which the disbursement is being made. This links the disbursement to the corresponding bill claim.
- Employee: Choose the employee who is receiving the disbursement or whose claim is being processed.
-
Save and Complete the Disbursement:
- Once all fields are filled, save the disbursement entry. The payment will be processed accordingly.
Bill Disburse List
The list page shows all the bill disburse lists that are being created in the application.
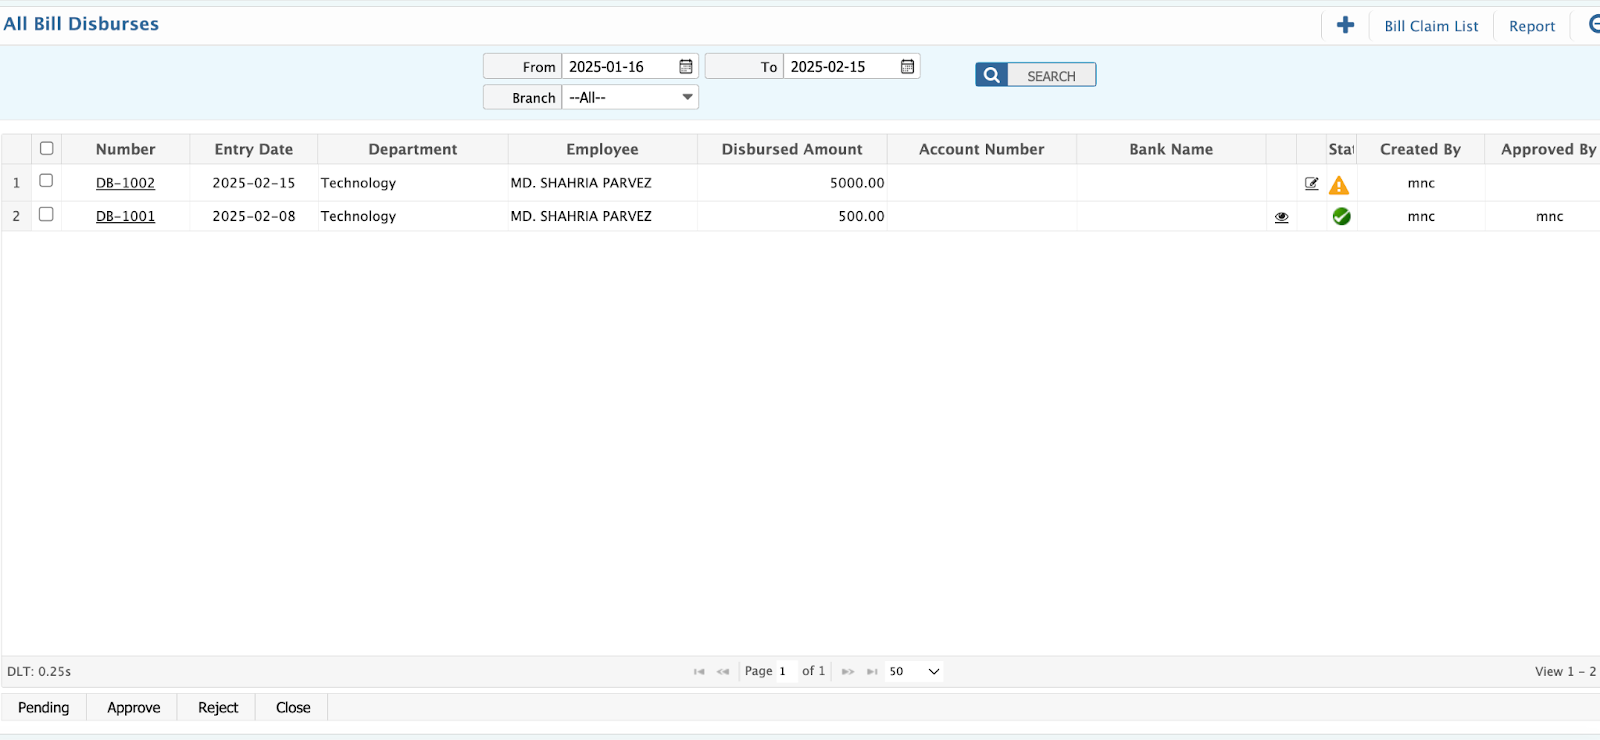
The Bill Claim Purpose List Page in PrismERP offers a user-friendly interface to manage all bill claim purposes. Key features include:
-
Search Fields:
- Branch: Search for claim purposes associated with specific branches.
- From Date and To Date: Filter claim purposes by date range to narrow down the results.
-
Edit Bill Claims: Users can edit or update the claim purpose details directly from the list page if any changes are required.
-
Bill Disburse Status: Manage the disbursement status of the claims, including:
- Pending: Bill is yet to be processed.
- Approved: Bill has been approved for payment.
- Rejected: Bill has been rejected and will not be processed.
- Closed: The claim process has been completed or canceled.
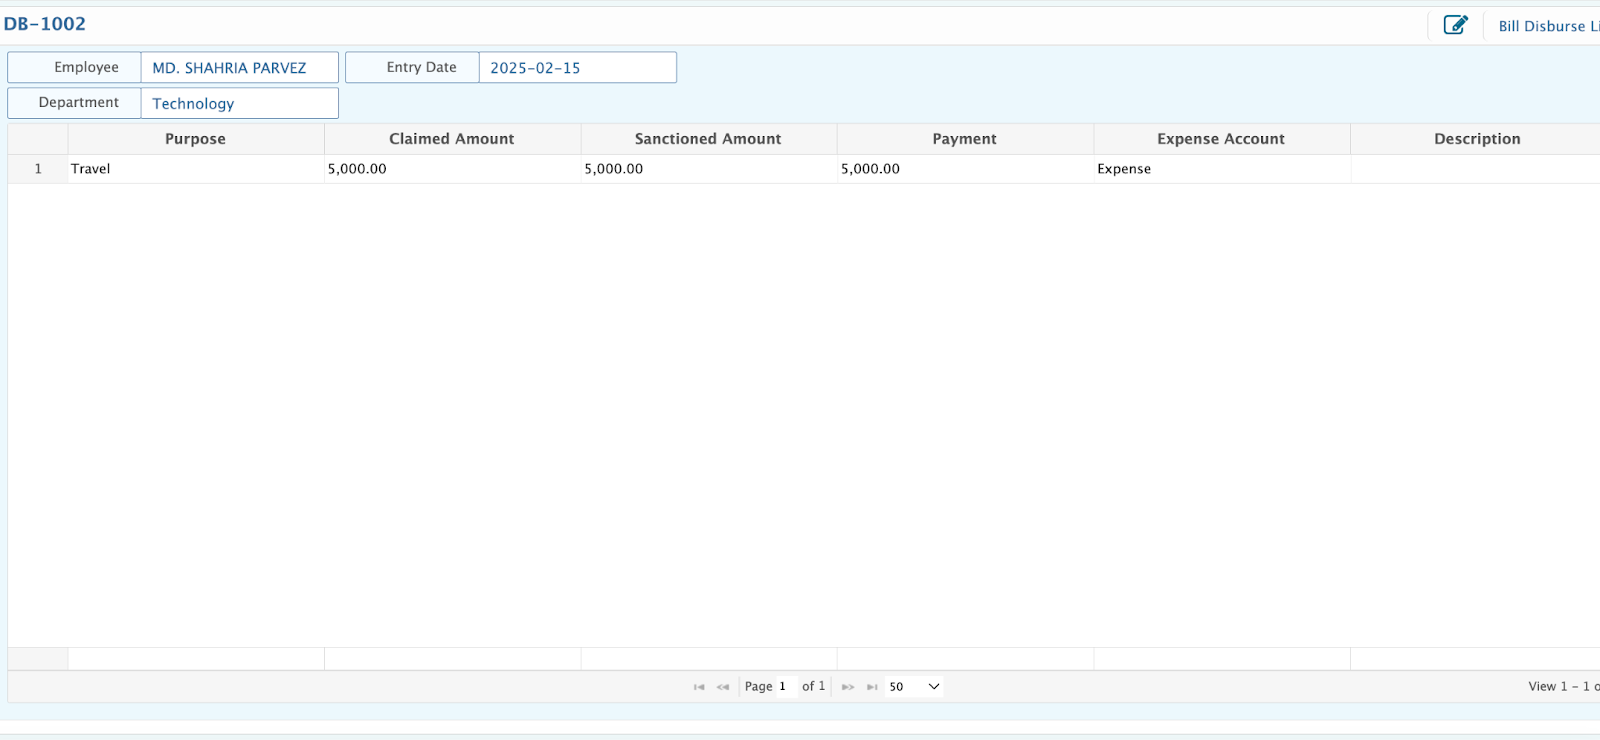
Bill Disburse Details
On the Bill Disburse Detail Page, you can view and manage detailed information related to each bill disbursement. Key fields include:
- Purpose: Displays the purpose of the bill claim (e.g., travel, office supplies, etc.).
- Claimed Amount: Shows the total claimed amount that the employee requested for reimbursement.
- Sanctioned Amount: Displays the sanctioned amount that has been approved for disbursement.
- Payment Amount: The amount paid to the employee as part of the disbursement.
- Expense Ledger: Shows the expense ledger associated with the bill claim, helping to categorize the claim correctly in the accounts.
- Entry Date: The entry date of the bill disbursement, indicating when the disbursement was processed.
- Employee: Displays the employee name who submitted the bill claim.
- Employee Department: Shows the department to which the employee belongs, helping to associate the claim with the correct department.
PrismERP's Bill Claim module provides a comprehensive and organized way to manage business-related expenses, including submitting claims, tracking approvals, and processing disbursements. The system offers intuitive features for managing claims, claim purposes, and disbursements, ensuring smooth financial operations and transparency.