Payment Schedule & EMI Management
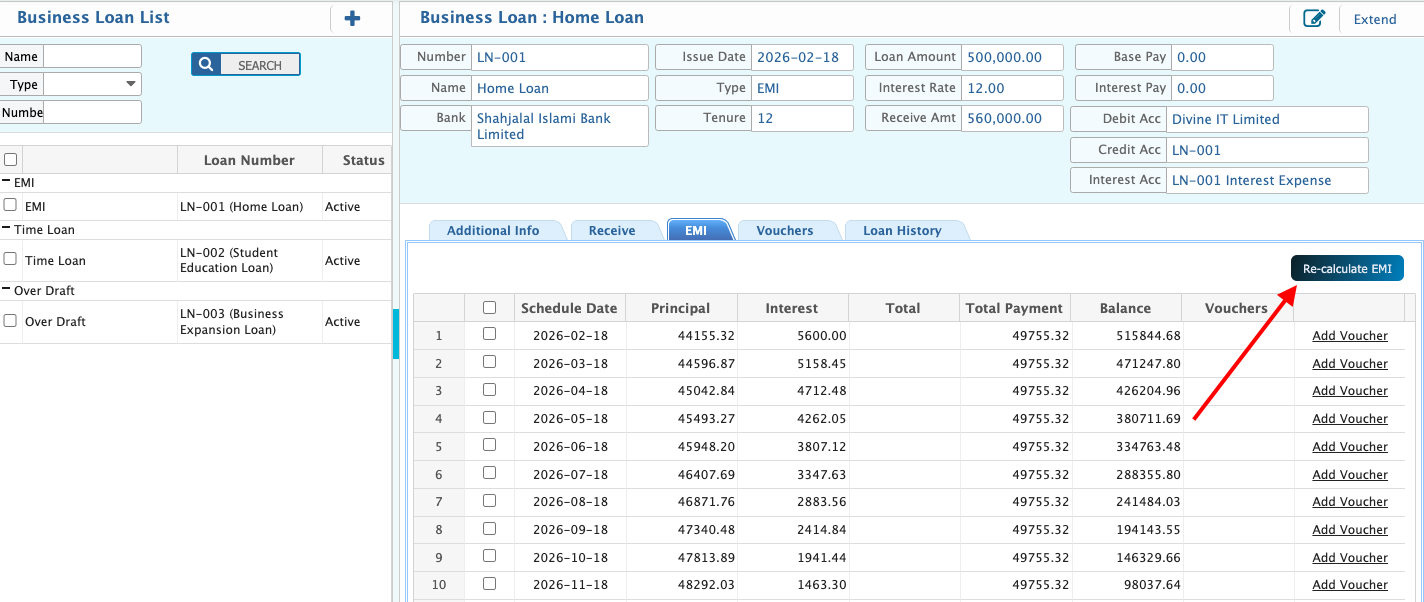
After creating a business loan, the repayment plan can be viewed and managed from the EMI section in the loan details page. This section shows how the loan will be paid back over time. Each installment clearly shows the due date, principal amount, interest amount, total EMI, and the remaining balance after payment.
The EMI schedule is generated based on the loan amount, interest type, interest rate, repayment frequency, and tenure selected during loan creation. If any of these details change, the schedule can be recalculated to reflect the updated information.
Payments can be recorded directly from the EMI schedule. Once a payment is saved, the system automatically updates the installment status and adjusts the outstanding balance.
Calculate EMI
| Field | Action |
|---|---|
| EMI Tab | Navigate to the EMI tab in the Loan Details page to view all scheduled EMIs for the selected loan. |
| Recalculate EMI | Click the Recalculate EMI button to generate or update the EMI schedule based on the current loan balance, interest rate, and tenure. |
| EMI Schedule Table | After recalculation, a table is displayed showing each EMI installment with details like installment number, due date, principal amount, interest, total EMI, and remaining balance. |
| Add Voucher (per schedule) | Beside each EMI in the schedule, there is an Add Voucher button. Click it to create a receipt voucher for the specific EMI installment. The voucher will automatically populate relevant loan and amount details for posting to the ledger. |
| Voucher Fields | On clicking Add Voucher, fields like Date, Amount, Payment Method, Party, Branch, Description, Debit Account, Credit Account are available for entry before saving the payment. |
| Post EMI Payment | After filling the voucher details, save the voucher to post the EMI payment. The EMI schedule will update the paid amount and remaining balance automatically. |