Vacancy Management
Vacancy Management in PrismERP handles the creation and tracking of job openings across different departments and locations. It is used to define key job details such as designation, structure, location, job type, priority, and required quantity before a position goes live. Once created, each vacancy moves through a controlled process where it can be listed, reviewed, posted through different channels, and updated as needed based on recruitment progress.
Add New Vacancy
| Field | Action |
|---|---|
| Job Template | Select the job template to use for creating the vacancy. |
| Designation | Enter or select the designation for the vacancy. |
| Structural Designation | Select the structural designation, if applicable. |
| Division | Select the division under which the vacancy is being created. |
| Department | Select the department for the vacancy. |
| Section | Select the section under the department. |
| Sub Section | Select the sub-section, if applicable. |
| Floor | Select the floor where the vacancy will be located. |
| Branch | Select the branch for the vacancy. |
| Outline | Select the assessment outline linked to the vacancy. |
| Pay Grade | Select the pay grade or pay scale associated with the vacancy. |
| Job Type | Select the type of job, e.g., Regular, Contractual, Full Time, Part Time. |
| Priority | Select the priority level for filling the vacancy, e.g., Highest, Medium, Low. |
| Quantity | Enter the number of positions to be filled for this vacancy. |
| Location | Enter the location of the vacancy. |
| Start Date | Select the date when the vacancy will start or be posted. |
| End Date | Select the date when the vacancy will end or close. |

After creating a vacancy, it appears in the Vacancy List where all vacancy records are shown with details like branch, division, department, section, sub-section, floor, quantity, vacancy number, designation, and status. Users can filter the list using these fields, and selecting “--All--” in the branch shows vacancies from all branches together. It also becomes easier to find a specific vacancy by searching through vacancy number or designation. From the same list, users can post a vacancy, update or approve vacancy details when needed, and change the status depending on the current stage of the recruitment process.
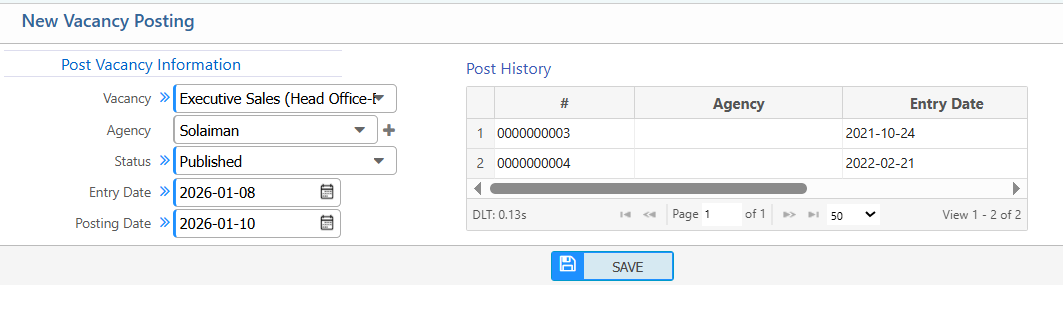
Add Vacancy Posting
| Field | Action |
|---|---|
| Vacancy | Select the vacancy to be posted from the list of available vacancies. |
| Agency | Select the recruitment agency or platform through which the vacancy will be posted. |
| Status | Select the current status of the vacancy posting, e.g., Pending, Posted, or Closed. |
| Entry Date | Select the date on which the vacancy posting information was entered. |
| Posting Date | Select the date on which the vacancy will be posted publicly. |
After adding a vacancy posting, it appears in the Vacancy Posting List where all posting records are displayed with details such as vacancy name or designation, agency, status, entry date, and posting date. Users can filter the list using these fields, including selecting different status types like Pending, InPublication, Published, Approved, or Closed to track the posting progress. It is also possible to narrow down results by specific dates to quickly find relevant records. From the same list, users can edit posting details when required, add candidates directly to a vacancy, and copy the vacancy link for sharing or internal reference.
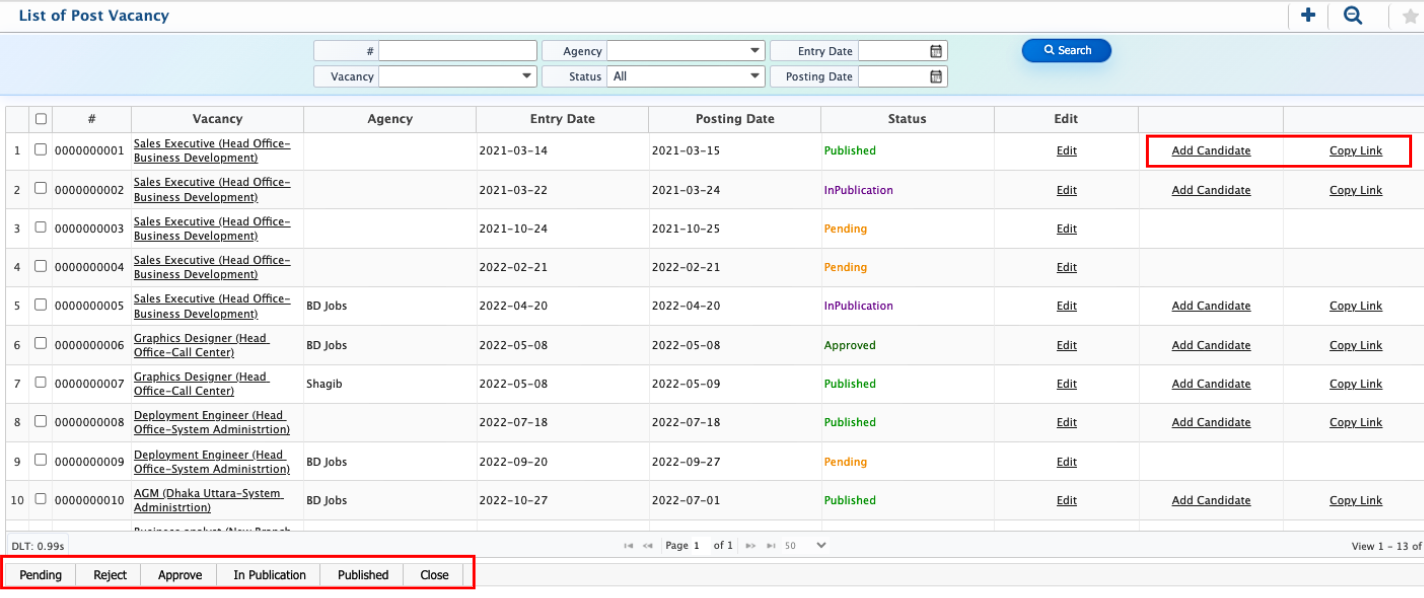
From the Vacancy Posting List, users can add candidates directly to a selected vacancy. While adding a candidate, they can enter complete personal information along with family details, educational background, training records, and work experience. After filling in all required information, the user can review the details and confirm the entry to successfully save the candidate in the system under the selected vacancy.