Payroll Processing
The payroll process in PrismERP works through a structured five-step workflow that guides users from schedule activation to final payment. Each step is dependent on the previous one, ensuring the payroll cycle is completed in a controlled and sequential manner.
The process begins with posting the payroll schedule, where the active schedule is prepared for processing. This is followed by attendance calculation, where employee attendance data is collected and finalized for the selected period. The third step is salary calculation, where employee salaries are generated based on attendance and configured rules. Next, the system performs journal posting, creating the accounting entry for the total salary amount. The final step is payment processing, where salary payments are prepared, approved, and finalized through voucher generation and posting.
Post Payroll Schedule
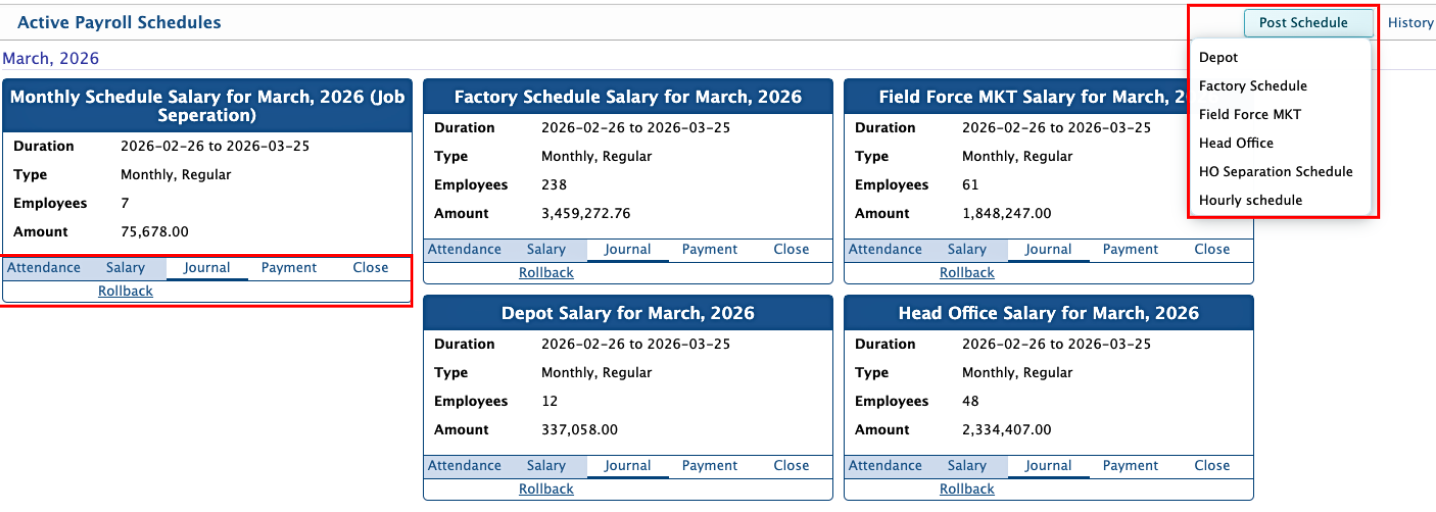
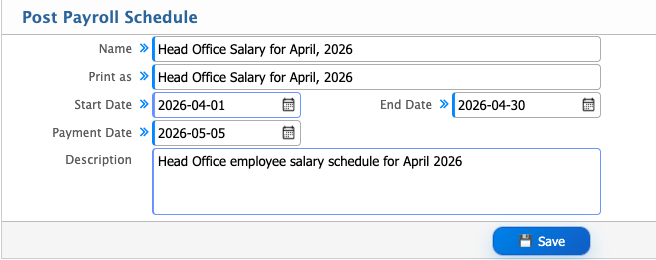
For salary generation, users need to post the active payroll schedule from the menu. After selecting the relevant schedule, they proceed with the posting action, which activates the payroll process for that period. After this, users need to enter the schedule name, date, and description to complete the posting setup.
| Field | Action |
|---|---|
| Name | Enter the name of the payroll schedule to be posted. |
| Print as | Enter the label that will appear in reports and payroll documents. |
| Start Date | Select the starting date of the payroll period. |
| End Date | Select the ending date of the payroll period. |
| Payment Date | Select the date when salary will be paid. |
| Description | Enter additional notes or details about the payroll posting. |
Attendance Calculation
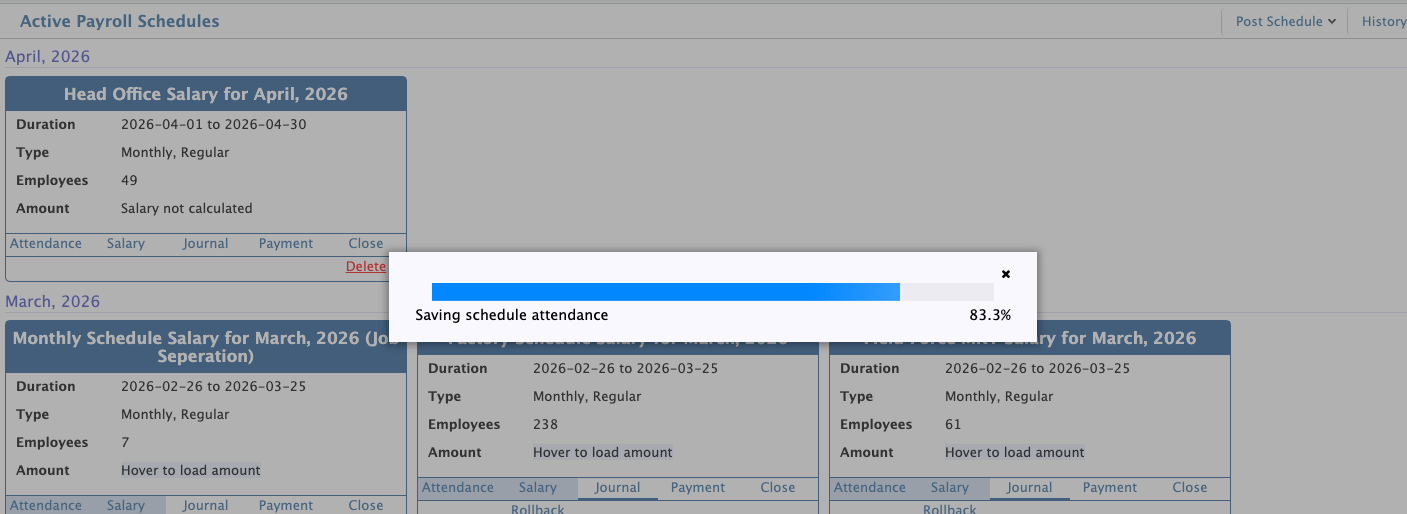
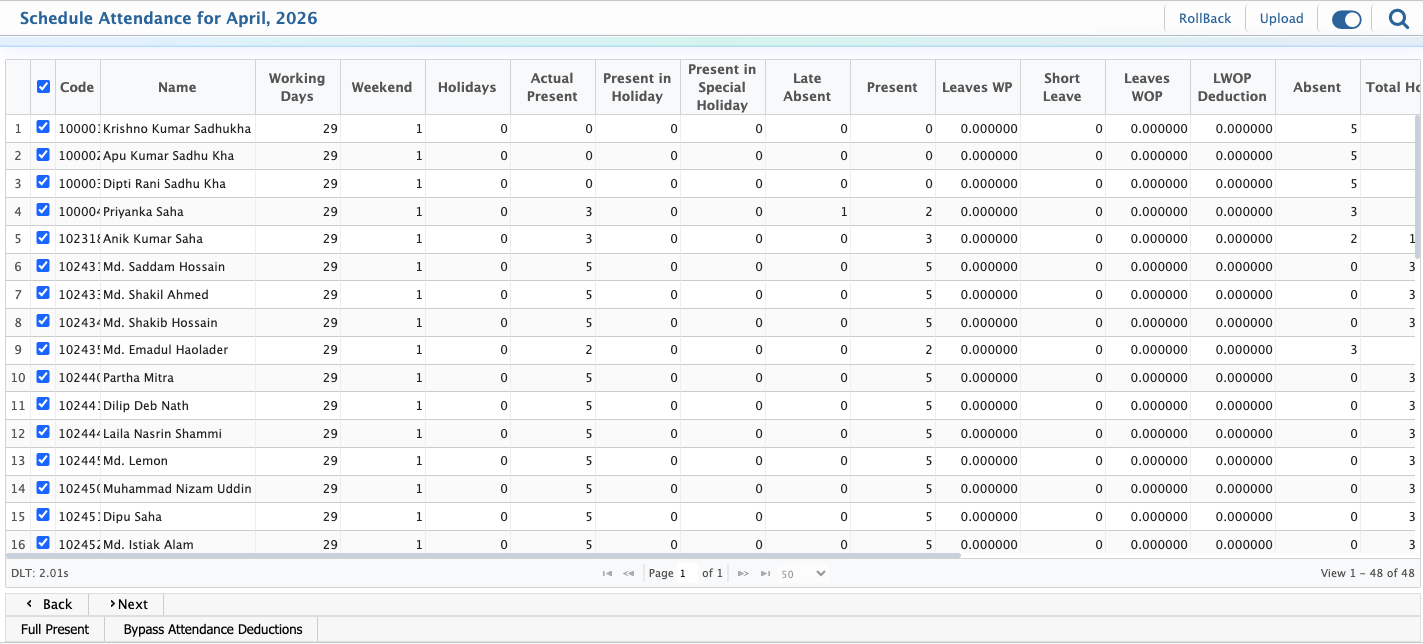
After posting the schedule, users need to calculate the attendance of the employees under that schedule. For this, users click on the Attendance option from the posted schedule, and the system loads attendance data from the attendance records.
If there is no attendance device data available, users can also manually update or adjust the device data before proceeding. Once the attendance information is loaded, users select the employees they want to include and click Next.
At this stage, users can also mark any employee as fully present and bypass absence deductions if required.
Salary Calculation
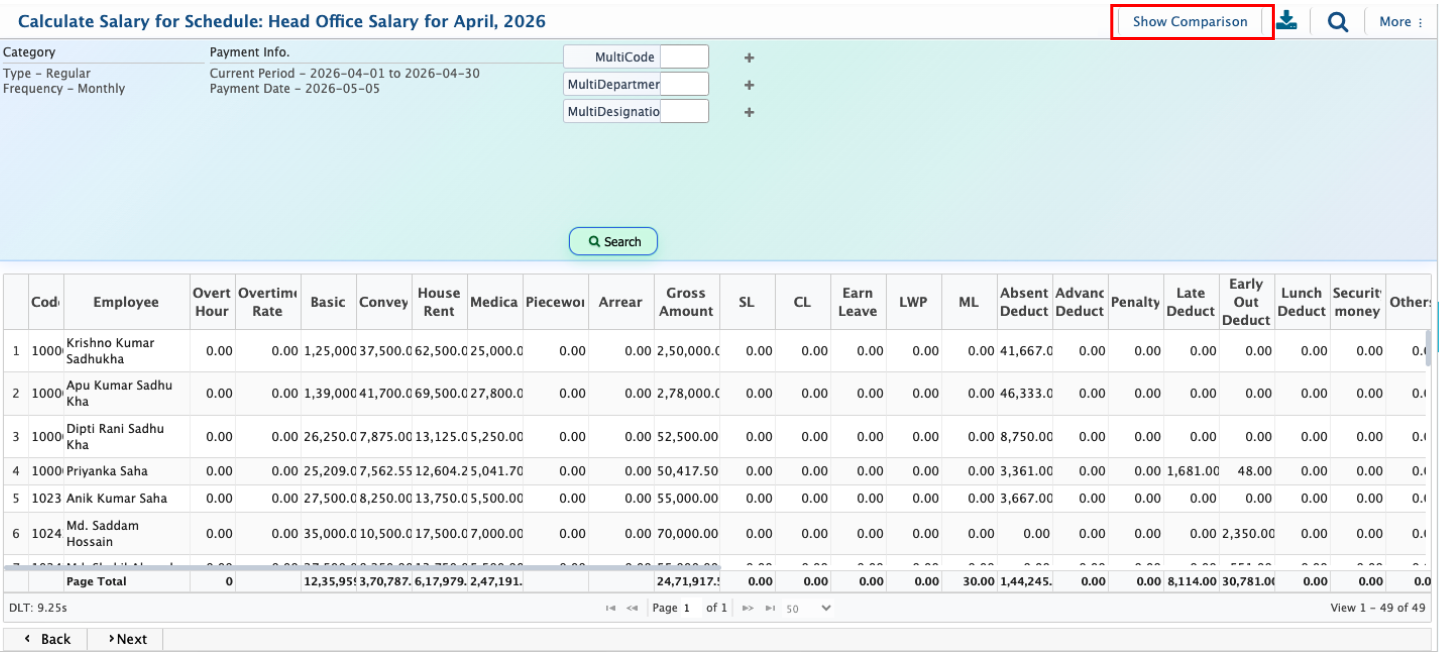
After attendance calculation, the system automatically generates the salary of employees based on their working days. It also considers any additions such as overtime and deductions such as absent deductions while preparing the salary.
Users can review the generated salary list, make edits if required, or remove any employee from the calculation. In addition, users can compare the current salary schedule with the previous month’s salary schedule to review differences between periods.
Journal Posting
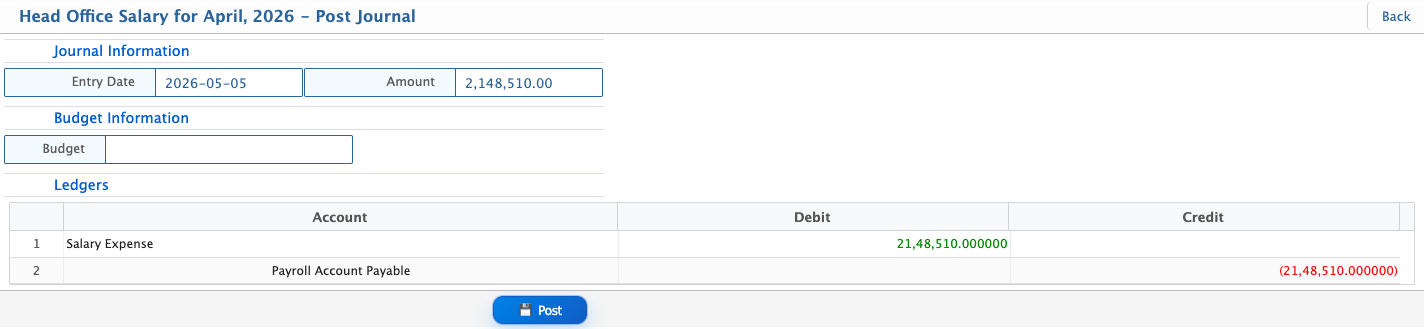
After salary calculation, the system generates a journal entry with the total salary amount for the payroll period. This journal reflects the overall salary expense that has been processed for the employees under the selected schedule. Users need to post the journal to complete the payroll accounting process.
Payment Processing
Users can proceed to the final stage of the payroll process by opening the relevant payroll schedule and selecting the Payment option. This is the last step in the payroll workflow, where the salary payment process is initiated for the selected period.
| Field | Action |
|---|---|
| Payment Information Date | Select the date of the salary payment entry. |
| Description | Enter a short note or reference for the payment. |
| Debit Account | Select the account from which the salary amount will be paid. |
| Credit Account | Select the account that will receive the salary entry. |
| Payroll Schedule | Select the payroll schedule for which the payment is being processed. |
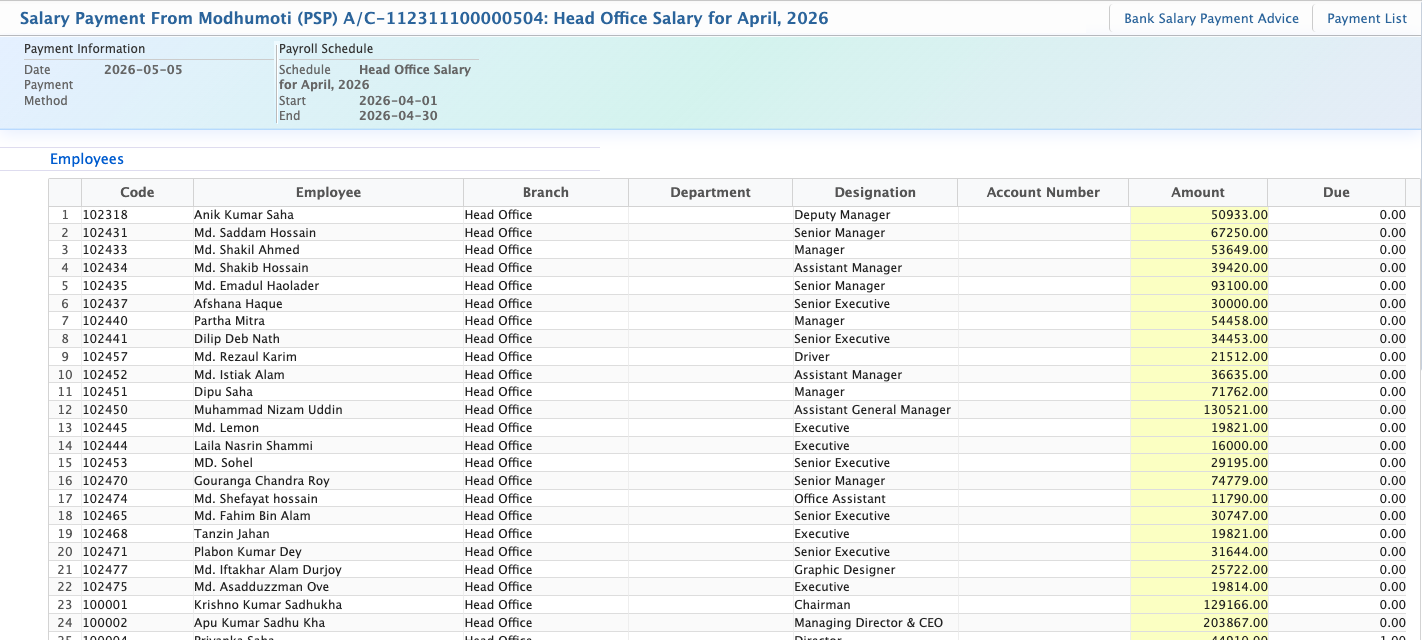
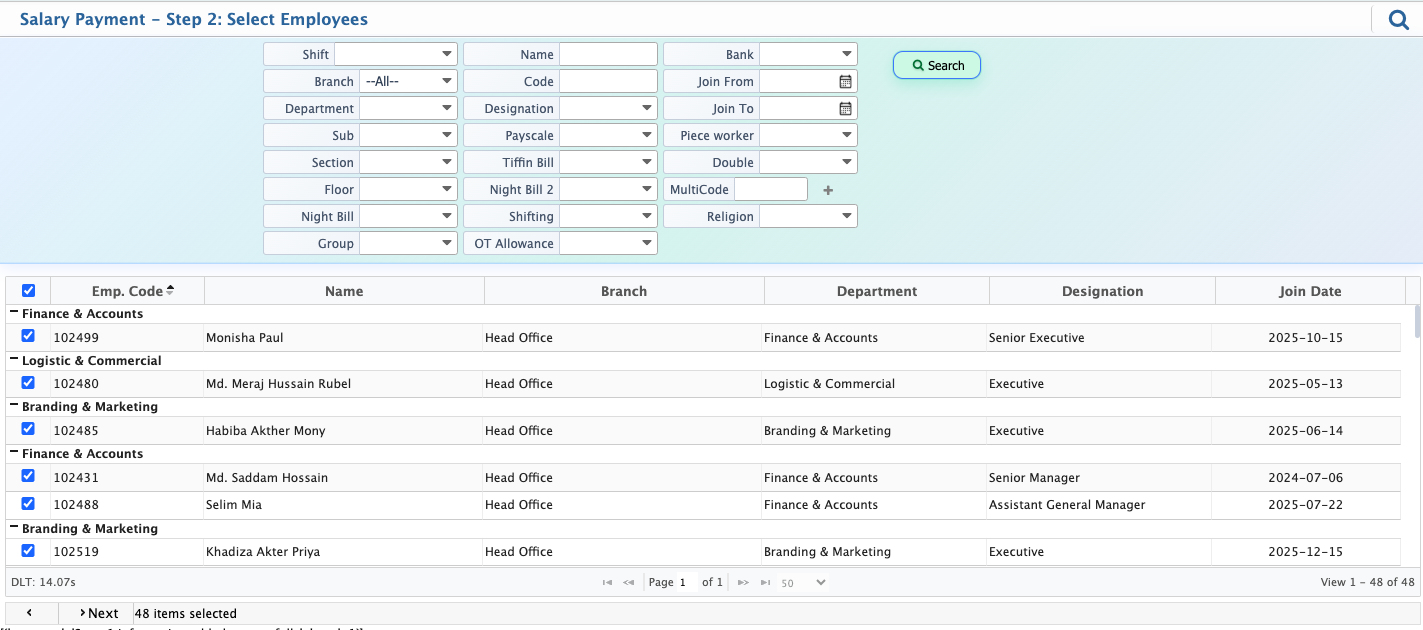
For the next step, users need to select the employees included in this payment and click Next. Some organizations process salaries in multiple slabs depending on their internal payment structure, where employees may not always receive the full salary in a single cycle.
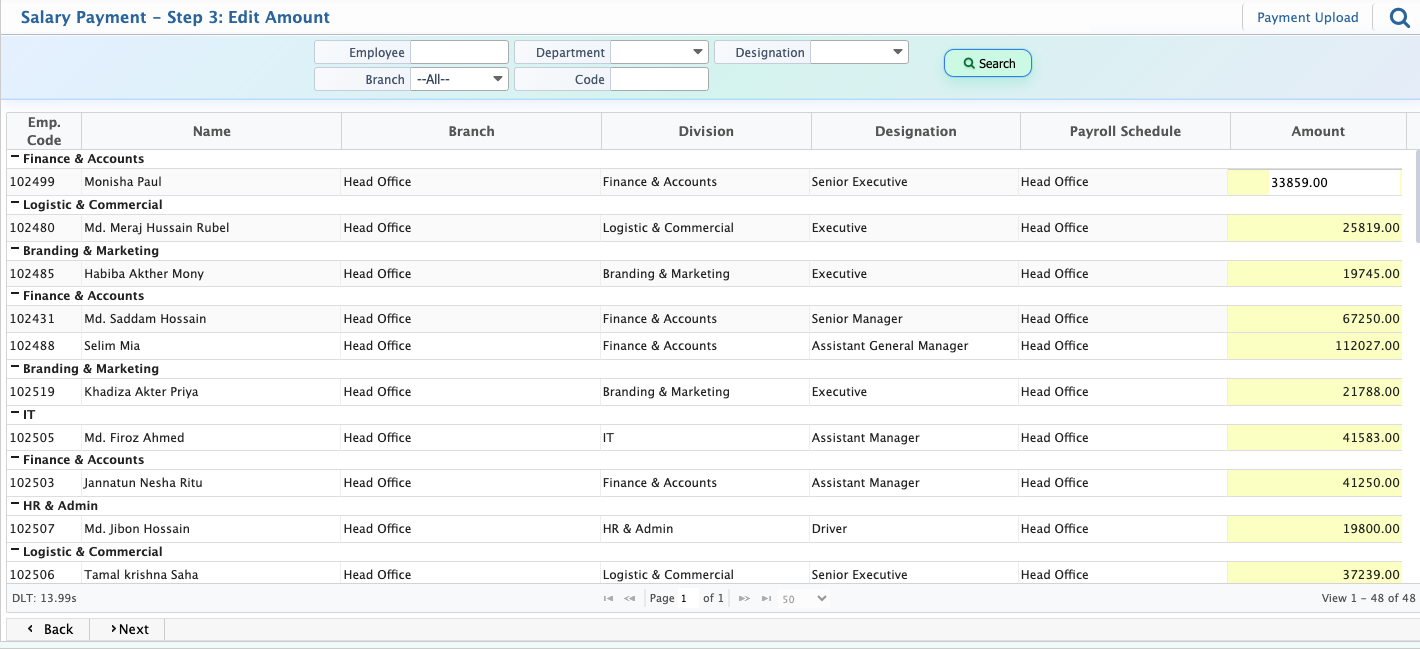
After selecting the employees and their salary amounts, users can adjust the payment before proceeding. The system allows users to modify the salary amount for each employee, either paying the full amount or a partial amount.
If a partial payment is made, the remaining unpaid portion is automatically recorded as due, and it will be shown against that employee for future settlement.
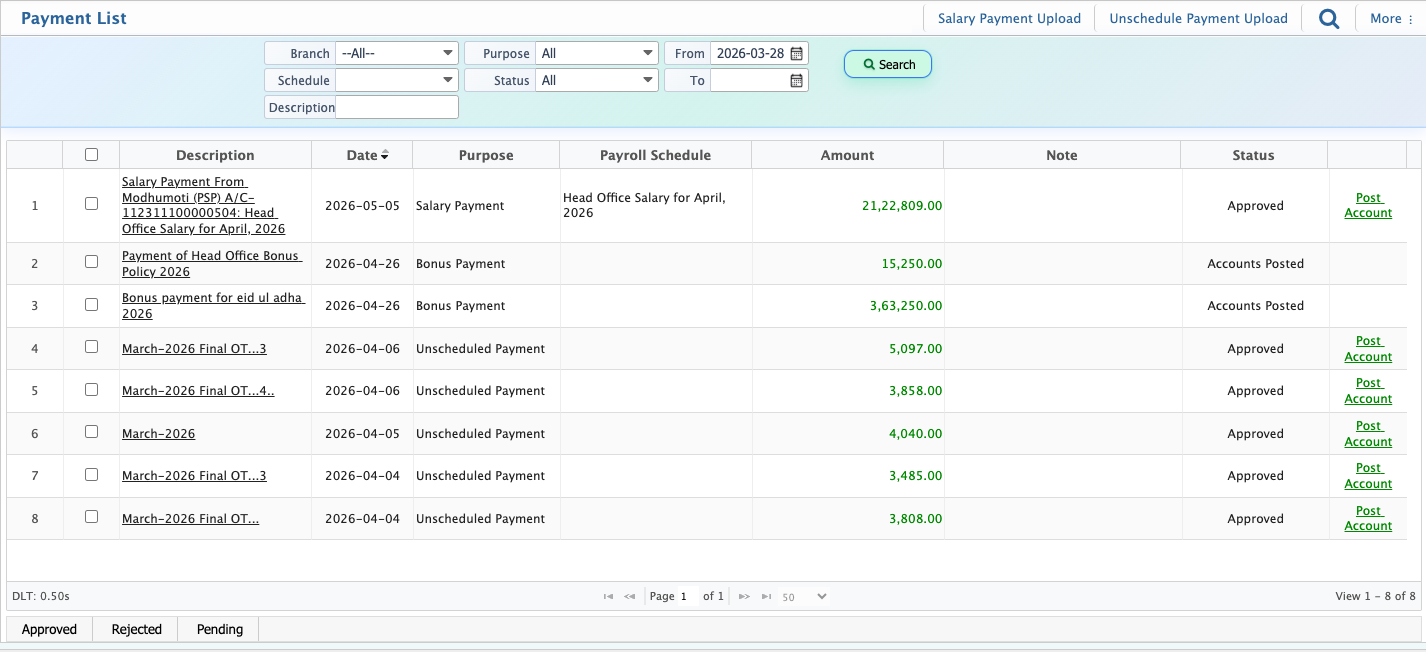
Next, the payment is posted to the Payment List, where users need to approve it before proceeding. If the payment is rejected, it is sent back for correction and can be resubmitted after necessary updates.
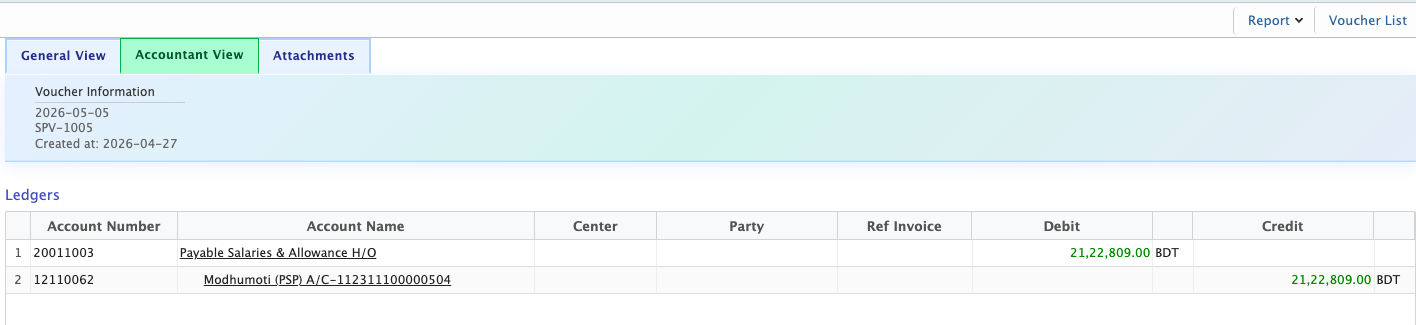
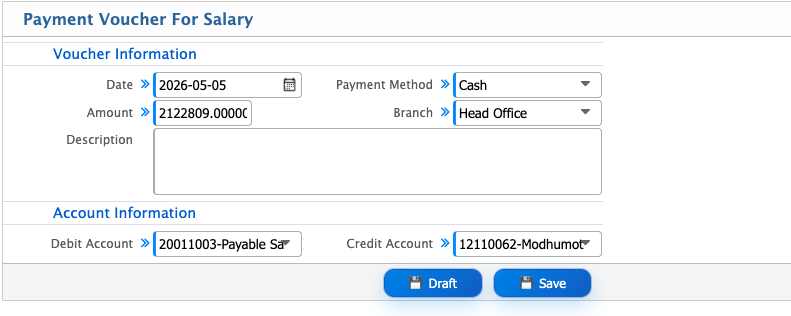
After approval, users can post the account entry. Clicking on Post Account opens the Payment Voucher page, where users select the branch and payment method. After saving the voucher, the system generates the entry, and users can view the overall salary payment details. Users can also generate bank payment advice.
The created salary payment voucher appears in the Voucher List, where users can review and approve it. From the list, users can open the voucher in both General View and Accountant View to check the details from different perspectives. Users can also add attachments to include supporting documents with the voucher before or after approval.