Route
The Route setup in PrismERP is used to define and configure customer routes within the territory structure. Here, users enter route details such as name, code, territory hierarchy (national, division, zone, territory), location coordinates, and assign a sales representative. After creation, the routes are available in the route list where users can search, view details, and manage assigned customers under each route.
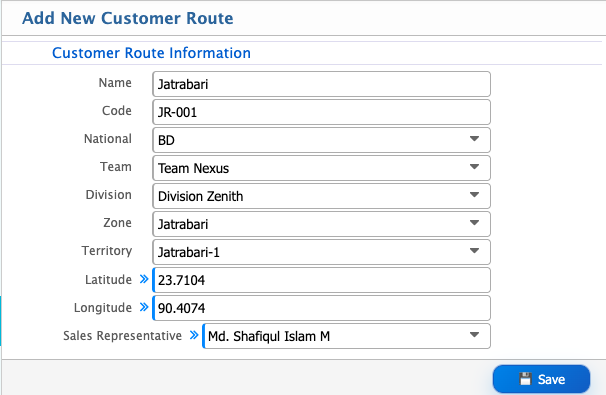
Add Route
| Field | Action |
|---|---|
| Name | Enter the name of the route. |
| Code | Enter a unique code for the route. |
| National | Select the national-level territory for the route. |
| Team | Select the team responsible for the route. |
| Division | Select the division under which the route falls. |
| Zone | Select the zone associated with the route. |
| Territory | Select the specific territory for the route. |
| Latitude | Enter the latitude coordinate of the route location. |
| Longitude | Enter the longitude coordinate of the route location. |
| Sales Representative | Select the sales representative assigned to the route. |
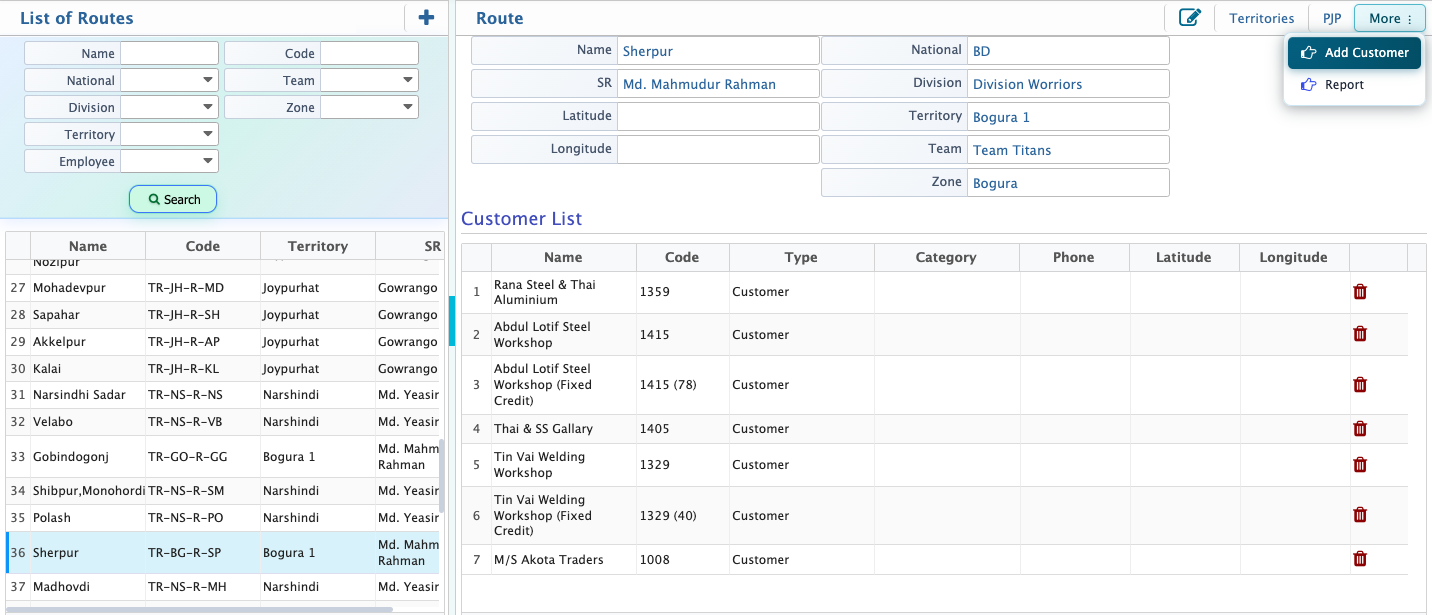
After creating a customer route, the record becomes available in the List of Routes. Users can use the Search Panel to search for specific routes by entering relevant criteria such as route name, code, territory, or sales representative. The list displays route information along with the assigned territory hierarchy and sales representative.
When a route is selected, the route details are displayed on the right side of the screen. From this view, users can review route information, including the assigned sales representative, territory structure, and location details. Users can also edit the route information whenever updates are required.
The route details view also contains a Customer List, which displays all customers assigned to the selected route. From this list, users can review customer information and remove customers from the route when necessary.