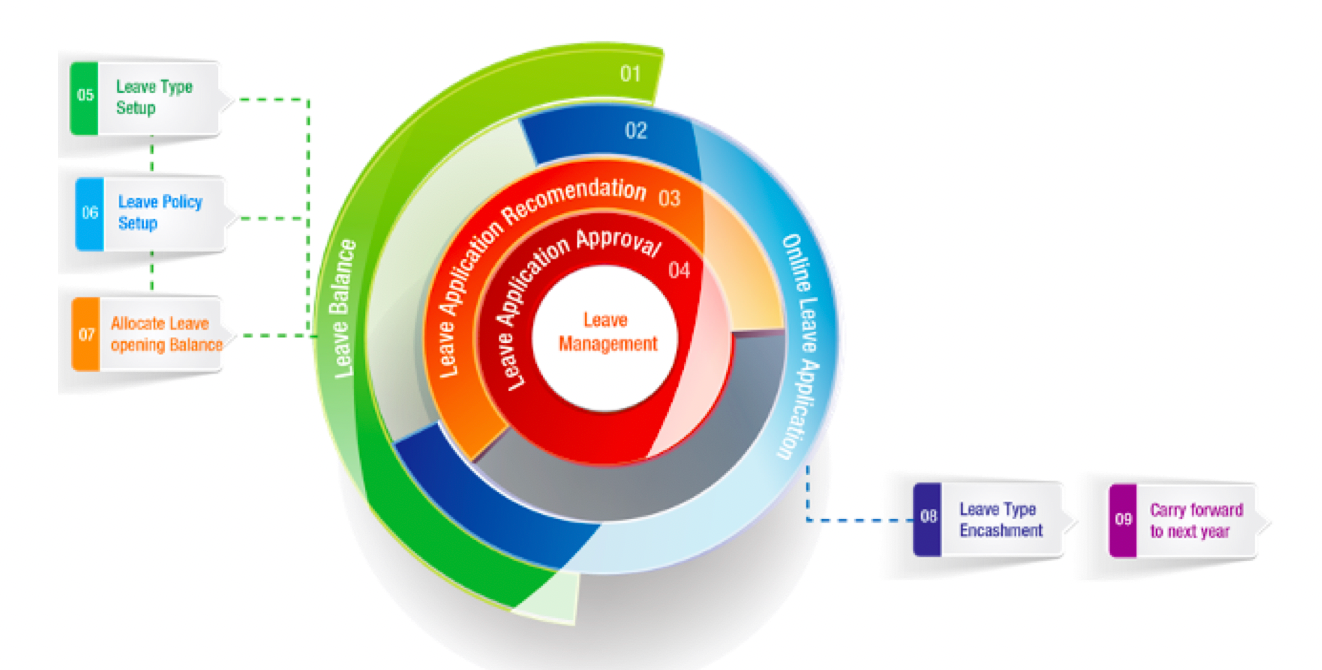
Leave Management in PrismERP
Leave Management in PrismERP is a digital system that allows employees to request time off (such as vacation, sick leave, or casual leave) and enables HR or supervisors to track, review, and approve leave applications. This module removes manual paperwork, keeps accurate leave records, and gives employees real-time access to their leave balances. It simplifies the entire leave lifecycle from application to approval and historical record tracking.
How to Use This Feature in PrismERP
A. Apply for Leave (Employee Portal)
Steps:
-
Find the Leave Application Form
- Employee info auto-fills: name, department, etc.
-
Choose Leave Type
- Select from dropdown (e.g., Sick Leave, Casual Leave, Earned Leave).
-
Select Leave Period
- Pick start and end dates using the calendar.
-
Add Reason
- Write why the leave is needed.
-
Upload Supporting Documents (Optional)
- e.g., attach doctor’s note or official letter.
-
Check Leave Balance
- On the right panel, see:
- Pre. Balance
- Taken YTD
- Total YTD
- Balance YTD
- Available
- On the right panel, see:
-
Submit the Application
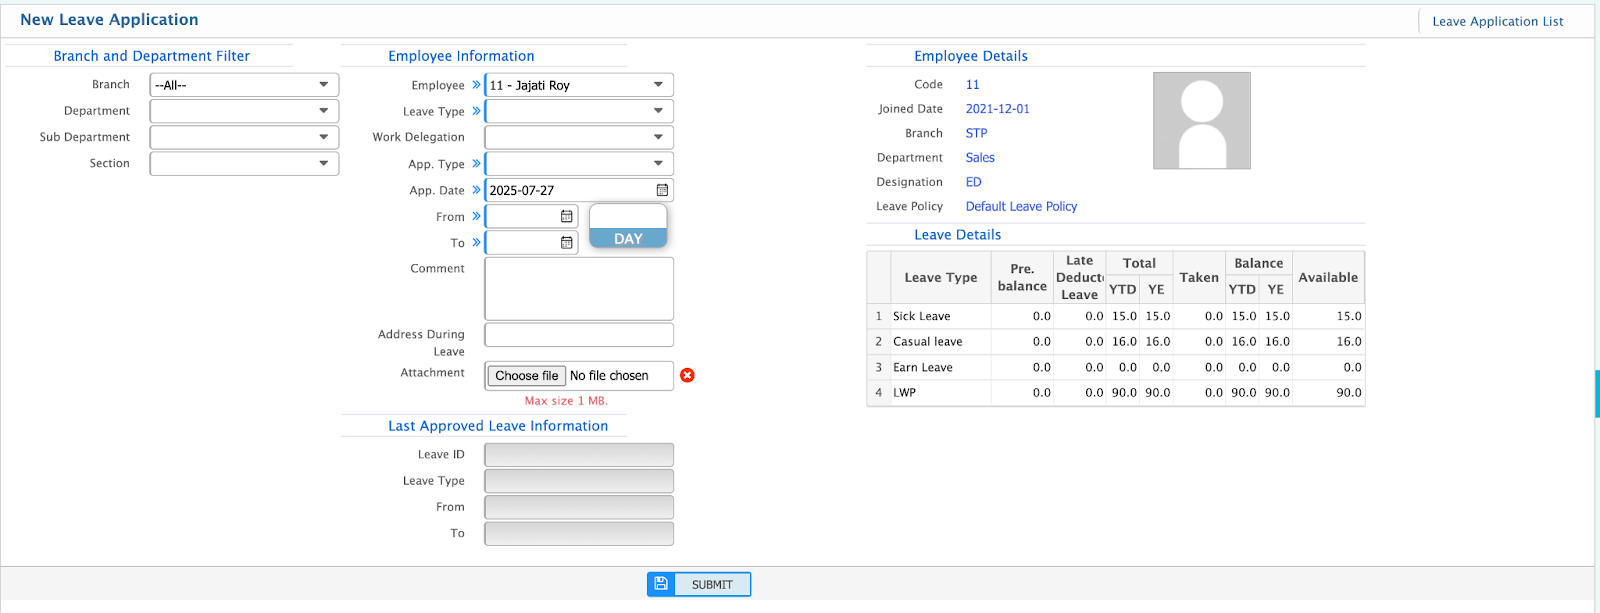
- The leave request is now sent to the next level (manager/HR) for review.
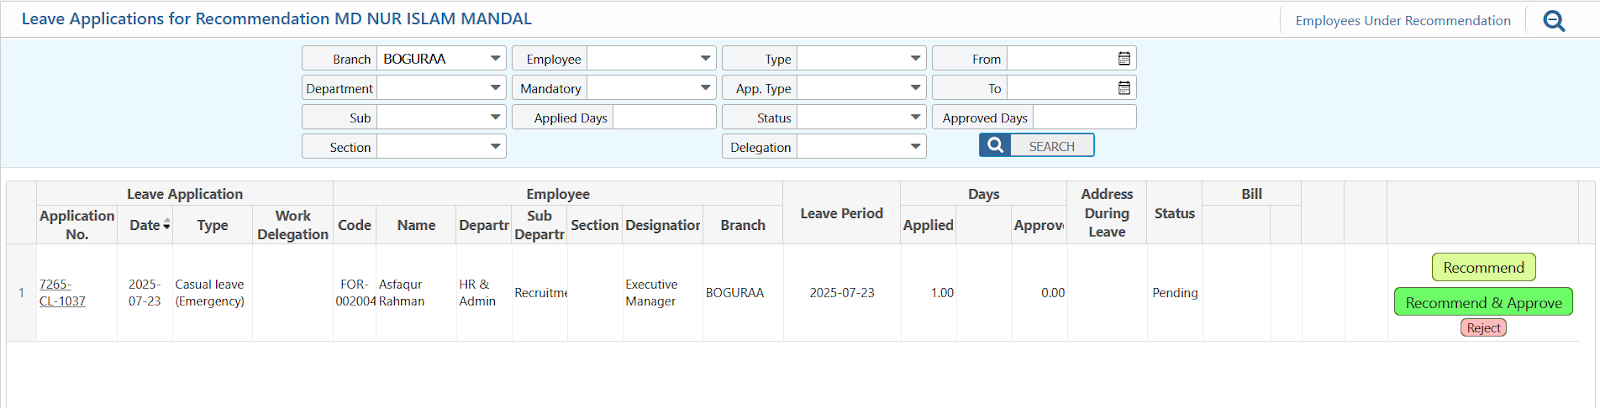
B. Leave Approval Process (Manager/HR Panel)
Once a leave application is submitted, it appears in the approval panel for HR or supervisor.
How to Review:
-
Access the Leave Approval Panel
- Go to Leave Application List or Pending Requests.
-
Review Employee Details
- Code, Name, Department, Designation, Reporting Manager, etc.
-
Check Leave Balances (Table View)
- Sick Leave, Casual Leave, Annual Leave, etc.
- Metrics include:
- Pre. Balance
- Taken YTD
- Balance YTD
- Available
-
Review Application Details
- Leave Type, Dates (From–To), Total Days, Reason.
- Address during leave (if provided).
-
Check Attachments
- Click to view/download if uploaded.
- If blank: "No Records to View".
-
Take Action (Top Right Corner)
- Click on Action and choose:
- Recommend
- Recommend & Approve
- Reject (with a reason)
- Cancel (with a reason)
- Click on Action and choose:
-
Confirm Decision
- System updates the status automatically after the action.